最新固件(2.5.0)OPENMV4PLUS使用LCD扩展板时屏幕画面失真问题。
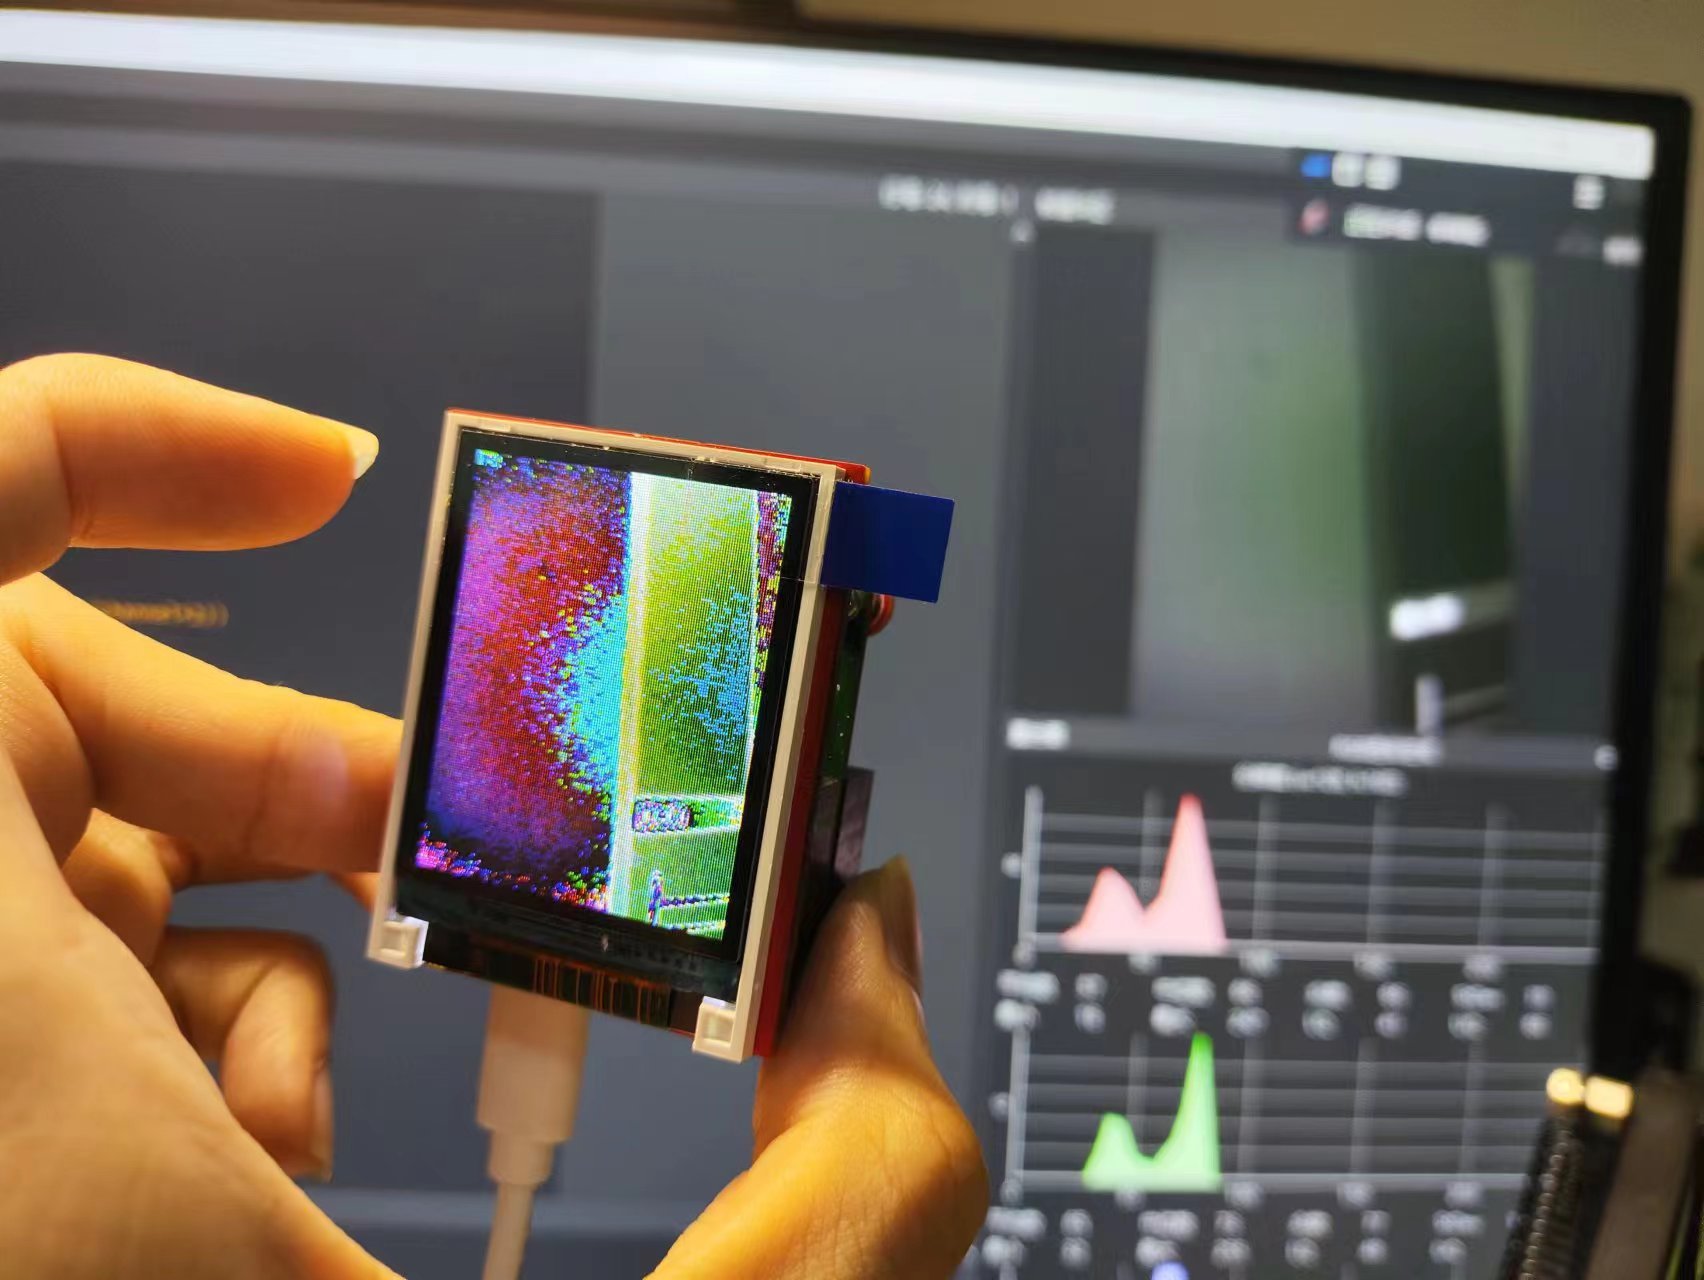
如图,旧固件2.3版本的LCD显示屏功能一切正常,刷成最新固件2.5后就会出现如图的情况。IDE里图像一切正常。已尝试过更换另一个OPENMV,问题依旧。LCD的驱动IC是ST7735S。
LCD例程采用官方的例程:https://book.openmv.cc/shield/lcd.html
其中最新固件2.5是采用该代码:
import sensor
import display

sensor.reset()  # 初始化sensor
sensor.set_pixformat(sensor.RGB565)  # or sensor.GRAYSCALE
sensor.set_framesize(sensor.QQVGA2)  # 128x160大小的特定液晶屏。

lcd = display.SPIDisplay()

while True:
    lcd.write(sensor.snapshot())  # 拍照并显示图像。
旧固件2.3是采用该代码:
import sensor, image, lcd

sensor.reset() # 初始化sensor
sensor.set_pixformat(sensor.RGB565) # or sensor.GRAYSCALE

sensor.set_framesize(sensor.QQVGA2) # 128x160大小的特定液晶屏。
lcd.init() # 初始化lcd屏幕。

while(True):
    lcd.display(sensor.snapshot()) # 拍照并显示图像。
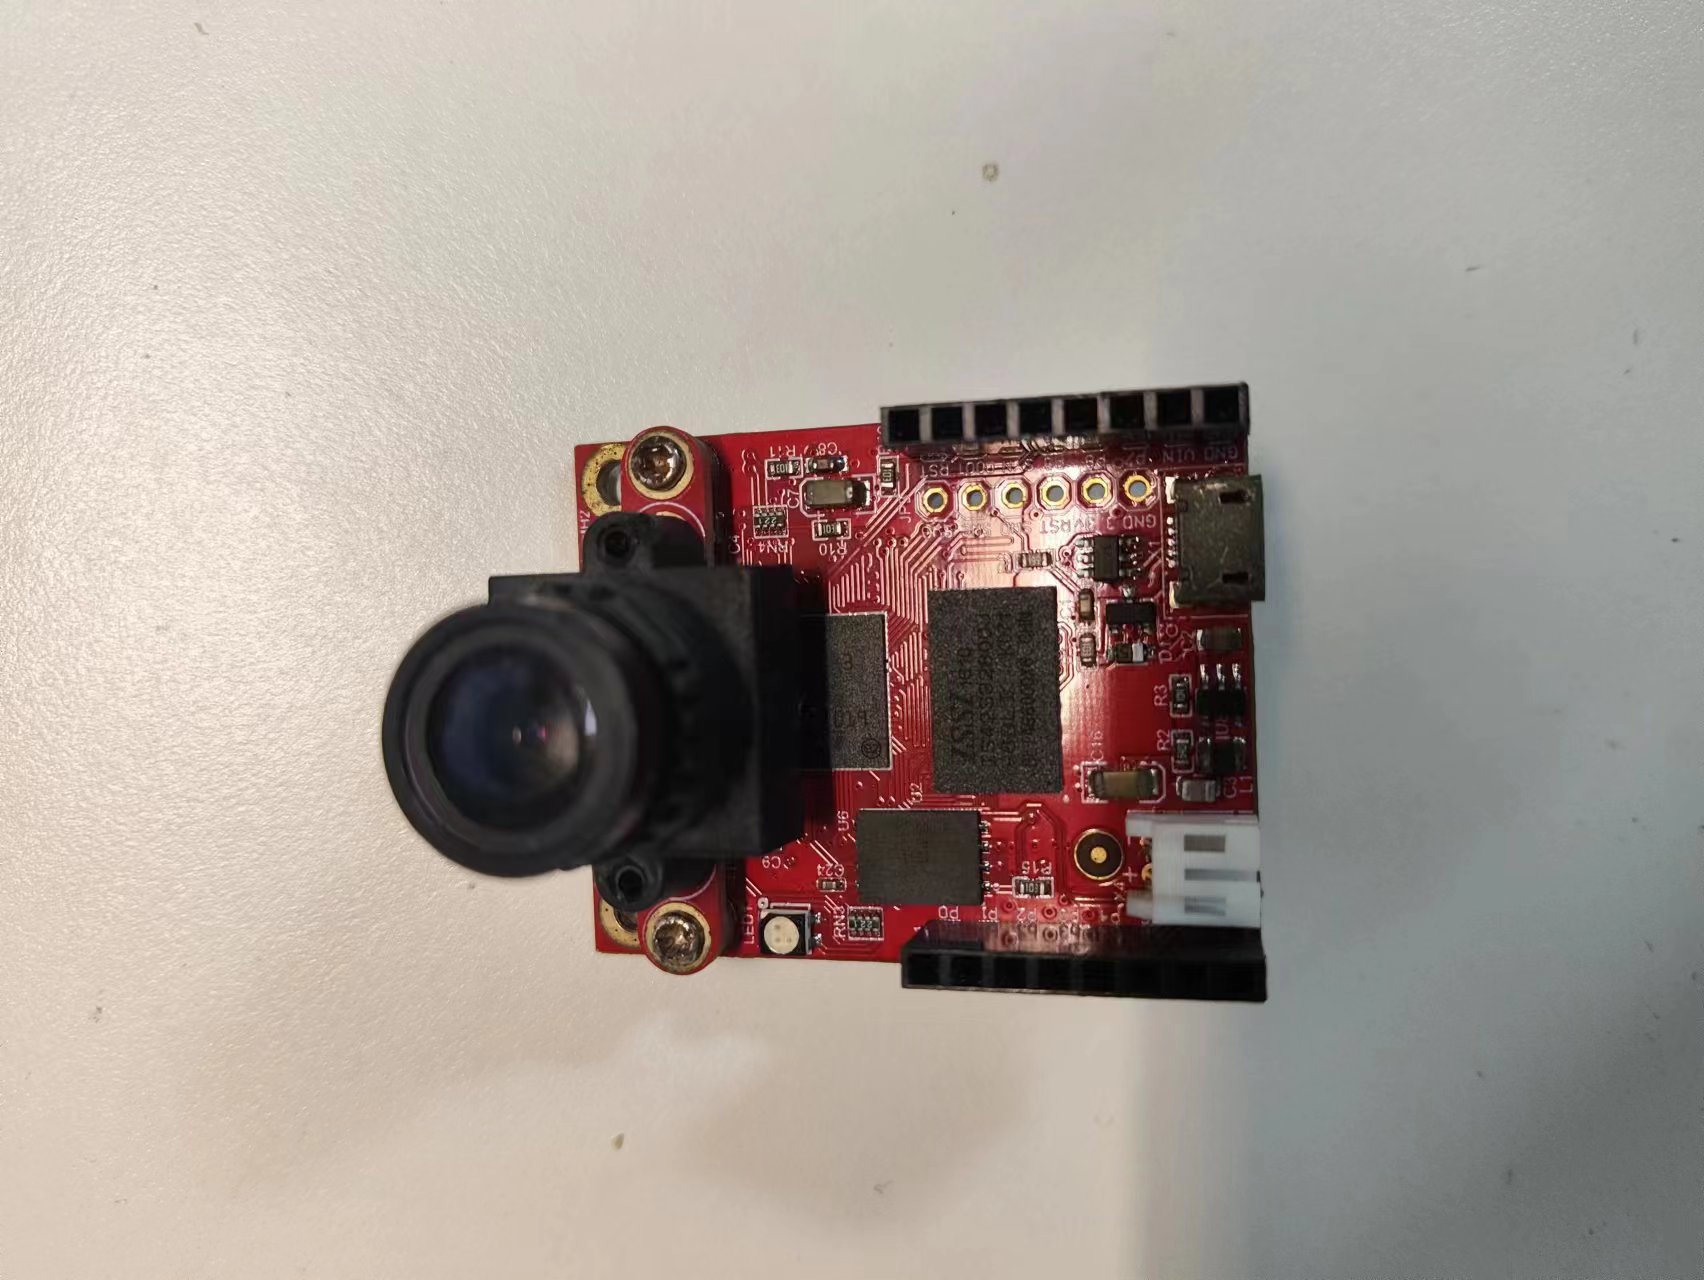
在普通OPENMV4 H7上分别测试了2.3固件和2.5固件,都可以使LCD正常运行。但是OPENMV4PLUS就不行。附使用的OPENMV4PLUS:
为什么我第一次识别红色成功后第二次再识别屏幕的色彩变绿了好多
sensor初始化应该放在一开始,而不应该循环重新设置。
            sensor.reset()
            sensor.set_pixformat(sensor.RGB565)
            sensor.set_framesize(sensor.QQVGA)
            sensor.skip_frames(time = 2000)
            sensor.set_auto_gain(False)
            sensor.set_auto_whitebal(False)
            sensor.set_auto_exposure(False, 1500)#这里设置曝光时间
openmv的库函数怎么在电脑上打开查看?比如image,sensor库等
包括micropython解释器,image库,sensor库,都是编译在一起的,生成一个固件烧录在电路板里。你直接看GitHub上的源码就知道了。
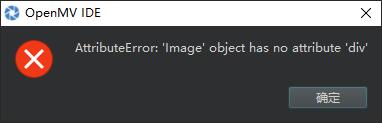
img.div函数为啥用不了了
# Untitled - By: 22096 - Tue Mar 26 2024

import sensor, image, time

sensor.reset()
sensor.set_pixformat(sensor.RGB565)
sensor.set_framesize(sensor.QVGA)
sensor.skip_frames(time = 2000)

clock = time.clock()


img = sensor.snapshot()
img.save("test.bmp")
img.mean(25)
img.div("test.bmp")
报错
救急,我编了一个识别绿色后驱动电机轴转90度的程序,但不知道哪里出了问题。程序如下,连接图也在下面。
import sensor, image, time
from pyb import Servo
s1 = Servo(1)
red_threshold = (30, 100, -64, -8, -32, 32)
sensor.reset() # Initialize the camera sensor.
sensor.set_pixformat(sensor.RGB565) # use RGB565.
sensor.set_framesize(sensor.QQVGA) # use QQVGA for speed.
sensor.skip_frames(10) # Let new settings take affect.
sensor.set_auto_whitebal(False) # turn this off.
clock = time.clock() # Tracks FPS.
def find_max(blobs):
max_size=0
for blob in blobs:
if blob[2]*blob[3] > max_size:
max_blob=blob
max_size = blob[2]*blob[3]
return max_blob
while(True):
clock.tick() # Track elapsed milliseconds between snapshots().
img = sensor.snapshot() # Take a picture and return the image.
blobs = img.find_blobs([red_threshold])
if blobs:
    max_blob = find_max(blobs)


    img.draw_rectangle(max_blob.rect()) # rect
    img.draw_cross(max_blob.cx(), max_blob.cy()) # cx, cy


    s1.angle(90)

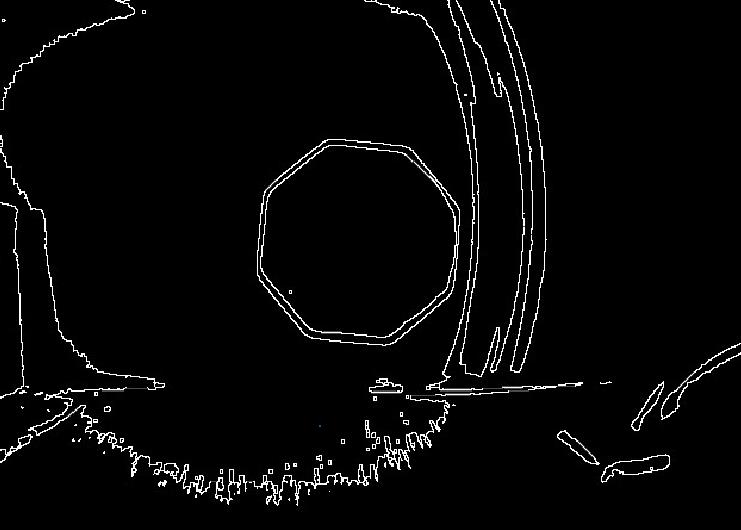
二值化,边缘检测后,线段无法检测?
enable_lens_corr = False

import sensor, image, time

sensor.reset()                      # Reset and initialize the sensor.
sensor.set_pixformat(sensor.GRAYSCALE) # Set pixel format to RGB565 (or GRAYSCALE)
sensor.set_framesize(sensor.VGA)   # Set frame size to QVGA (320x240)
sensor.skip_frames(time = 2000)     # Wait for settings take effect.
clock = time.clock()                # Create a clock object to track the FPS.
sensor.set_auto_gain(False) # must be turned off for color tracking
sensor.set_auto_whitebal(False) # must be turned off for color tracking


while(True):
    clock.tick()                    # Update the FPS clock.
    img = sensor.snapshot()         # Take a picture and return the image.
    img = img.binary([(255, 50)])


    img.find_edges(image.EDGE_SIMPLE,threshold =(255, 255))


    if enable_lens_corr: img.lens_corr(1.8)
    for l in img.find_line_segments(merge_distance = 0, max_theta_diff = 5):
        img.draw_line(l.line(),color = (255,0,0))
        print(l)
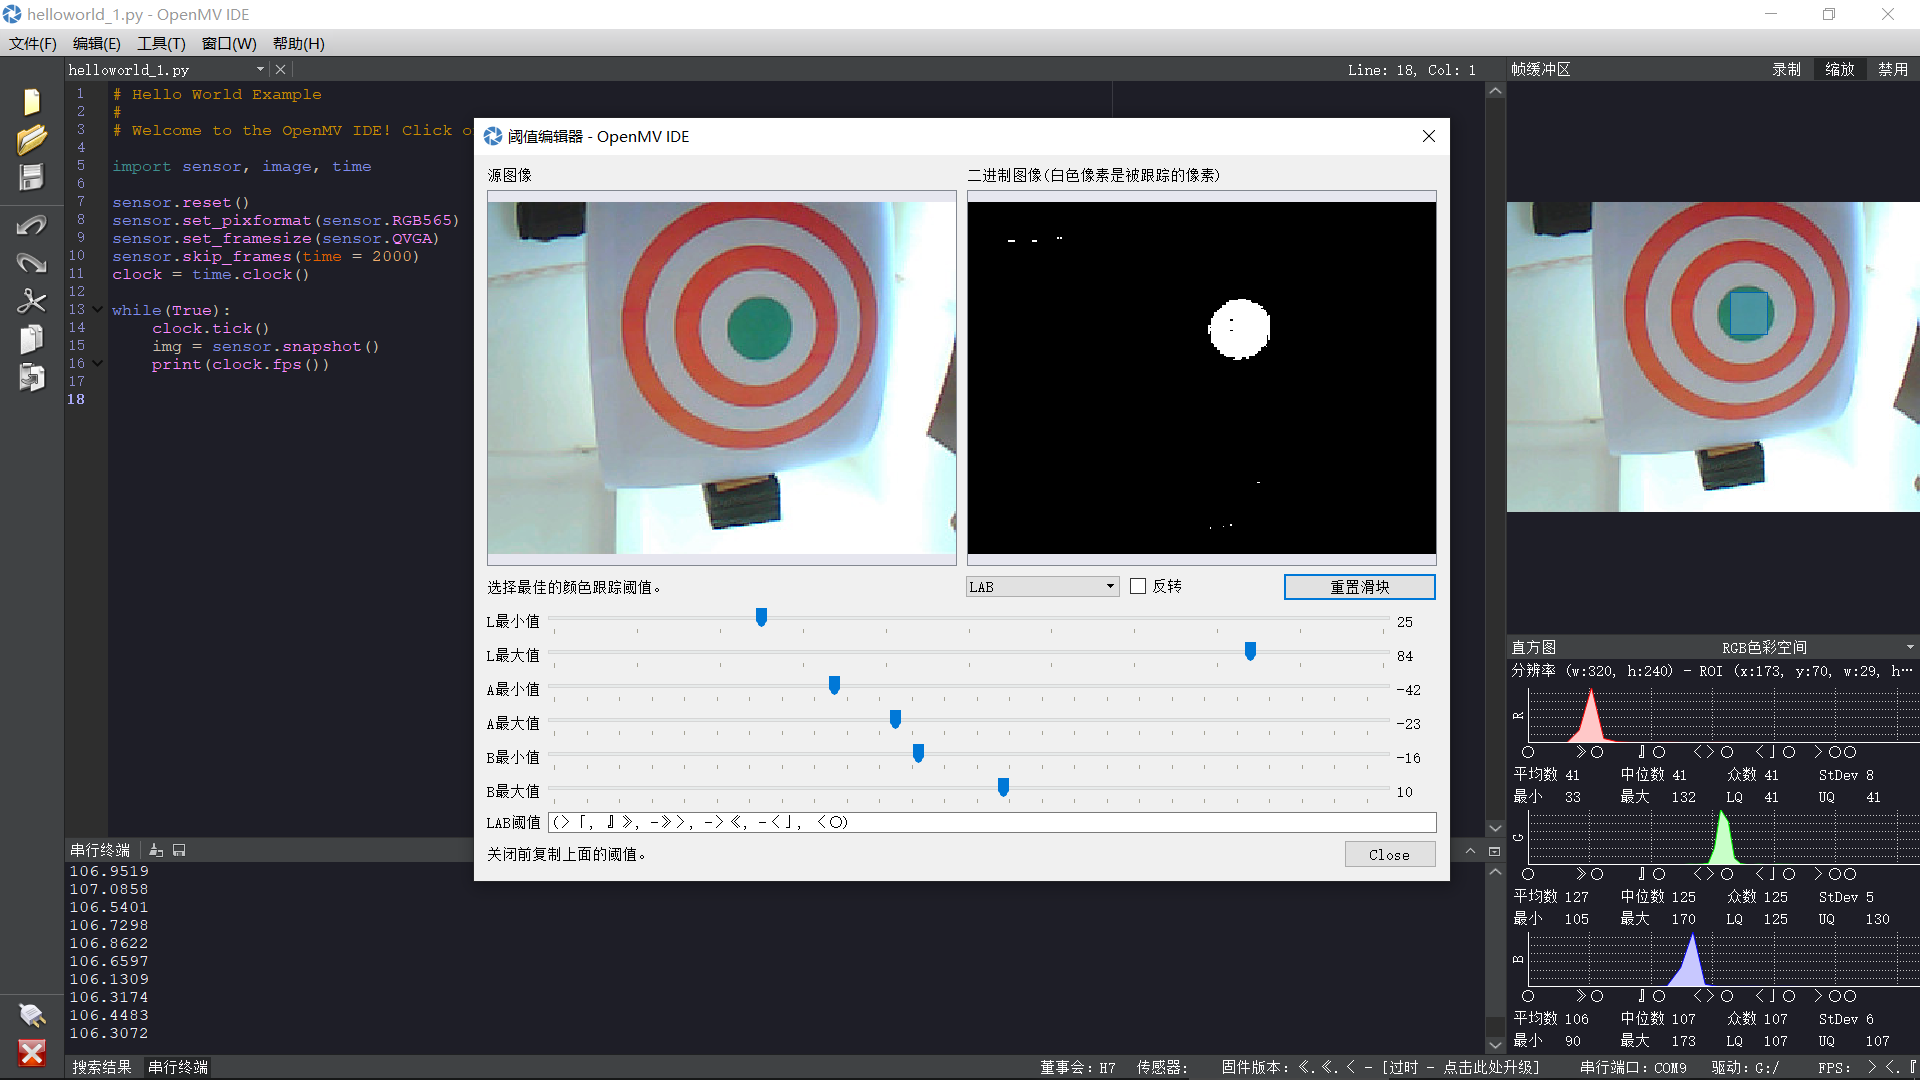
IDE中阈值编辑器的LAB阈值输出变成了符号,之前是可以正常使用的,输出也是数字
# Hello World Example
#
# Welcome to the OpenMV IDE! Click on the green run arrow button below to run the script!

import sensor, image, time

sensor.reset()                      # Reset and initialize the sensor.
sensor.set_pixformat(sensor.RGB565) # Set pixel format to RGB565 (or GRAYSCALE)
sensor.set_framesize(sensor.QVGA)   # Set frame size to QVGA (320x240)
sensor.skip_frames(time = 2000)     # Wait for settings take effect.
clock = time.clock()                # Create a clock object to track the FPS.

while(True):
    clock.tick()                    # Update the FPS clock.
    img = sensor.snapshot()         # Take a picture and return the image.
    print(clock.fps())              # Note: OpenMV Cam runs about half as fast when connected
                                    # to the IDE. The FPS should increase once disconnected.
升级到2.6.9版本,固件升级后,相机初始化失败,颜色不正常?
不是硬件的问题了,就是更新了固件,驱动不一样了。默认白平衡变了。
原因:sensor.set_auto_whitebal(False)这里没有指定白平衡。
解决步骤:
1,打白光。
2,运行这个代码:https://book.openmv.cc/example/21-Sensor-Control/sensor-manual-whitebal-control.html
会得到白平衡的参数。比如(-6.02073, -5.75391, -0.931115)。
2,然后再你的代码中改为:sensor.set_auto_whitebal(False,(-5.75391, -6.02073, -2.40891)),参数是你自己环境的。
建议:sensor.set_auto_gain(False)里面的参数也要指定。
更新最新固件版本,画面初始化为这样 ,怎么解决
不是硬件的问题了,就是更新了固件,驱动不一样了。默认白平衡变了。
原因:sensor.set_auto_whitebal(False)这里没有指定白平衡。
解决步骤:
1,打白光。
2,运行这个代码:https://book.openmv.cc/example/21-Sensor-Control/sensor-manual-whitebal-control.html
会得到白平衡的参数。比如(-6.02073, -5.75391, -0.931115)。
2,然后再你的代码中改为:sensor.set_auto_whitebal(False,(-5.75391, -6.02073, -2.40891)),参数是你自己环境的。
建议:sensor.set_auto_gain(False)里面的参数也要指定。