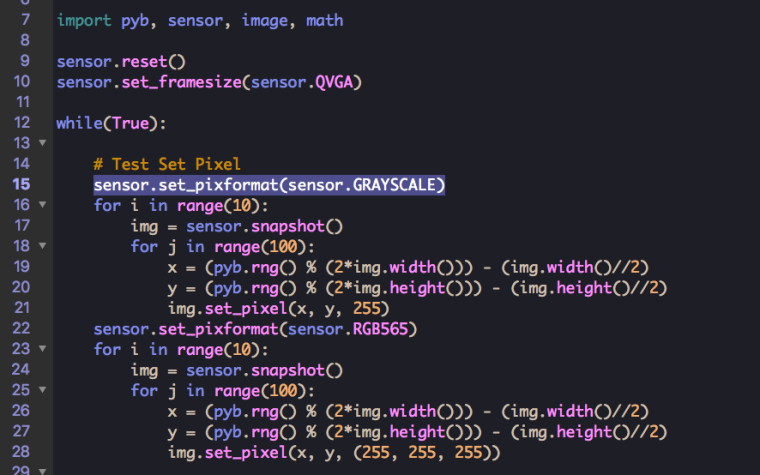
先颜色识别后模块匹配的程序,为什么没有图像显示?
@kidswong999  我参考的这个程序啊,这个程序也是在循环里面设置sensor
急急急!如何控制摄像头在收到串口数据后,才进行人脸识别
此代码用于介绍思路,不能运行。
import sensor
from pyb import UART

while(True):
    if uart.any():
        data = int(uart.readline())
        if data ==1:
            img = sensor.snapshot()
            img.find_lbp()
            这里是其他的处理
模块化以后,当我想要在主函数里面打印函数的返回值的时候,图片会一卡一卡的,是运算量太大的问题吗?
你代码有问题。
在find_red_blob函数,
不管参数是多少,第一次循环都会返回。所以一直在初始化sensor,所以帧率慢。
为什么串口输入123后他没有反应,不拍照。
# Blob Detection and uart transport
import sensor, image, time,socket
from pyb import UART
import json

uart = UART(1, 115200,timeout_char=1000)

while(True):
    if uart.any():
        a=uart.read().decode()
        print(a)
        if(a==12):
            img = sensor.snapshot()
        elif(a==123):
            print(0)
如何实现连续拍照并且储存到sd卡中?
不好意思,之前的代码没检查
import sensor, image, time

sensor.reset()
sensor.set_pixformat(sensor.RGB565)
sensor.set_framesize(sensor.QVGA)
sensor.skip_frames(time = 2000)

clock = time.clock()
i=0
while(True):
    clock.tick()
    img = sensor.snapshot()
    img.save(str(i)+".jpg")
    i+=1
    print(clock.fps())
OPENMV的SD卡可以保持运行程序,但是录制视频,GIF都是0K,一般是什么问题呢?
@kidswong999
复制错了:
import sensor, image, time, gif, pyb
RED_LED_PIN = 1
BLUE_LED_PIN = 3
sensor.reset() # Initialize the camera sensor.
sensor.set_pixformat(sensor.RGB565) # or sensor.GRAYSCALE
sensor.set_framesize(sensor.QQVGA) # or sensor.QVGA (or others)
sensor.skip_frames(time = 2000) # Let new settings take affect.
clock = time.clock() # Tracks FPS.
pyb.LED(RED_LED_PIN).on()
sensor.skip_frames(time = 2000) # Give the user time to get ready.
pyb.LED(RED_LED_PIN).off()
pyb.LED(BLUE_LED_PIN).on()
g = gif.Gif("example.gif", loop=True)
print("You're on camera!")
for i in range(100):
clock.tick()
# clock.avg() returns the milliseconds between frames - gif delay is in
g.add_frame(sensor.snapshot(), delay=int(clock.avg()/10)) # centiseconds.
print(clock.fps())
g.close()
pyb.LED(BLUE_LED_PIN).off()
print("Done! Reset the camera to see the saved recording.")
关于定时器的使用,设定定时器频率,出现报错
import sensor, image, pyb, os,time,utime
from pyb import Pin, Timer, LED

x = 640
y = 180
ROI = (0,300,x,y);

sensor.reset() # Initialize the camera sensor.
sensor.set_contrast(1)
sensor.set_gainceiling(16)
sensor.set_pixformat(sensor.GRAYSCALE)
sensor.set_framesize(sensor.VGA)
sensor.set_windowing(ROI)
sensor.skip_frames(time = 1000) # Let new settings take affect.
sensor.set_auto_whitebal(False) # Turn off white balance.


extra_fb = sensor.alloc_extra_fb(x, y, sensor.GRAYSCALE)
extra_fbb = sensor.alloc_extra_fb(x, y, sensor.GRAYSCALE)

extra_fb.replace(sensor.snapshot())
extra_fbb.replace(sensor.snapshot())


def CheckingArea(picture):
    img = sensor.snapshot()
    img.difference(picture)
    stats = img.statistics()
    if (stats[5] > 50):
        return 1
    else:
        return 0

def systick(timer):            # we will receive the timer object when being called
    print("yes")

tim = pyb.Timer(2, freq=10)
tim.callback(systick)
#循环体
while(True):
    CheckingArea(extra_fb)
请问能否解释以下这段测距的代码
import sensor, image, time
yellow_threshold = ( 56, 83, 5, 57, 63, 80)
sensor.reset() # Initialize the camera sensor.
sensor.set_pixformat(sensor.RGB565) # use RGB565.
sensor.set_framesize(sensor.QQVGA) # use QQVGA for speed.
sensor.skip_frames(10) # Let new settings take affect.
sensor.set_auto_whitebal(False) # turn this off.
clock = time.clock() # Tracks FPS.
K=5000#the value should be measured
while(True):
clock.tick() # Track elapsed milliseconds between snapshots().
img = sensor.snapshot() # Take a picture and return the image.
blobs = img.find_blobs([yellow_threshold])
if len(blobs) == 1:#为什么列表的长度是1?
    b = blobs[0]
    img.draw_rectangle(b[0:4]) # rect
    img.draw_cross(b[5], b[6]) # cx, cy
    Lm = (b[2]+b[3])/2
    length = K/Lm
print(length)光源扩展板和拍照代码共同运行会出现卡顿,有没有什么改进方法?代码如下
import sensor, image, time
import time
from pyb import Pin, Timer
light = Timer(2, freq=50000).channel(1, Timer.PWM, pin=Pin("P6"))
light.pulse_width_percent(10) # 控制亮度 0~100
sensor.reset() # Reset and initialize the sensor.
sensor.set_pixformat(sensor.RGB565) # Set pixel format to RGB565 (or GRAYSCALE)
sensor.set_framesize(sensor.QVGA) # Set frame size to QVGA (320x240)
sensor.skip_frames(time = 2000) # Wait for settings take effect.
clock = time.clock() # Create a clock object to track the FPS.
while(True):
time.sleep_ms(200)
clock.tick() # Update the FPS clock.
img = sensor.snapshot() # Take a picture and return the image.
print(clock.fps()) # Note: OpenMV Cam runs about half as fast when connected
# to the IDE. The FPS should increase once disconnected.
每次输出为none,怎么样让串口连续接收数字
# Hello World Example
#
# Welcome to the OpenMV IDE! Click on the green run arrow button below to run the script!

import sensor, image, time
from pyb import UART
uart = UART(3, 115200)
sensor.reset()                      # Reset and initialize the sensor.
sensor.set_pixformat(sensor.RGB565) # Set pixel format to RGB565 (or GRAYSCALE)
sensor.set_framesize(sensor.QVGA)   # Set frame size to QVGA (320x240)
sensor.skip_frames(time = 2000)     # Wait for settings take effect.
clock = time.clock()                # Create a clock object to track the FPS.
while(True):
    def jisuan():
        if uart.any():
            m=uart.readline()
            if(m!=b'o'):
                a=int(m.decode())
                clock.tick()

                return a


    if uart.any():
        m=uart.readline()
        if(m!=b'o'):
            a=int(m.decode())
            clock.tick()
            jisuan()                   # Update the FPS clock.
        b=str(jisuan())

        uart.write(b )