求问如何在一分钟时输出一句话
# 边缘检测例子:
#
# 这个程序示范了在图像上使用morph函数来进行边缘检测。
# 然后在进行阈值和滤波

import sensor, image, time
import sensor, image, time, pyb

#设置核函数滤波,核内每个数值值域为[-128,127],核需为列表或元组
kernel_size = 1 # kernel width = (size*2)+1, kernel height = (size*2)+1
kernel = [-1, -1, -1,\
          -1, +8, -1,\
          -1, -1, -1]
# 这个一个高通滤波器。见这里有更多的kernel
# http://www.fmwconcepts.com/imagemagick/digital_image_filtering.pdf
thresholds = [(100, 255)] # grayscale thresholds设置阈值

sensor.reset() # 初始化 sensor.
sensor.set_pixformat(sensor.GRAYSCALE) # or sensor.RGB565
sensor.set_framesize(sensor.QQVGA) # or sensor.QVGA (or others)
sensor.skip_frames(10) # 让新的设置生效
clock = time.clock() # 追踪FPS

# 在OV7725 sensor上, 边缘检测可以通过设置sharpness/edge寄存器来增强。
# 注意:这个会edge detection can be enhanced
# significantly by setting the sharpness/edge registers.
# Note: This will be implemented as a function later.
if (sensor.get_id() == sensor.OV7725):
    sensor.__write_reg(0xAC, 0xDF)
    sensor.__write_reg(0x8F, 0xFF)

while(True):
    clock.tick() # Track elapsed milliseconds between snapshots().
    img = sensor.snapshot() # Take a picture and return the image.

    img.morph(kernel_size, kernel)
    #morph(size, kernel, mul=Auto, add=0),morph变换,mul根据图像对比度
    #进行调整,mul使图像每个像素乘mul;add根据明暗度调整,使得每个像素值加上add值。
    #如果不设置则不对morph变换后的图像进行处理。
    img.binary(thresholds)
    #利用binary函数对图像进行分割

    # Erode pixels with less than 2 neighbors using a 3x3 image kernel
    img.erode(1, threshold = 2)
    #侵蚀函数erode(size, threshold=Auto),去除边缘相邻处多余的点。threshold
    #用来设置去除相邻点的个数,threshold数值越大,被侵蚀掉的边缘点越多,边缘旁边
    #白色杂点少;数值越小,被侵蚀掉的边缘点越少,边缘旁边的白色杂点越多。

    print(clock.fps()) # Note: Your OpenMV Cam runs about half as fast while
    # connected to your computer. The FPS should increase once disconnected.
    time.sleep(2000)
    print('好')
现在是两秒输出帧数和好,但是我想在60秒时单独输出好,其余时间可以只输出帧数,请问应该如何改变,谢谢!
请问为什么灰度图像的二值化后图像与RGB图像二值化后图像的大小不一?
RGB图像代码:
import sensor, image, time

sensor.reset()
sensor.set_framesize(sensor.QVGA)
sensor.set_pixformat(sensor.RGB565)
sensor.skip_frames(time = 2000)
clock = time.clock()

# Use the Tools -> Machine Vision -> Threshold Edtor to pick better thresholds.
threshold_dark = (70, 100, -77, 76, 19, 74)
gray_threshold = (80, 255)


while(True):
    clock.tick()
    img = sensor.snapshot()
    img.binary([threshold_dark])
    # img.erode(100)
    # img.dilate(5)
    print(img)
灰度值图像代码
# Color Binary Filter Example
#
# This script shows off the binary image filter. You may pass binary any
# number of thresholds to segment the image by.

import sensor, image, time

sensor.reset()
sensor.set_framesize(sensor.QVGA)
sensor.set_pixformat(sensor.GRAYSCALE)
sensor.skip_frames(time = 2000)
sensor.set_auto_whitebal(True)  # 开启自动白平衡
clock = time.clock()

# Use the Tools -> Machine Vision -> Threshold Edtor to pick better thresholds.
threshold_dark = (70, 100, -77, 76, 19, 74)
threshold_light = (86, 100, -26, 8, -3, 45)
gray_threshold = (80, 255)


while(True):
    clock.tick()
    img = sensor.snapshot()
    img.binary([gray_threshold])
    # img.erode(100)
    # img.dilate(5)
    print(img)
在小球测距的时候,视野多出一个小球,如何保持测的是第一个小球
import sensor, image, time
For color tracking to work really well you should ideally be in a very, very,
very, controlled enviroment where the lighting is constant...
yellow_threshold = ( 56, 83, 5, 57, 63, 80)
You may need to tweak the above settings for tracking green things...
Select an area in the Framebuffer to copy the color settings.
sensor.reset() # Initialize the camera sensor.
sensor.set_pixformat(sensor.RGB565) # use RGB565.
sensor.set_framesize(sensor.QQVGA) # use QQVGA for speed.
sensor.skip_frames(10) # Let new settings take affect.
sensor.set_auto_whitebal(False) # turn this off.
clock = time.clock() # Tracks FPS.
K=5000#the value should be measured
while(True):
clock.tick() # Track elapsed milliseconds between snapshots().
img = sensor.snapshot() # Take a picture and return the image.
blobs = img.find_blobs([yellow_threshold])
if len(blobs) == 1:
    # Draw a rect around the blob.
    b = blobs[0]
    img.draw_rectangle(b[0:4]) # rect
    img.draw_cross(b[5], b[6]) # cx, cy
    Lm = (b[2]+b[3])/2
    length = K/Lm
print(length)编译代码遇到bug,求大佬解答
# Edge Impulse - OpenMV Image Classification Example

import sensor, image, time, os, tf

sensor.reset()                         # Reset and initialize the sensor.
sensor.set_pixformat(sensor.RGB565)    # Set pixel format to RGB565 (or GRAYSCALE)
sensor.set_framesize(sensor.QVGA)      # Set frame size to QVGA (320x240)
sensor.set_windowing((240, 240))       # Set 240x240 window.
sensor.skip_frames(time=2000)          # Let the camera adjust.

net = "trained.tflite"
labels = [line.rstrip('\n') for line in open("labels.txt")]

clock = time.clock()
while(True):
    clock.tick()

    img = sensor.snapshot()

    # default settings just do one detection... change them to search the image...
    for obj in tf.classify(net, img, min_scale=1.0, scale_mul=0.8, x_overlap=0.5, y_overlap=0.5):
        print("**********\nPredictions at [x=%d,y=%d,w=%d,h=%d]" % obj.rect())
        img.draw_rectangle(obj.rect())
        # This combines the labels and confidence values into a list of tuples
        predictions_list = list(zip(labels, obj.output()))

        for i in range(len(predictions_list)):
            print("%s = %f" % (predictions_list[i][0], predictions_list[i][1]))

    print(clock.fps(), "fps")
用ege impulse生成了识别程序在openmv ide却显示了图像像素过大这种错误该怎么办?

# Edge Impulse - OpenMV Image Classification Example

import sensor, image, time, os, tf

sensor.reset()                         # Reset and initialize the sensor.
sensor.set_pixformat(sensor.RGB565)    # Set pixel format to RGB565 (or GRAYSCALE)
sensor.set_framesize(sensor.QVGA)      # Set frame size to QVGA (320x240)
sensor.set_windowing((240, 240))       # Set 240x240 window.
sensor.skip_frames(time=2000)          # Let the camera adjust.

net = "trained.tflite"
labels = [line.rstrip('\n') for line in open("labels.txt")]

clock = time.clock()
while(True):
    clock.tick()

    img = sensor.snapshot()

    # default settings just do one detection... change them to search the image...
    for obj in tf.classify(net, img, min_scale=1.0, scale_mul=0.8, x_overlap=0.5, y_overlap=0.5):
        print("**********\nPredictions at [x=%d,y=%d,w=%d,h=%d]" % obj.rect())
        img.draw_rectangle(obj.rect())
        # This combines the labels and confidence values into a list of tuples
        predictions_list = list(zip(labels, obj.output()))

        for i in range(len(predictions_list)):
            print("%s = %f" % (predictions_list[i][0], predictions_list[i][1]))

    print(clock.fps(), "fps")
通过二值化得到了白色区域,如何将白色区域真正的颜色显示出来?
1.创建了原图像的副本
2.对图像副本进行二值化操作
3.将原图像与二值化后的图像进行按像素相乘
未达到理想效果
import sensor, image, time ,pyb

sensor.reset()                      # Reset and initialize the sensor.
sensor.set_pixformat(sensor.RGB565) # Set pixel format to RGB565 (or GRAYSCALE)
sensor.set_framesize(sensor.QVGA)   # Set frame size to QVGA (320x240)
sensor.skip_frames(time = 2000)     # Wait for settings take effect.
clock = time.clock()                # Create a clock object to track the FPS.
sensor.set_auto_gain(False) # must be turned off for color tracking
sensor.set_auto_whitebal(False) # must be turned off for color tracking
threshold = (0,100,7,66,-22,54)
while(True):
    a=[0]*3
    img = sensor.snapshot()         # Take a picture and return the image.
    img1 = img.copy(copy_to_fb=img)
    img1 = img.binary([threshold])
    img.mul(img,invert=0,mask=img1)
    print(img.get_pixel(159,88))
在做物体分类时显示内存不够,但我是按照b站教程来做的呀,为什么视频中四百张图片都可以我200张就不够内存了
代码如下
Edge Impulse - OpenMV Image Classification Example
import sensor, image, time, os, tf
sensor.reset() # Reset and initialize the sensor.
sensor.set_pixformat(sensor.RGB565) # Set pixel format to RGB565 (or GRAYSCALE)
sensor.set_framesize(sensor.QVGA) # Set frame size to QVGA (320x240)
sensor.set_windowing((240, 240)) # Set 240x240 window.
sensor.skip_frames(time=2000) # Let the camera adjust.
net = "trained.tflite"
labels = [line.rstrip('\n') for line in open("labels.txt")]
clock = time.clock()
while(True):
clock.tick()
img = sensor.snapshot()

# default settings just do one detection... change them to search the image...
for obj in tf.classify(net, img, min_scale=1.0, scale_mul=0.8, x_overlap=0.5, y_overlap=0.5):
    print("**********\nPredictions at [x=%d,y=%d,w=%d,h=%d]" % obj.rect())
    img.draw_rectangle(obj.rect())
    # This combines the labels and confidence values into a list of tuples
    predictions_list = list(zip(labels, obj.output()))

    for i in range(len(predictions_list)):
        print("%s = %f" % (predictions_list[i][0], predictions_list[i][1]))

print(clock.fps(), "fps")机器学习,程序运行报错

# Edge Impulse - OpenMV Image Classification Example

import sensor, image, time, os, tf

sensor.reset()                         # Reset and initialize the sensor.
sensor.set_pixformat(sensor.RGB565)    # Set pixel format to RGB565 (or GRAYSCALE)
sensor.set_framesize(sensor.QVGA)      # Set frame size to QVGA (320x240)
sensor.set_windowing((240, 240))       # Set 240x240 window.
sensor.skip_frames(time=2000)          # Let the camera adjust.

net = "trained.tflite"
labels = [line.rstrip('\n') for line in open("labels.txt")]

clock = time.clock()
while(True):
    clock.tick()

    img = sensor.snapshot()

    # default settings just do one detection... change them to search the image...
    for obj in tf.classify(net, img, min_scale=1.0, scale_mul=0.8, x_overlap=0.5, y_overlap=0.5):
        print("**********\nPredictions at [x=%d,y=%d,w=%d,h=%d]" % obj.rect())
        img.draw_rectangle(obj.rect())
        # This combines the labels and confidence values into a list of tuples
        predictions_list = list(zip(labels, obj.output()))

        for i in range(len(predictions_list)):
            print("%s = %f" % (predictions_list[i][0], predictions_list[i][1]))

    print(clock.fps(), "fps")
IDE中预览时出现黑色条纹轮播


import sensor, image, time

sensor.reset() # 初始化sensor
sensor.set_pixformat(sensor.RGB565) # or sensor.GRAYSCALE
#设置图像色彩格式,有RGB565色彩图和GRAYSCALE灰度图两种
sensor.set_framesize(sensor.QQVGA) # or sensor.QVGA (or others)
sensor.set_saturation(3)
sensor.set_contrast(3)
sensor.set_brightness(3)
sensor.skip_frames(time = 1000)
sensor.set_auto_exposure(False, 4532)
sensor.set_auto_gain(False,gain_db=8.95857)
sensor.set_auto_whitebal(False,rgb_gain_db=(-4.64378, -6.02073, -3.05939))
sensor.skip_frames(time = 3000)
clock = time.clock()

while(True):
    clock.tick()
    img = sensor.snapshot()#.find_edges(image.EDGE_CANNY,threshold=(70, 100))
    '''cs=img.find_circles(threshold = 3000, x_margin = 50, y_margin = 50, r_margin = 10,r_min = 2, r_max = 100, r_step = 2)
    if cs:
        for c in cs:
            img.draw_circle(c.x(), c.y(), c.r(), color = (255, 0, 0))
            print(c)
    else:
        print("None")'''
    print(clock.fps())
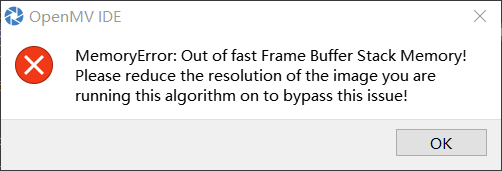
MemoryError: Out of fast Frame Buffer Stack Memory

Edge Impulse - OpenMV Image Classification Example
import sensor, image, time, os, tf
sensor.reset() # Reset and initialize the sensor.
sensor.set_pixformat(sensor.RGB565) # Set pixel format to RGB565 (or GRAYSCALE)
sensor.set_framesize(sensor.QVGA) # Set frame size to QVGA (320x240)
sensor.set_windowing((240, 240)) # Set 240x240 window.
sensor.skip_frames(time=2000) # Let the camera adjust.
net = "trained.tflite"
labels = [line.rstrip('\n') for line in open("labels.txt")]
clock = time.clock()
while(True):
clock.tick()
img = sensor.snapshot()

# default settings just do one detection... change them to search the image...
for obj in tf.classify(net, img, min_scale=1.0, scale_mul=0.8, x_overlap=0.5, y_overlap=0.5):
    print("**********\nPredictions at [x=%d,y=%d,w=%d,h=%d]" % obj.rect())
    img.draw_rectangle(obj.rect())
    # This combines the labels and confidence values into a list of tuples
    predictions_list = list(zip(labels, obj.output()))

    for i in range(len(predictions_list)):
        print("%s = %f" % (predictions_list[i][0], predictions_list[i][1]))

print(clock.fps(), "fps")