uart = UART(1,115200)为什么不可以使用啊,我想不用uart3的引脚用uart1的引脚,求大佬解答,?
import sensor, image, time
import json
from pyb import UART
# For color tracking to work really well you should ideally be in a very, very,
# very, controlled enviroment where the lighting is constant...
yellow_threshold   = ( 46,  100,  -68,   72,   58,   92)
# You may need to tweak the above settings for tracking green things...
# Select an area in the Framebuffer to copy the color settings.

sensor.reset() # Initialize the camera sensor.
sensor.set_pixformat(sensor.RGB565) # use RGB565.
sensor.set_framesize(sensor.QQVGA) # use QQVGA for speed.
sensor.skip_frames(10) # Let new settings take affect.
sensor.set_auto_whitebal(False) # turn this off.
clock = time.clock() # Tracks FPS.

uart = UART(1,115200)

while(True):
    clock.tick() # Track elapsed milliseconds between snapshots().
    img = sensor.snapshot() # Take a picture and return the image.

    blobs = img.find_blobs([yellow_threshold])
    if blobs:
        #print('sum : %d'% len(blobs))
        data=[]
        for b in blobs:
            # Draw a rect around the blob.
            img.draw_rectangle(b.rect()) # rect
            img.draw_cross(b.cx(), b.cy()) # cx, cy
            data.append((b.cx(),b.cy()))

        #{(1,22),(-3,33),(22222,0),(9999,12),(0,0)}
        data_out = json.dumps(set(data))
        uart.write(data_out +'\n')
        print('you send:',data_out)
    else:
        print("not found!")
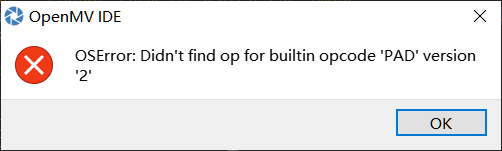
在进行口罩识别的例程最后一步,已经生成了适合openmv的模型,并上传,却出现了如下错误,请大家帮忙解答
# Edge Impulse - OpenMV Image Classification Example

import sensor, image, time, os, tf

sensor.reset()                         # Reset and initialize the sensor.
sensor.set_pixformat(sensor.RGB565)    # Set pixel format to RGB565 (or GRAYSCALE)
sensor.set_framesize(sensor.QVGA)      # Set frame size to QVGA (320x240)
sensor.set_windowing((240, 240))       # Set 240x240 window.
sensor.skip_frames(time=2000)          # Let the camera adjust.

net = "trained.tflite"
labels = [line.rstrip('\n') for line in open("labels.txt")]

clock = time.clock()
while(True):
    clock.tick()

    img = sensor.snapshot()

    # default settings just do one detection... change them to search the image...
    for obj in tf.classify(net, img, min_scale=1.0, scale_mul=0.8, x_overlap=0.5, y_overlap=0.5):
        print("**********\nPredictions at [x=%d,y=%d,w=%d,h=%d]" % obj.rect())
        img.draw_rectangle(obj.rect())
        # This combines the labels and confidence values into a list of tuples
        predictions_list = list(zip(labels, obj.output()))

        for i in range(len(predictions_list)):
            print("%s = %f" % (predictions_list[i][0], predictions_list[i][1]))

    print(clock.fps(), "fps")
没有看懂这些代码,能注释一下吗?
1 import sensor, image, time, os, tf
2
3 sensor.reset() # Reset and initialize the sensor.
4 sensor.set_pixformat(sensor.RGB565) # Set pixel format to RGB565 (or GRAYSCALE)
5 sensor.set_framesize(sensor.QVGA) # Set frame size to QVGA (320x240)
6 sensor.set_windowing((240, 240)) # Set 240x240 window.
7 sensor.skip_frames(time=2000) # Let the camera adjust.
8
9 net = "trained.tflite"
10 labels = [line.rstrip('\n') for line in open("labels.txt")]
11
12 clock = time.clock()
13 while(True):
14 clock.tick()
15
16 img = sensor.snapshot()
17
18 for obj in tf.classify(net, img, min_scale=1.0, scale_mul=0.8, x_overlap=0.5, y_overlap=0.5):
19 print("**********\nPredictions at [x=%d,y=%d,w=%d,h=%d]" % obj.rect())
20 img.draw_rectangle(obj.rect())
21 predictions_list = list(zip(labels, obj.output()))
22 for i in range(len(predictions_list)):
23 print("%s = %f" % (predictions_list[i][0], predictions_list[i][1]))
24 print(clock.fps(), "fps")
有几行代码没有看懂,第14、18-24行的代码能注释一下吗?
插入SD卡之后运行代码显示闪退,并让处理代码问题,是什么原因呢?
请# Edge Impulse - OpenMV Image Classification Example

import sensor, image, time, os, tf

sensor.reset()                         # Reset and initialize the sensor.
sensor.set_pixformat(sensor.RGB565)    # Set pixel format to RGB565 (or GRAYSCALE)
sensor.set_framesize(sensor.QVGA)      # Set frame size to QVGA (320x240)
sensor.set_windowing((240, 240))       # Set 240x240 window.
sensor.skip_frames(time=2000)          # Let the camera adjust.

net = "trained.tflite"
labels = [line.rstrip('\n') for line in open("labels.txt")]

clock = time.clock()
while(True):
    clock.tick()

    img = sensor.snapshot()

    # default settings just do one detection... change them to search the image...
    for obj in tf.classify(net, img, min_scale=1.0, scale_mul=0.8, x_overlap=0.5, y_overlap=0.5):
        print("**********\nPredictions at [x=%d,y=%d,w=%d,h=%d]" % obj.rect())
        img.draw_rectangle(obj.rect())
        # This combines the labels and confidence values into a list of tuples
        predictions_list = list(zip(labels, obj.output()))

        for i in range(len(predictions_list)):
            print("%s = %f" % (predictions_list[i][0], predictions_list[i][1]))

    print(clock.fps(), "fps")
在这里粘贴代码
openmv和单片机机通讯的过程当中在串口当中输出的数据在PC显示正常,但是单片机接受不到,请问是有什么问题?
import sensor, image, time, os, tf, pyb
from pyb import UART
import json

sensor.reset()                         # Reset and initialize the sensor.
sensor.set_pixformat(sensor.RGB565)    # Set pixel format to RGB565 (or GRAYSCALE)
sensor.set_framesize(sensor.QVGA)      # Set frame size to QVGA (320x240)
sensor.set_windowing((240, 240))       # Set 240x240 window.
sensor.skip_frames(time=2000)          # Let the camera adjust.

net = "trained.tflite"
labels = [line.rstrip('\n') for line in open("labels.txt")]
clock = time.clock()

uart1=UART(3,19200)

while(True):
    clock.tick()
    img = sensor.snapshot()

    # default settings just do one detection... change them to search the image...
    for obj in tf.classify(net, img, min_scale=1.0, scale_mul=0.8, x_overlap=0.5, y_overlap=0.5):
        print("**********\nPredictions at [x=%d,y=%d,w=%d,h=%d]" % obj.rect())
        img.draw_rectangle(obj.rect())
        # This combines the labels and confidence values into a list of tuples
        list1=list(labels)
        list2=list(obj.output())
        position=list2.index(max(list2))
        print(list1[position])


        output_str=json.dumps(list1[position]) #方式2
        print(output_str)
        print(output_str[1:2])
        print(hex(ord(output_str[1:2])))
        data=bytearray(hex(ord(output_str[1:2])))


        uart1.write(data)
        time.sleep_ms(2500)
请问各位大佬,openMV如何拍摄并且保存多张照片
# 保存图片例程
#
# 注意:您需要一张SD卡来运行这个例子
#
# 你可以使用你的OpenMV摄像头来保存图像文件

import sensor, image, pyb

RED_LED_PIN = 1
BLUE_LED_PIN = 3

sensor.reset() # 初始化sensor

sensor.set_pixformat(sensor.RGB565) # or sensor.GRAYSCALE
#设置图像色彩格式,有RGB565色彩图和GRAYSCALE灰度图两种

sensor.set_framesize(sensor.QVGA) # or sensor.QQVGA (or others)
#设置图像像素大小

sensor.skip_frames(time = 2000) # 让新的设置生效

#红灯亮
pyb.LED(RED_LED_PIN).on()
sensor.skip_frames(time = 2000) # 给用户一个时间来准备

#红灯灭,蓝灯亮
pyb.LED(RED_LED_PIN).off()
pyb.LED(BLUE_LED_PIN).on()

#保存截取到的图片到SD卡
print("You're on camera!")
sensor.snapshot().save("example.jpg") # or "example.bmp" (or others)

pyb.LED(BLUE_LED_PIN).off()
print("Done! Reset the camera to see the saved image.")
有懂得老哥吗,小弟不知道怎么处理这个
#tracking.py
THRESHOLD = (0,100) # Grayscale threshold for dark things...
import sensor, image, time
from pyb import LED
import car
from pid import PID
rho_pid = PID(p=0.4, i=0)
theta_pid = PID(p=0.001, i=0)
BINARY_VISIBLE = True # 首先执行二进制操作,以便您可以看到正在运行的线性回归...虽然可能会降低FPS。
import sensor, image, time
sensor.reset()
sensor.set_pixformat(sensor.GRAYSCALE)
sensor.set_framesize(sensor.QQVGA)
sensor.skip_frames(time = 2000)
clock = time.clock()
# to process a frame sometimes.
while(True):
clock.tick()
img = sensor.snapshot().binary([THRESHOLD])
line = img.get_regression([(255,255) if BINARY_VISIBLE else THRESHOLD])
if (line):
rho_err = abs(line.rho())-img.width()/2
if line.theta()>90:
theta_err = line.theta()-180
else:
theta_err = line.theta()
img.draw_line(line.line(), color = 127)
print(rho_err,line.magnitude(),rho_err)
if line.magnitude()>0:
#if -40<b_err<40 and -30<t_err<30:
rho_output = rho_pid.get_pid(rho_err,1)
theta_output = theta_pid.get_pid(theta_err,1)
output = rho_output+theta_output
car.run(50+output, 50-output)
else:
car.run(0,0)
else:
car.run(50,-50)
pass
#print(clock.fps())
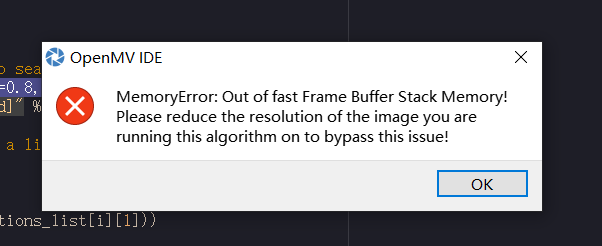
这种降低像素的情况怎么解决呀,(降到最低也不行)
用的是openmv-h7,代码是垃圾识别的代码
请在这里粘贴代码
```# Edge Impulse - OpenMV Image Classification Example

import sensor, image, time, os, tf

sensor.reset()                         # Reset and initialize the sensor.
sensor.set_pixformat(sensor.RGB565)    # Set pixel format to RGB565 (or GRAYSCALE)
sensor.set_framesize(sensor.QVGA)      # Set frame size to QVGA (320x240)
sensor.set_windowing((240, 240))       # Set 240x240 window.
sensor.skip_frames(time=2000)          # Let the camera adjust.

net = "trained.tflite"
labels = [line.rstrip('\n') for line in open("labels.txt")]

clock = time.clock()
while(True):
    clock.tick()

    img = sensor.snapshot()

    # default settings just do one detection... change them to search the image...
    for obj in tf.classify(net, img, min_scale=1.0, scale_mul=0.8, x_overlap=0.5, y_overlap=0.5):
        print("**********\nPredictions at [x=%d,y=%d,w=%d,h=%d]" % obj.rect())
        img.draw_rectangle(obj.rect())
        # This combines the labels and confidence values into a list of tuples
        predictions_list = list(zip(labels, obj.output()))

        for i in range(len(predictions_list)):
            print("%s = %f" % (predictions_list[i][0], predictions_list[i][1]))

print(clock.fps(), "fps")怎么修改这个程序,让它能串口发出最大可能性的垃圾类型?
import sensor, image, time, os, tf
import json
from pyb import UART

sensor.reset()                         # Reset and initialize the sensor.
sensor.set_pixformat(sensor.RGB565)    # Set pixel format to RGB565 (or GRAYSCALE)
sensor.set_framesize(sensor.QVGA)      # Set frame size to QVGA (320x240)
sensor.set_windowing((240, 240))       # Set 240x240 window.
sensor.skip_frames(time=2000)          # Let the camera adjust.

net = "trained.tflite"
labels = [line.rstrip('\n') for line in open("labels.txt")]

clock = time.clock()
uart = UART(3, 115200)
uart.init(115200, bits=8, parity=None, stop=1)
while(True):
    clock.tick()

    img = sensor.snapshot()

    # default settings just do one detection... change them to search the image...
    for obj in tf.classify(net, img, min_scale=1.0, scale_mul=0.8, x_overlap=0.5, y_overlap=0.5):
        print("**********\nPredictions at [x=%d,y=%d,w=%d,h=%d]" % obj.rect())
        img.draw_rectangle(obj.rect())
        # This combines the labels and confidence values into a list of tuples
        predictions_list = list(zip(labels, obj.output()))

        for i in range(len(predictions_list)):

            print("%s = %f" % (predictions_list[i][0], predictions_list[i][1]))

    print(clock.fps(), "fps")
    uart.write(predictions_list)
为什么有线图传显示屏显示的画面会这么卡?帧缓冲区的画面都很流畅
# Edge Impulse - OpenMV Image Classification Example

import sensor, image, time, os, tf,tv

sensor.reset()                         # Reset and initialize the sensor.
sensor.set_pixformat(sensor.RGB565)    # Set pixel format to RGB565 (or GRAYSCALE)
sensor.set_framesize(sensor.SIF)      # Set frame size to QVGA (320x240)
#sensor.set_windowing((240, 240))       # Set 240x240 window.
#sensor.skip_frames(time=2000)          # Let the camera adjust.
tv.init(triple_buffer=False) # Initialize the tv.
tv.channel(8) # For wireless video transmitter shield
net = "trained.tflite"
labels = [line.rstrip('\n') for line in open("labels.txt")]

clock = time.clock()
while(True):
    clock.tick()

    img = sensor.snapshot()

    # default settings just do one detection... change them to search the image...
    for obj in tf.classify(net, img, min_scale=1.0, scale_mul=0.8, x_overlap=0.5, y_overlap=0.5):
        print("**********\nPredictions at [x=%d,y=%d,w=%d,h=%d]" % obj.rect())
        img.draw_rectangle(obj.rect())
        # This combines the labels and confidence values into a list of tuples
        predictions_list = list(zip(labels, obj.output()))

        for i in range(len(predictions_list)):
            print("%s = %f" % (predictions_list[i][0], predictions_list[i][1]))
    tv.display(img)
    print(clock.fps(), "fps")