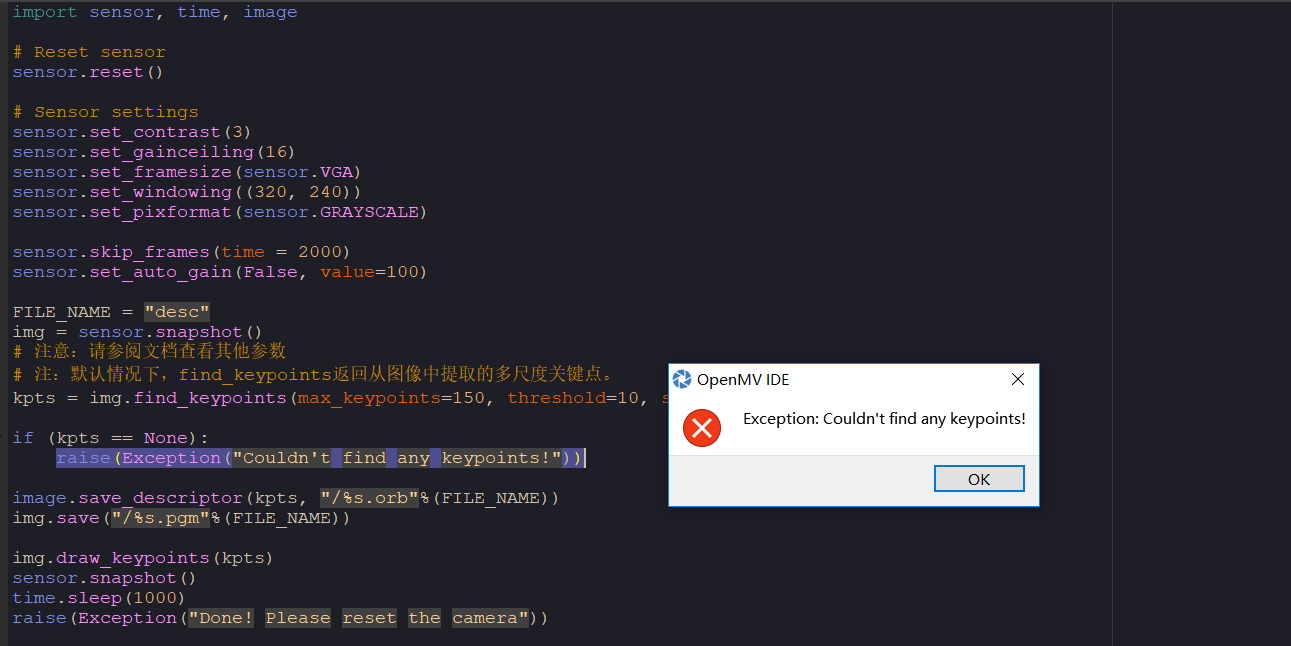
提示找不到关键点是怎么回事?代码是从https://singtown.com搜的特征值保存程序?
# 特征点保存例程
# 此示例显示如何将关键点描述符保存到文件。向相机显示一个对象,然后运行
# 该脚本。该脚本将提取并保存关键点描述符和图像。
# 您可以使用keypoints_editor.py 来删除不需要的关键点。
#
# 注意:请在运行此脚本后重置摄像头以查看新文件。
import sensor, time, image

# Reset sensor
sensor.reset()

# Sensor settings
sensor.set_contrast(3)
sensor.set_gainceiling(16)
sensor.set_framesize(sensor.VGA)
sensor.set_windowing((320, 240))
sensor.set_pixformat(sensor.GRAYSCALE)

sensor.skip_frames(time = 2000)
sensor.set_auto_gain(False, value=100)

FILE_NAME = "desc"
img = sensor.snapshot()
# 注意:请参阅文档查看其他参数
# 注:默认情况下,find_keypoints返回从图像中提取的多尺度关键点。
kpts = img.find_keypoints(max_keypoints=150, threshold=10, scale_factor=1.2)

if (kpts == None):
    raise(Exception("Couldn't find any keypoints!"))//这里报错:winking_face:

image.save_descriptor(kpts, "/%s.orb"%(FILE_NAME))
img.save("/%s.pgm"%(FILE_NAME))

img.draw_keypoints(kpts)
sensor.snapshot()
time.sleep(1000)
raise(Exception("Done! Please reset the camera"))
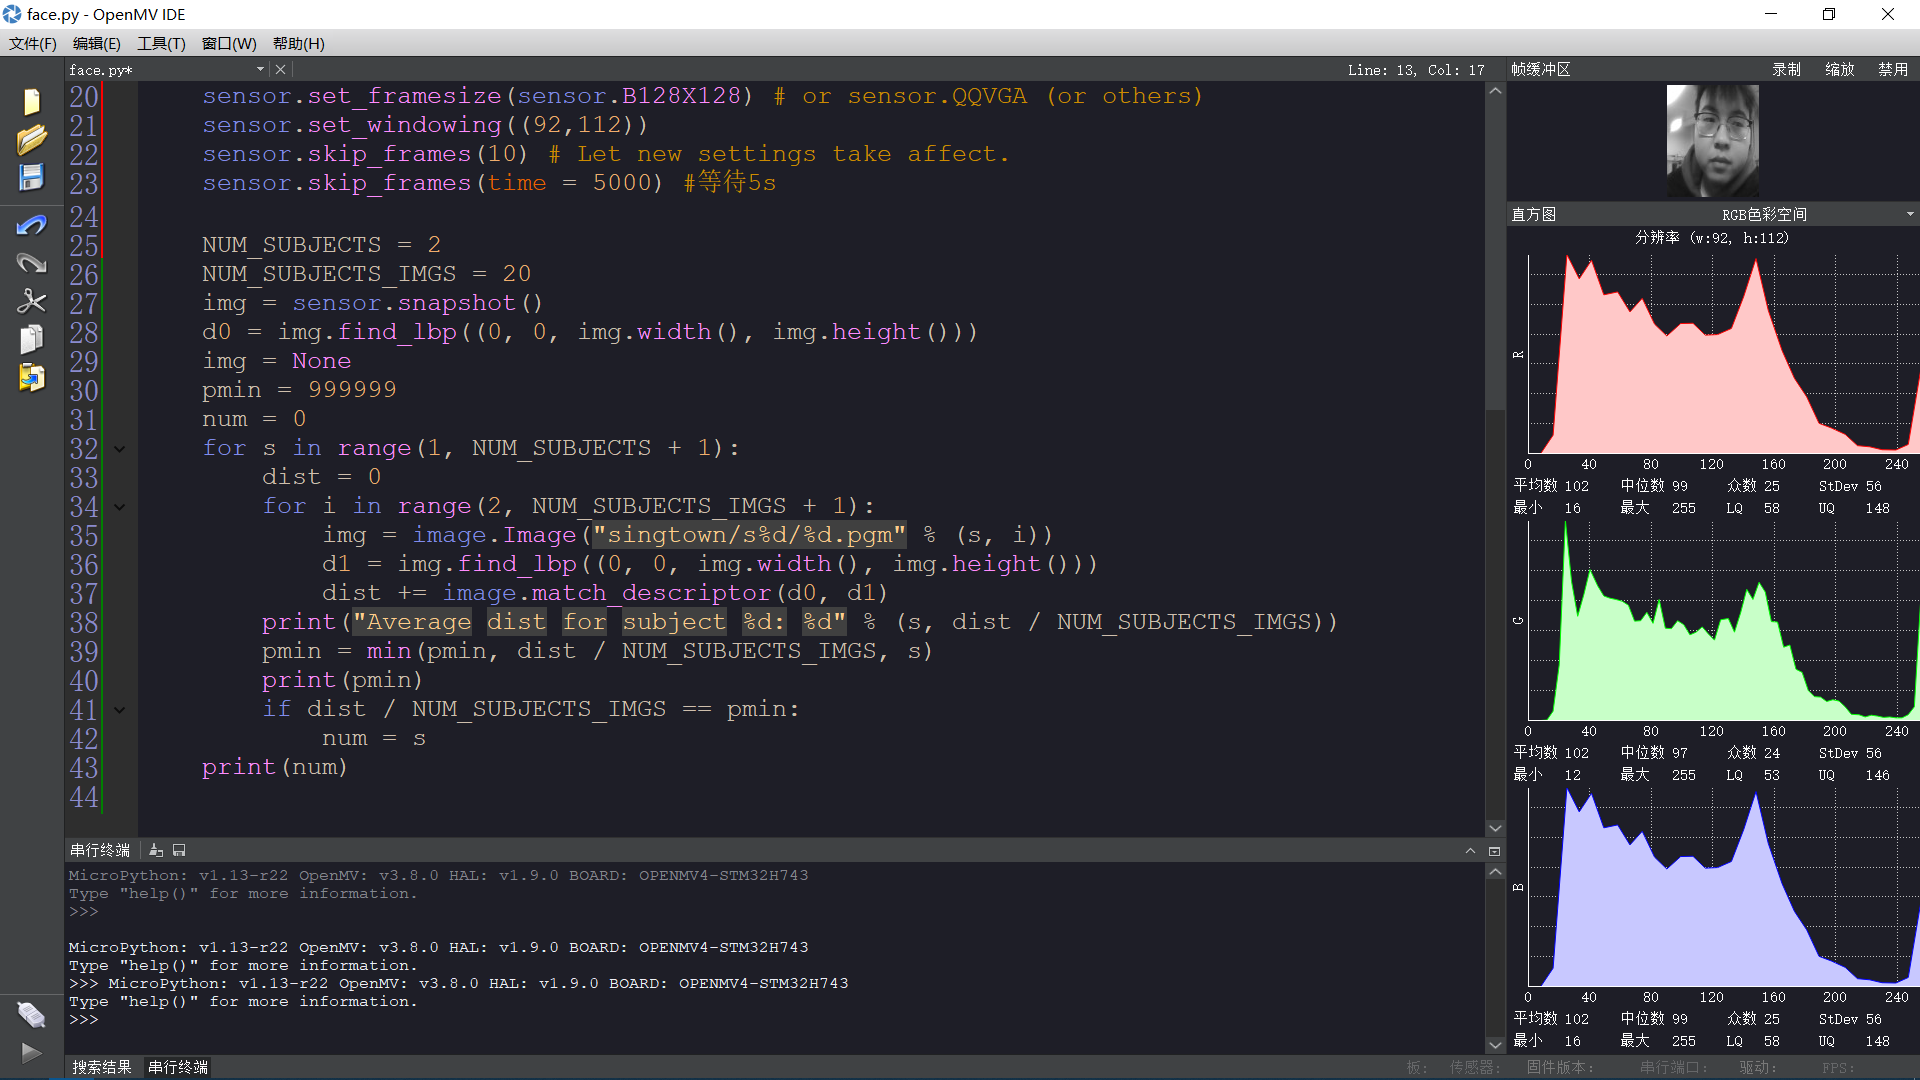
求助关于人脸分辨的相关问题
你好请问这个人脸识别代码为什么不能输出num的值,串行口显示没有输出值,万分感谢
import sensor, time, image, pyb

sensor.reset() # Initialize the camera sensor.
sensor.set_pixformat(sensor.GRAYSCALE) # or sensor.GRAYSCALE
sensor.set_framesize(sensor.B128X128) # or sensor.QQVGA (or others)
sensor.set_windowing((92,112))
sensor.skip_frames(10) # Let new settings take affect.
sensor.skip_frames(time = 5000) #等待5s
num = 0
def min(pmin, a, s):
    global num
    print(00000000)
    if a < pmin:
        pmin = a
        num = s

    return pmin
    sensor.reset() # Initialize the camera sensor.
    sensor.set_pixformat(sensor.GRAYSCALE) # or sensor.GRAYSCALE
    sensor.set_framesize(sensor.B128X128) # or sensor.QQVGA (or others)
    sensor.set_windowing((92,112))
    sensor.skip_frames(10) # Let new settings take affect.
    sensor.skip_frames(time = 5000) #等待5s

    NUM_SUBJECTS = 2
    NUM_SUBJECTS_IMGS = 20
    img = sensor.snapshot()
    d0 = img.find_lbp((0, 0, img.width(), img.height()))
    img = None
    pmin = 999999
    num = 0
    for s in range(1, NUM_SUBJECTS + 1):
        dist = 0
        for i in range(2, NUM_SUBJECTS_IMGS + 1):
            img = image.Image("singtown/s%d/%d.pgm" % (s, i))
            d1 = img.find_lbp((0, 0, img.width(), img.height()))
            dist += image.match_descriptor(d0, d1)
        print("Average dist for subject %d: %d" % (s, dist / NUM_SUBJECTS_IMGS))
        pmin = min(pmin, dist / NUM_SUBJECTS_IMGS, s)
        print(pmin)
        if dist / NUM_SUBJECTS_IMGS == pmin:
            num = s
    print(num)
为什么运行示例会这样?
请在这里粘贴代码# This work is licensed under the MIT license.
# Copyright (c) 2013-2023 OpenMV LLC. All rights reserved.
# https://github.com/openmv/openmv/blob/master/LICENSE
#
# Keypoints descriptor example.
# This example shows how to save a keypoints descriptor to file. Show the camera an object
# and then run the script. The script will extract and save a keypoints descriptor and the image.
# You can use the keypoints_editor.py util to remove unwanted keypoints.
import sensor
import time
import image
# Reset sensor
sensor.reset()
# Sensor settings
sensor.set_contrast(3)
sensor.set_gainceiling(16)
sensor.set_framesize(sensor.VGA)
sensor.set_windowing((320, 240))
sensor.set_pixformat(sensor.GRAYSCALE)
sensor.skip_frames(time=2000)
sensor.set_auto_gain(False, value=100)
FILE_NAME = "desc"
img = sensor.snapshot()
# NOTE: See the docs for other arguments
# NOTE: By default find_keypoints returns multi-scale keypoints extracted from an image pyramid.
kpts = img.find_keypoints(max_keypoints=150, threshold=10, scale_factor=1.2)
if kpts is None:
raise (Exception("Couldn't find any keypoints!"))
image.save_descriptor(kpts, "/%s.orb" % (FILE_NAME))
img.save("/%s.pgm" % (FILE_NAME))
img.draw_keypoints(kpts)
sensor.snapshot()
time.sleep_ms(1000)
raise (Exception("Please reset the camera to see the new file."))

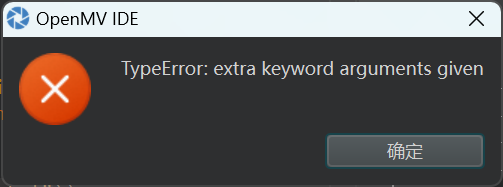
关于定时器的使用,设定定时器频率,出现报错
@kidswong999 发现如果有img = sensor.snapshot() 这句代码,就会出现定时器报错
import sensor, image, time
from pyb import Pin, Timer

sensor.reset()                      # Reset and initialize the sensor.
sensor.set_pixformat(sensor.RGB565) # Set pixel format to RGB565 (or GRAYSCALE)
sensor.set_framesize(sensor.QVGA)   # Set frame size to QVGA (320x240)
sensor.skip_frames(time = 2000)     # Wait for settings take effect.
clock = time.clock()                # Create a clock object to track the FPS.

def systick(timer):            # we will receive the timer object when being called
    print("yes")


tim = Timer(2, freq=10)
tim.callback(systick)

while(True):
    clock.tick()                    # Update the FPS clock.
    img = sensor.snapshot()         # Take a picture and return the image.
    print(clock.fps())              # Note: OpenMV Cam runs about half as fast when connected
                                    # to the IDE. The FPS should increase once disconnected.
有人能运行Selective Search 例程吗?
# Selective Search Example

import sensor, image, time
from random import randint

sensor.reset()                      # Reset and initialize the sensor.
sensor.set_pixformat(sensor.RGB565) # Set pixel format to RGB565 (or GRAYSCALE)
sensor.set_framesize(sensor.QVGA)   # Set frame size to QVGA (320x240)
sensor.skip_frames(time = 2000)     # Wait for settings take effect.
sensor.set_auto_gain(False)
sensor.set_auto_exposure(False, exposure_us=10000)
clock = time.clock()                # Create a clock object to track the FPS.


while(True):
    clock.tick()                    # Update the FPS clock.
    img = sensor.snapshot()         # Take a picture and return the image.
    rois = img.selective_search(threshold = 200, size = 20, a1=0.5, a2=1.0, a3=1.0)
    for r in rois:
        img.draw_rectangle(r, color=(255, 0, 0))
        #img.draw_rectangle(r, color=(randint(100, 255), randint(100, 255), randint(100, 255)))
    print(clock.fps())
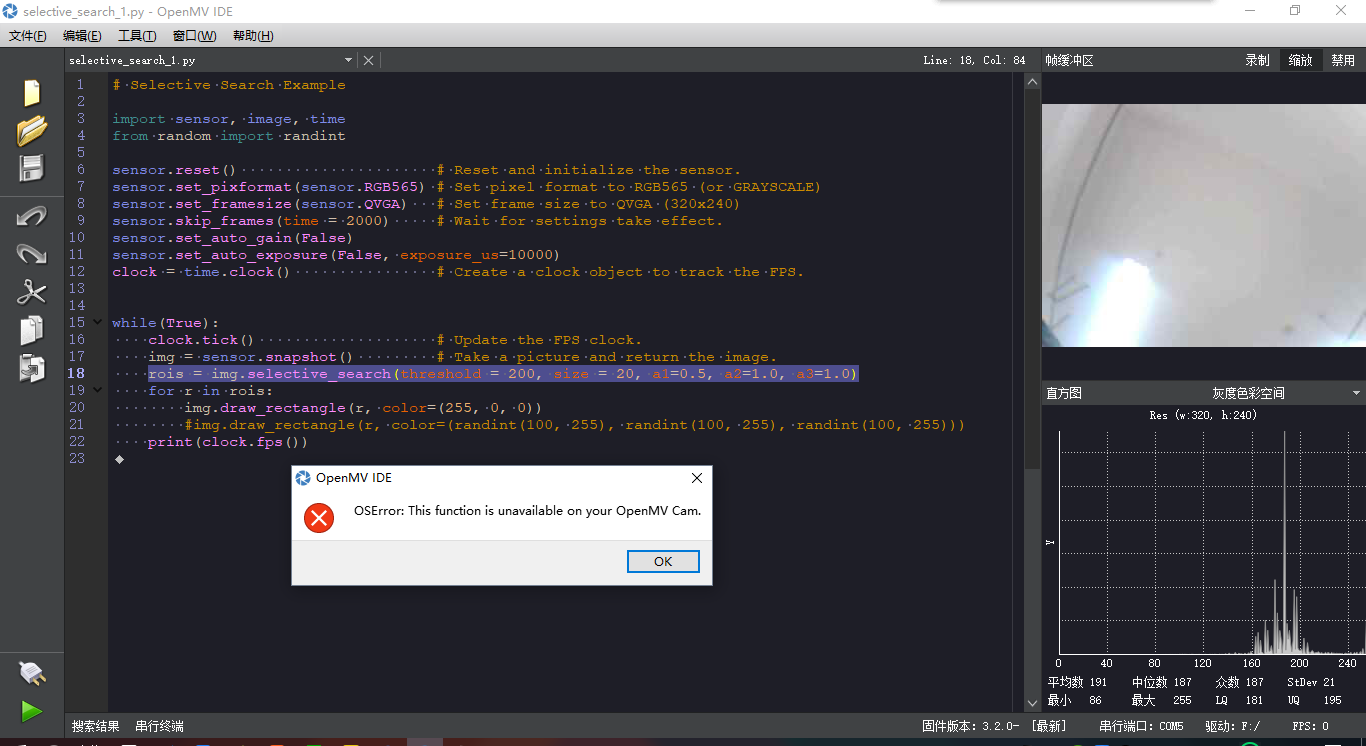
这个例程有人能用吗?是不是不支持openmv3?
口罩识别代码中,如何将face和mask后面的数值改成字符串
import sensor, image, time, os, tf

sensor.reset()                         # Reset and initialize the sensor.
sensor.set_pixformat(sensor.RGB565)    # Set pixel format to RGB565 (or GRAYSCALE)
sensor.set_framesize(sensor.QVGA)      # Set frame size to QVGA (320x240)
sensor.set_windowing((240, 240))       # Set 240x240 window.
sensor.skip_frames(time=2000)          # Let the camera adjust.

net = "trained.tflite"
labels = [line.rstrip('\n') for line in open("labels.txt")]

clock = time.clock()
while(True):
    clock.tick()

    img = sensor.snapshot()

    # default settings just do one detection... change them to search the image...
    for obj in tf.classify(net, img, min_scale=1.0, scale_mul=0.8, x_overlap=0.5, y_overlap=0.5):
        print("**********\nPredictions at [x=%d,y=%d,w=%d,h=%d]" % obj.rect())
        img.draw_rectangle(obj.rect())
        # This combines the labels and confidence values into a list of tuples
        predictions_list = list(zip(labels, obj.output()))

        for i in range(len(predictions_list)):
            print("%s = %f" % (predictions_list[i][0], predictions_list[i][1]))

    print(clock.fps(), "fps")
AttributeError:'module'object has no attribute 'width'?怎么解决
# Snapshot Example
#
# Note: You will need an SD card to run this example.
#
# You can use your OpenMV Cam to save image files.

import sensor, image, pyb,time
from pyb import UART

RED_LED_PIN = 1
BLUE_LED_PIN = 3

sensor.reset() # Initialize the camera sensor.
sensor.set_pixformat(sensor.RGB565) # or sensor.GRAYSCALE
sensor.set_framesize(sensor.QVGA) # or sensor.QQVGA (or others)
sensor.skip_frames(time = 2000) # Let new settings take affect.

uart = UART(3, 19200,timeout_char=1000)

pyb.LED(RED_LED_PIN).on()
sensor.skip_frames(time = 2000) # Give the user time to get ready.

pyb.LED(RED_LED_PIN).off()
pyb.LED(BLUE_LED_PIN).on()

img = sensor.snapshot() # or "example.bmp" (or others)

pyb.LED(BLUE_LED_PIN).off()

uart = UART(3, 19200)
fr = True
while(fr):
    p_width=image.width()
    p_height=image.height()
    uart.write("12345")
    for x in range(p_width):
        for y in range(p_height):
            rgb=img.get_pixel(n,k)
            uart.write(rgb[0])
            uart.write(rgb[1])
            uart.write(rgb[2])
    uart.write("12345")
    fr = False
使用全局快门模组,外部触发采集图像并保存,无法实现10帧以上的保存速度,有没有什么更快地保存方式。
import sensor, image, pyb,time
import machine
import stm
from pyb import ExtInt,Pin,RTC
RED_LED_PIN = 1
BLUE_LED_PIN = 3
#摄像头初始化
sensor.reset() # Initialize the camera sensor.
sensor.set_pixformat(sensor.GRAYSCALE) # or sensor.GRAYSCALE
sensor.set_framesize(sensor.QVGA) # or sensor.QQVGA (or others)
sensor.skip_frames(time = 2000) # Let new settings take affect.
clock = time.clock()
sensor.ioctl(sensor.IOCTL_SET_TRIGGERED_MODE, True)
PictureNum=0
key_node = 0 #按键标志位
rtc=RTC()
#extra_fb = sensor.alloc_extra_fb(sensor.width(), sensor.height(), sensor.GRAYSCALE)
##############################################
按键和其回调函数
##############################################
def key(ext):
global key_node
key_node = 1
ext = ExtInt(Pin('P3'), ExtInt.IRQ_FALLING, Pin.PULL_UP, key) #下降沿触发,打开上拉电阻
while True:
if key_node==1: #按键被按下
    PictureNum+=1

    sensor.snapshot().save(str(PictureNum)+".jpg",quality=50)
    print("camera:%d"%PictureNum)
key_node = 0 #清空按键标志位OPENMV的颜色通道,默认为LAB通道,如何应用RGB进行检测
@dcqu 这个就是一个公式,把lab转成rgb
你传LAB的均值,结果就是这个均值的rgb的值。
import sensor, image, time

sensor.reset()                      # Reset and initialize the sensor.
sensor.set_pixformat(sensor.RGB565) # Set pixel format to RGB565 (or GRAYSCALE)
sensor.set_framesize(sensor.QVGA)   # Set frame size to QVGA (320x240)
sensor.skip_frames(time = 2000)     # Wait for settings take effect.
clock = time.clock()                # Create a clock object to track the FPS.

rgb_threould_low = (10,10,10) #深灰色
rgb_threould_up = (100,100,100) #浅灰色

lab_threould_low = image.rgb_to_lab(rgb_threould_low)
lab_threould_up = image.rgb_to_lab(rgb_threould_up)

while(True):
    clock.tick()                    # Update the FPS clock.
    img = sensor.snapshot()         # Take a picture and return the image.
    print(img.find_blobs([(lab_threould_low[0], lab_threould_up[0]),
        (lab_threould_low[1],lab_threould_up[1]),
        (lab_threould_low[2],lab_threould_up[2])]))
特征点检测程序问题
# Sensor settings
sensor.set_contrast(3)
sensor.set_gainceiling(16)
sensor.set_framesize(sensor.VGA)
sensor.set_windowing((320, 240))
sensor.set_pixformat(sensor.GRAYSCALE)

sensor.skip_frames(time = 2000)
sensor.set_auto_gain(False, value=100)
这是例程中的一段,sensor.set_gainceiling(16),将增益的上限设置为16,sensor.set_auto_gain(False, value=100)这个100是增益指数,矛盾吗?