共 499 条结果匹配 "sensor",(耗时 0.06 秒)
新版固件中LCD怎么显示QVGA的中心图像?
可以添加SCALE_ASPECT_IGNORE
import sensor
import display
import image

sensor.reset()
sensor.set_pixformat(sensor.RGB565)
sensor.set_framesize(sensor.QVGA)
lcd = display.SPIDisplay()

while True:
    lcd.write(sensor.snapshot(), hint=image.SCALE_ASPECT_IGNORE)
想获取分辨率高的图片 但是报错怎么解决?
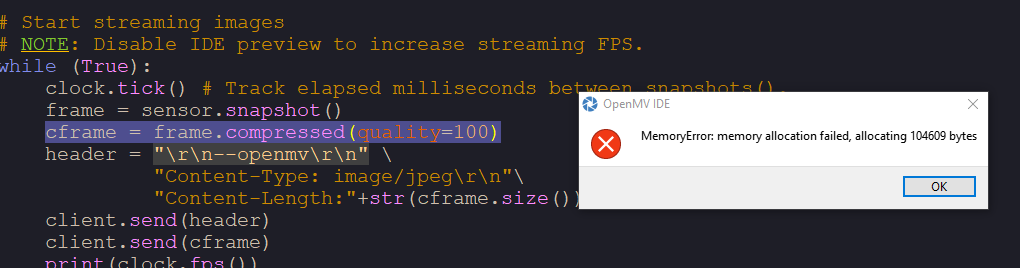
sensor.set_pixformat(sensor.JPEG)
#FHD 1920x1080 (only for the OV5640 sensor)
sensor.set_framesize(sensor.FHD)
怎么讲sd卡里的图片显示在LCD上呢?
我运行下面的代码很正常,我看到你的尺寸可能不对,应该是QQVGA2保存成bmp
import sensor, image, lcd

sensor.reset() # Initialize the camera sensor.
sensor.set_pixformat(sensor.RGB565) # or sensor.GRAYSCALE
sensor.set_framesize(sensor.QQVGA2) # Special 128x160 framesize for LCD Shield.
lcd.init() # Initialize the lcd screen.

sensor.snapshot().save("test.bmp")
img = image.Image("test.bmp",copy_to_fb=True)
lcd.display(img) # Take a picture and display the image.
调用difference函数问题
import sensor, image, time

sensor.reset()                      # Reset and initialize the sensor.
sensor.set_pixformat(sensor.GRAYSCALE) # Set pixel format to RGB565 (or GRAYSCALE)
sensor.set_framesize(sensor.QQVGA)   # Set frame size to QVGA (320x240)
sensor.skip_frames(time = 2000)     # Wait for settings take effect.
sensor.set_auto_whitebal(False)
clock = time.clock()                # Create a clock object to track the FPS.

clock.tick()# Update the FPS clock.
img = sensor.snapshot().mean(1)
template = image.Image("/template.bmp")
sensor.skip_frames(time = 2000)
diff = img.difference(template)
在RGB565格式时是可以用的
如何实现上电自动录制视频并保存
import sensor
import time
import mjpeg
import machine

sensor.reset()  # Reset and initialize the sensor.
sensor.set_pixformat(sensor.RGB565)  # Set pixel format to RGB565 (or GRAYSCALE)
sensor.set_framesize(sensor.QVGA)  # Set frame size to QVGA (320x240)
sensor.skip_frames(time=2000)  # Wait for settings take effect.

led = machine.LED("LED_RED")

while True:

    led.on()
    m = mjpeg.Mjpeg("example.mjpeg")

    clock = time.clock()  # Create a clock object to track the FPS.
    for i in range(5*60*30):
        clock.tick()
        m.add_frame(sensor.snapshot())
        print(clock.fps())

    m.close(clock.fps())
    led.off()

    print("saved")