怎么将openmv获取的图片形式转换为.pbm的形式。
import sensor, image, time
sensor.reset()
sensor.set_pixformat(sensor.RGB565)
sensor.set_framesize(sensor.QQVGA)
sensor.skip_frames(time = 2000)
img = sensor.snapshot()
如何使img为.pbm(二进制)的格式?
如何实现连续拍照并且储存到sd卡中?
import sensor, image, time

sensor.reset()
sensor.set_pixformat(sensor.RGB565)
sensor.set_framesize(sensor.QVGA)
sensor.skip_frames(time = 2000)

clock = time.clock()
i=0
while(True):
    clock.tick()
    img = sensor.snapshot()
    img.save(i+".jpg")
    print(clock.fps())
颜色识别和模板识别需要相互切换,我想用中断计数但是一按中断就会和openmv断联
- 不要用try catch把主程序包起来,出错你都看不到。
- 没有import image, sensor
请问人脸检测例子能在openMV-git上找到源码吗?
来自星瞳实验室APP: sensor 模块的源码在哪里?怎样查看,谢谢!https://forum.singtown.com/topic/69
如何定时500毫秒串口发送数据
import sensor, image
import pyb

sensor.reset()
sensor.set_pixformat(sensor.RGB565)
sensor.set_framesize(sensor.QVGA)
sensor.skip_frames(time = 2000)

last_time = pyb.millis()

while(True):
    img = sensor.snapshot()
    if pyb.millis() - last_time > 500:
        last_time = pyb.millis()
        print('send')
测试openmv 与 arduino 第一次 通信成功 里的代码有几处出错,不明白为什么
import sensor, image, time
import json
from pyb import UART
sensor.reset() # Initialize the camera sensor.
sensor.set_pixformat(sensor.RGB565) # use RGB565.
sensor.set_framesize(sensor.QQVGA) # use QQVGA for speed.
sensor.skip_frames(10) # Let new settings take affect.
sensor.set_auto_whitebal(False) # turn this off.
clock = time.clock() # Tracks FPS.
uart = UART(3, 9600)
while(True):
clock.tick() # Track elapsed milliseconds between snapshots().
img = sensor.snapshot() # Take a picture and return the image.
img.lens_corr(1.5)
for code in img.find_qrcodes():
message = code.payload()
uart.write(message)
print(code)
else:
print(“not found!”)
请问这个摄像头初始化的问题怎么解决?我对准强光镜头是一个效果,背光是另一种效果,有时候镜头会整体偏向一种颜色怎么调稳定
阈值与设置摄像头的参数无关。
你的代码是,最开始的3秒,自动设置摄像头的白平衡和增益,然后关闭摄像头的白平衡和增益。
如果像一开始就手动设置,可以用这个代码:https://book.openmv.cc/example/21-Sensor-Control/sensor-exposure-control.html
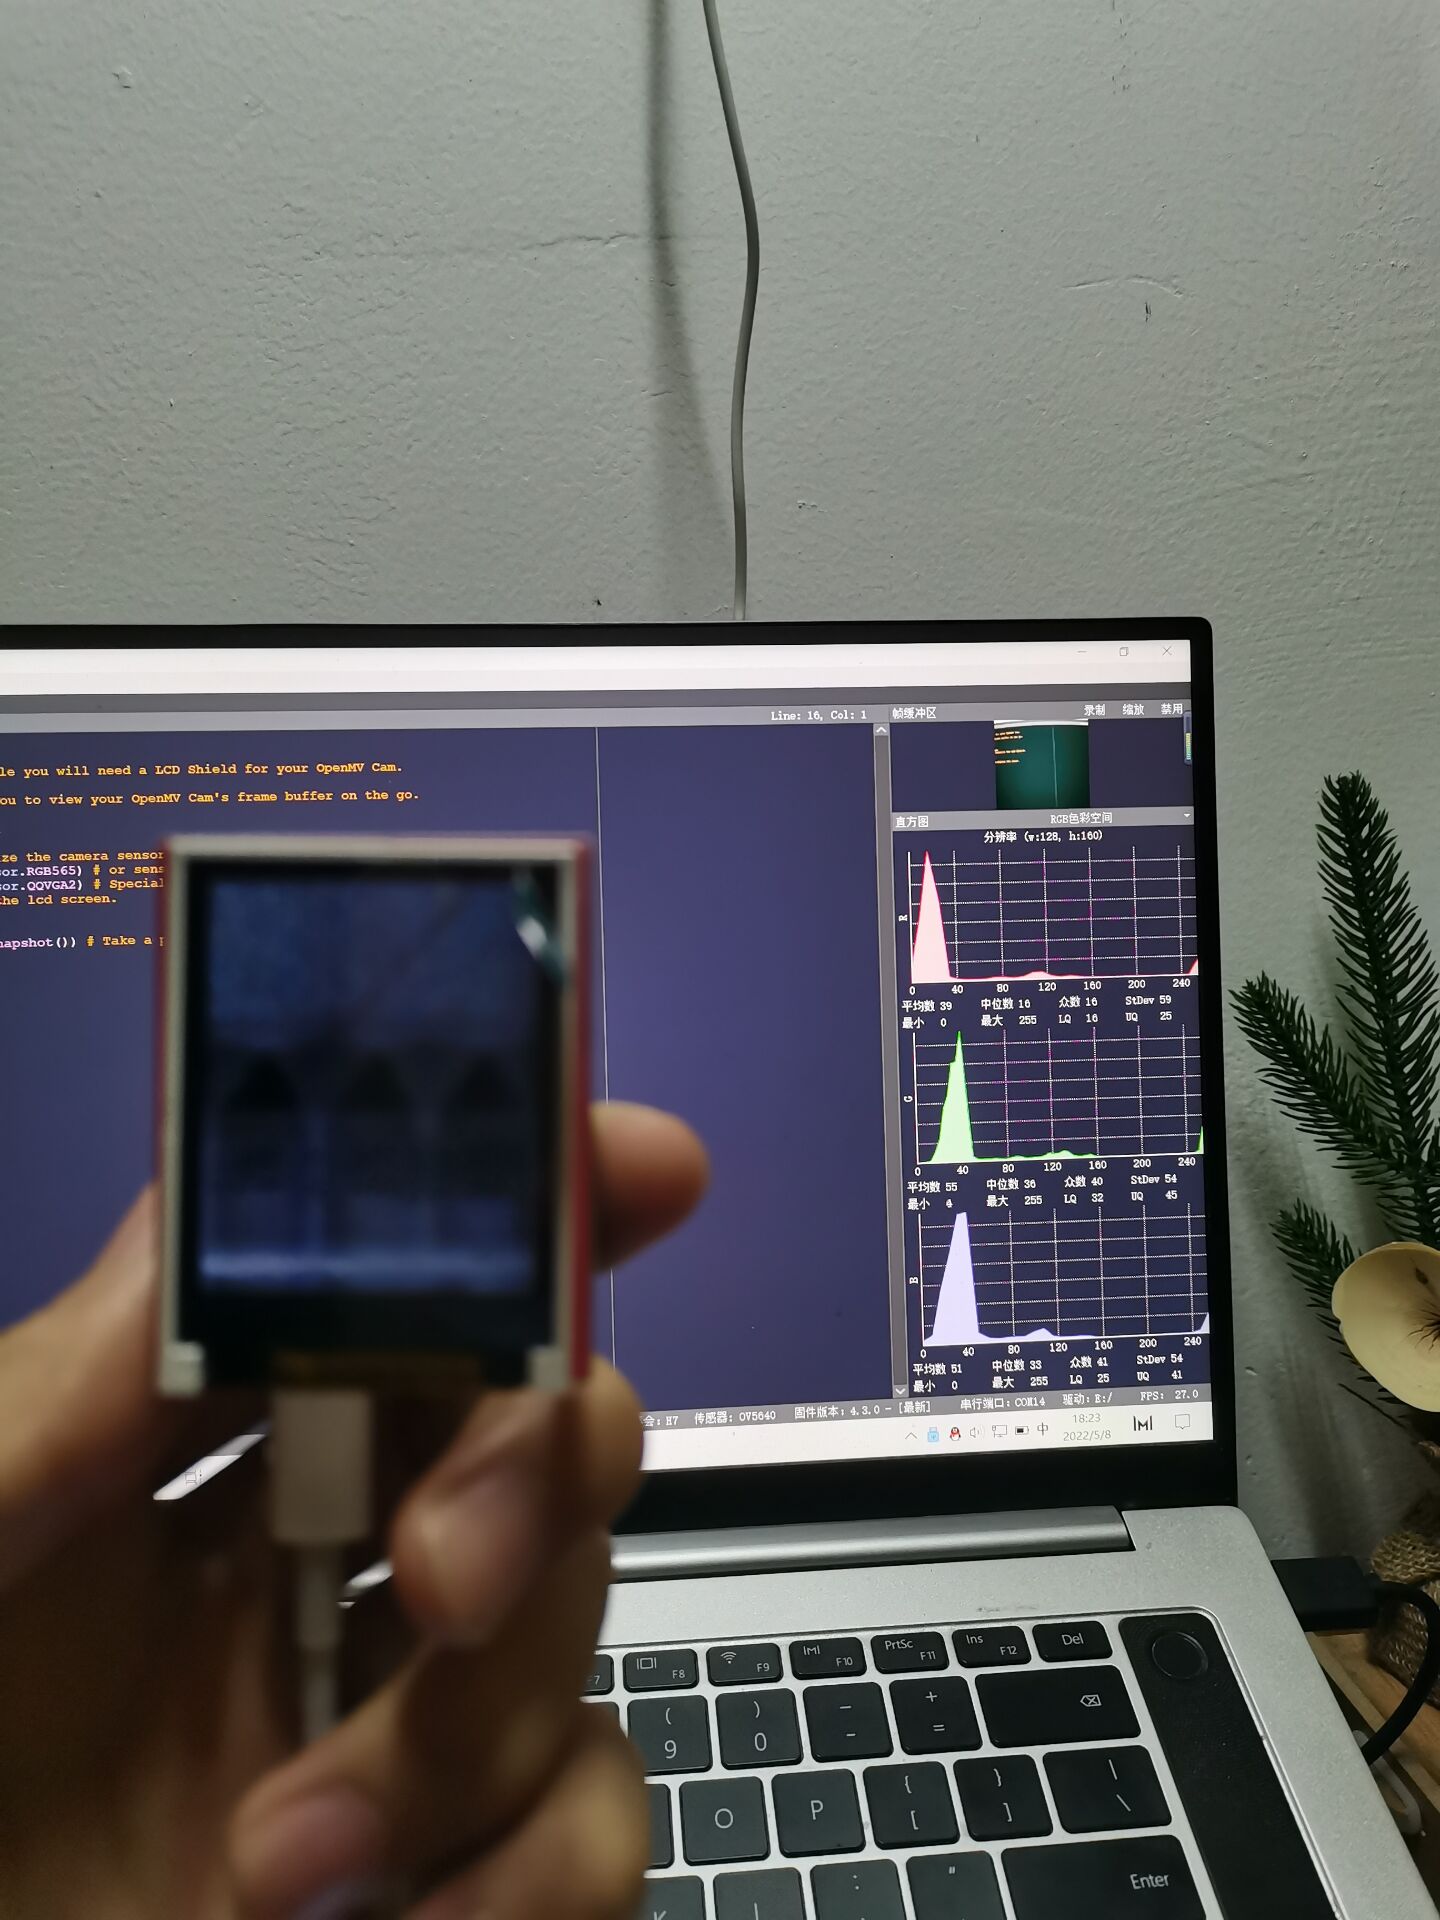
OPENMV4 H7 PLUS使用LCD历程LCD屏幕无法正常显示画面
# LCD Example
#
# Note: To run this example you will need a LCD Shield for your OpenMV Cam.
#
# The LCD Shield allows you to view your OpenMV Cam's frame buffer on the go.

import sensor, image, lcd

sensor.reset() # Initialize the camera sensor.
sensor.set_pixformat(sensor.RGB565) # or sensor.GRAYSCALE
sensor.set_framesize(sensor.QQVGA2) # Special 128x160 framesize for LCD Shield.
lcd.init() # Initialize the lcd screen.

while(True):
    lcd.display(sensor.snapshot()) # Take a picture and display the image.
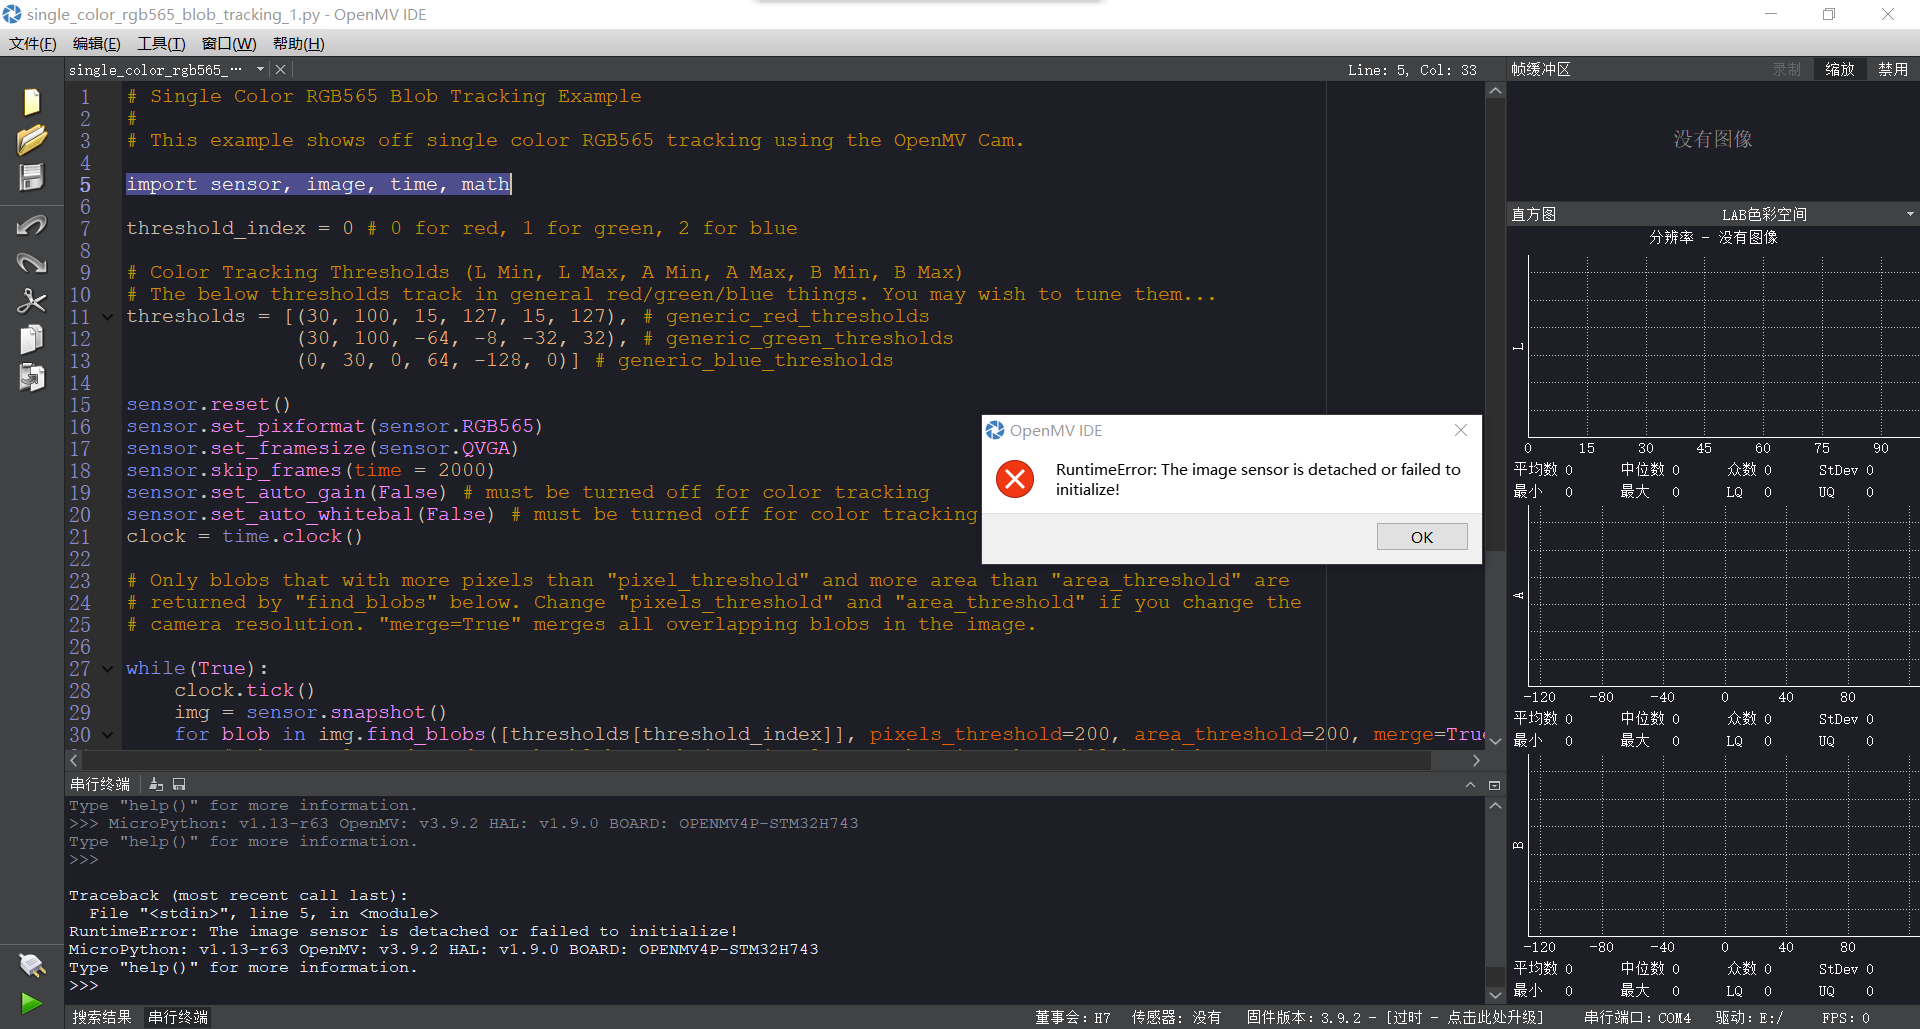
连接openmv不显示图像
连接openmv后显示The image sensor is detached or failed to initialize!