openmv4PLUS的图像为什么这么偏暗偏绿
应该是环境太暗了。你运行下面的代码。
import sensor, image, time

sensor.reset()                      # Reset and initialize the sensor.
sensor.set_pixformat(sensor.RGB565) # Set pixel format to RGB565 (or GRAYSCALE)
sensor.set_framesize(sensor.QVGA)   # Set frame size to QVGA (320x240)
sensor.set_auto_whitebal(False, rgb_gain_db=(62,60,63))
sensor.set_auto_exposure(False, 101244)
sensor.set_auto_gain(False, 22)
sensor.skip_frames(time = 2000)     # Wait for settings take effect.
clock = time.clock()                # Create a clock object to track the FPS.

while(True):
    clock.tick()                    # Update the FPS clock.
    img = sensor.snapshot()         # Take a picture and return the image.
    print(clock.fps())
为什么我的lcd模块找不到?
如果是新的固件,使用新的display库,替代lcd库
import sensor
import display

sensor.reset()  # Initialize the camera sensor.
sensor.set_pixformat(sensor.RGB565)  # or sensor.GRAYSCALE
sensor.set_framesize(sensor.QQVGA2)  # Special 128x160 framesize for LCD Shield.
# Initialize the lcd screen.
# Note: A DAC or a PWM backlight controller can be used to control the
# backlight intensity if supported:
#  lcd = display.SPIDisplay(backlight=display.DACBacklight(channel=2))
#  lcd.backlight(25) # 25% intensity
# Otherwise the default GPIO (on/off) controller is used.
lcd = display.SPIDisplay()

while True:
    lcd.write(sensor.snapshot())  # Take a picture and display the image.
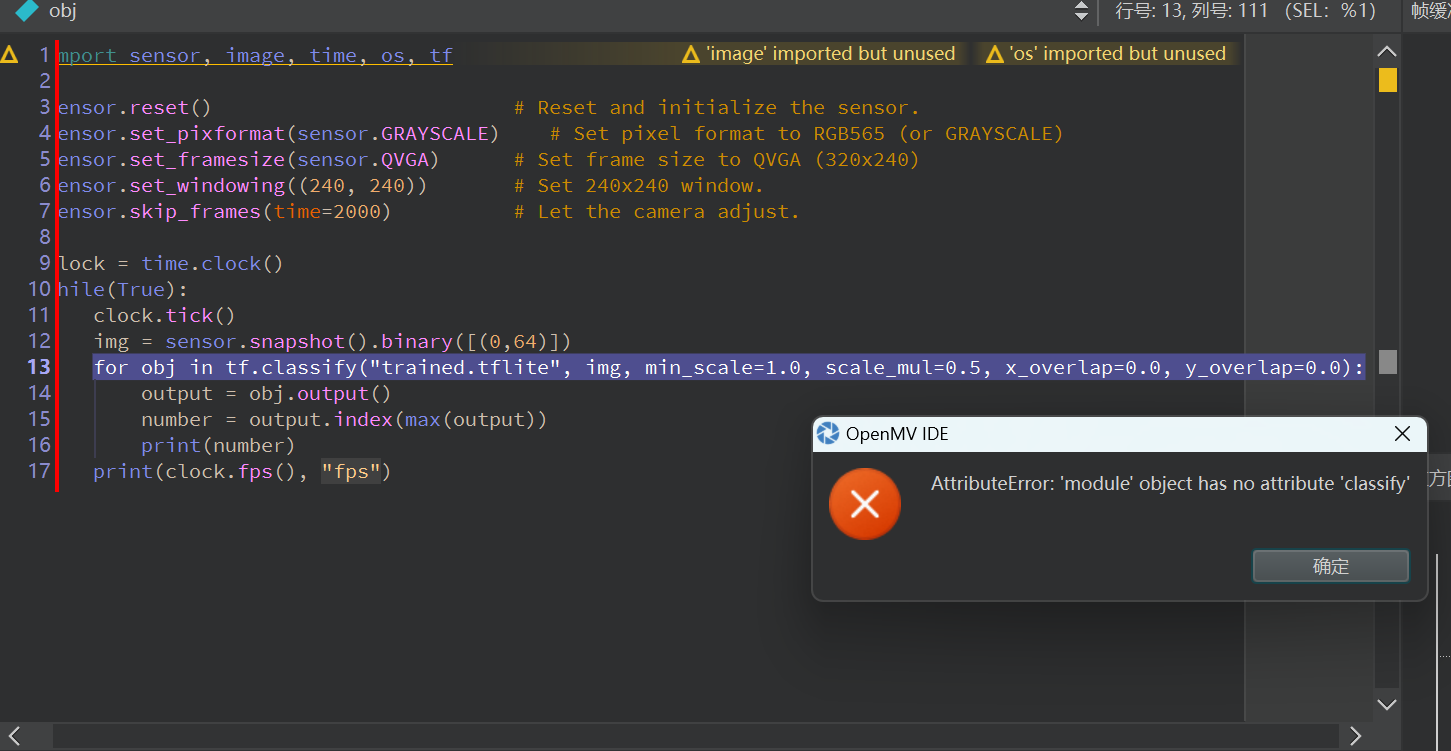
使用Mnist数字识别的时候报错为‘module' object has no attribute 'classify'
import sensor, image, time, os, tf

sensor.reset()                         # Reset and initialize the sensor.
sensor.set_pixformat(sensor.GRAYSCALE)    # Set pixel format to RGB565 (or GRAYSCALE)
sensor.set_framesize(sensor.QVGA)      # Set frame size to QVGA (320x240)
sensor.set_windowing((240, 240))       # Set 240x240 window.
sensor.skip_frames(time=2000)          # Let the camera adjust.

clock = time.clock()
while(True):
    clock.tick()
    img = sensor.snapshot().binary([(0,64)])
    for obj in tf.classify("trained.tflite", img, min_scale=1.0, scale_mul=0.5, x_overlap=0.0, y_overlap=0.0):
        output = obj.output()
        number = output.index(max(output))
        print(number)
print(clock.fps(), "fps")
训练数字识别的神经网络,tf库的函数好像都会报这个错误,用的openmv4 H7 plus,固件版本4.7.0,为什么?
import sensor, image, time, os, tf
sensor.reset() # Reset and initialize the sensor.
sensor.set_pixformat(sensor.GRAYSCALE) # Set pixel format to RGB565 (or GRAYSCALE)
sensor.set_framesize(sensor.QVGA) # Set frame size to QVGA (320x240)
sensor.set_windowing((240, 240)) # Set 240x240 window.
sensor.skip_frames(time=2000) # Let the camera adjust.
clock = time.clock()
while(True):
clock.tick()
img = sensor.snapshot().binary([(0,64)])
for obj in tf.classify("trained.tflite", img, min_scale=1.0, scale_mul=0.5, x_overlap=0.0, y_overlap=0.0):
output = obj.output()
number = output.index(max(output))
print(number)
固件4.7.0不支持tf库了吗?为什么导入是时候没有报错、警告,调用里面的函数会报错?

import sensor, time, tf

sensor.reset()                         # Reset and initialize the sensor.
sensor.set_pixformat(sensor.GRAYSCALE)    # Set pixel format to RGB565 (or GRAYSCALE)
sensor.set_framesize(sensor.QVGA)      # Set frame size to QVGA (320x240)
sensor.set_windowing((240, 240))       # Set 240x240 window.
sensor.skip_frames(time=2000)          # Let the camera adjust.

clock = time.clock()
while(True):
    clock.tick()
    img = sensor.snapshot().binary([(0,64)])
    for obj in tf.classify("trained.tflite", img, min_scale=1.0, scale_mul=0.5, x_overlap=0.0, y_overlap=0.0):
        output = obj.output()
        number = output.index(max(output))
        print(number)
    print(clock.fps(), "fps")
socket传输图片未能传输完全,代码如何修改?
socket传输的图片效果

openmv客户端
import sensor, image, time, network, usocket, sys

# Reset sensor
sensor.reset()

# Set sensor settings
sensor.set_contrast(1)
sensor.set_brightness(1)
sensor.set_saturation(1)
sensor.set_gainceiling(16)
sensor.set_framesize(sensor.QVGA)
sensor.set_pixformat(sensor.RGB565)
sensor.set_auto_gain(True)
sensor.set_auto_whitebal(True)

SSID='*******'
KEY='*******'
wlan = network.WINC()
wlan.connect(SSID, key=KEY, security=wlan.WPA_PSK)
print(wlan.ifconfig())

addr=("******",20000)

# connect to serve
client = usocket.socket(usocket.AF_INET, usocket.SOCK_STREAM)
client.connect(addr)

client.settimeout(0)

frame = sensor.snapshot()
cframe = frame.compressed(quality=35)
client.send(str(cframe.size()))
client.send(cframe)

client.close()
服务器端
import base64
import threading
from socket import *
import time

print("Waiting for connection...")
phserv = socket(AF_INET,SOCK_STREAM)
phserv.bind(('******', 20000))
phserv.listen(5)
car, addr = phserv.accept()
print("Connected to")
print(addr)

a=car.recv(4)
size=int(a.decode())
time.sleep(1)

fl=open('nw2.jpg','wb')
while size>0:
        data = car.recv(1024)
        fl.write(data)
        size=size-len(data)

time.sleep(0.02)
fl.close()
car.close()
二值化+拍照 得到的是灰度图,不是二值化处理后的图。
你的代码有问题 。 sensor.snapshot().save("huodu2.bmp") 你每次保存的都是从sensor重新获取的,当然不对。
改为img.save("huodu2.bmp")