# Edge Impulse - OpenMV Image Classification Example

import sensor, image, time, os, tf,pyb
from pyb import Pin

sensor.reset()                         # Reset and initialize the sensor. 重置感光元件
sensor.set_pixformat(sensor.RGB565)    # Set pixel format to RGB565 (or GRAYSCALE) 设置感光元件图像的色彩
sensor.set_framesize(sensor.QVGA)      # Set frame size to QVGA (320x240) 设置感光元件分辨率大小
sensor.set_windowing((240, 240))       # Set 240x240 window.
sensor.skip_frames(time=2000)          # Let the camera adjust. 图像跳过几帧使以上设置生效
sensor.set_auto_gain(False)            # 必须关闭此功能,以防止图像冲洗…

pin8 = Pin('P8', Pin.OUT_PP, Pin.PULL_NONE)

net = "trained.tflite"
labels = [line.rstrip('\n') for line in open("labels.txt")]

mask=False

led = pyb.LED(2) # Red LED = 1, Green LED = 2, Blue LED = 3, IR LEDs = 4.
usb = pyb.USB_VCP() # This is a serial port object that allows you to

clock = time.clock() #设置时钟
while(True):
    clock.tick()

    img = sensor.snapshot()
    img.lens_corr(1.8) # 1.8的强度参数对于2.8mm镜头来说是不错的。 软件畸变矫正
    if mask==False :
          for obj in tf.classify(net, img, min_scale=1.0, scale_mul=0.8, x_overlap=0.5, y_overlap=0.5):
            print("**********\nPredictions at [x=%d,y=%d,w=%d,h=%d]" % obj.rect())
            img.draw_rectangle(obj.rect())
            # This combines the labels and confidence values into a list of tuples
            predictions_list = list(zip(labels, obj.output()))
            for i in range(len(predictions_list)):
                print("%s = %f" % (predictions_list[i][0], predictions_list[i][1]))
                if predictions_list[1][1] > 0.5 : #mask>0.5 戴口罩时,灯亮,蜂鸣器不响
                        led.on()
                        pin8.value(0)  #蜂鸣器不响
                        print ("请进行二维码识别")
                        mask==True

                else :         #不戴口罩时,蜂鸣器响,灯不亮
                        led.off()
                        pin8.value(1)  #蜂鸣器响
            if   led.on()and print ("请进行二维码识别") :
                 mask==True
            if mask==True :
                    for code in img.find_qrcodes():
                            img.draw_rectangle(code.rect(), color = (255, 0, 0))
                            message=code.payload()
                            print(message)
                            if message == "健康":
                                 led.on()
                                 pin8.value(0)  #绿灯亮 蜂鸣器不响       #蜂鸣器8 LED7
                                 print("进行体温监测")
                                # return True
                                # pin7.value(1)
                            else :
                                 led.off()
                                 pin8.value(1)  #蜂鸣器响
                                # pin7.value(0)  #灯
R
rhg6
@rhg6
0
声望
4
楼层
1402
资料浏览
0
粉丝
0
关注
rhg6 发布的帖子
-
先进行口罩识别在进行二维码识别 但是在口罩识别完成之后没法进行二维码识别,请问下程序代码有什么问题吗发布在 OpenMV Cam
-
颜色识别出错这是什么原因 我只想能狗区分红绿颜色,然后绿色的话灯亮,红色蜂鸣器响加灯亮发布在 OpenMV Cam
![0_1682048968157_HTF[8%X%8075{VDU`@V]WD7.png](https://fcdn.singtown.com/5d7c372f-cbc6-430b-95e6-27330a5a7e30.png)
# Single Color RGB565 Blob Tracking Example # # This example shows off single color RGB565 tracking using the OpenMV Cam. import sensor, image, time#, math threshold_index = 0 # 0 for red, 1 for green, 2 for blue # Color Tracking Thresholds (L Min, L Max, A Min, A Max, B Min, B Max) # The below thresholds track in general red/green/blue things. You may wish to tune them... thresholds = [(30, 100, 15, 127, 15, 127)], # generic_red_thresholds # (30, 100, -64, -8, -32, 32), # generic_green_thresholds # (0, 30, 0, 64, -128, 0)] # generic_blue_thresholds sensor.reset() sensor.set_pixformat(sensor.RGB565) sensor.set_framesize(sensor.QVGA) sensor.skip_frames(time = 2000) sensor.set_auto_gain(False) # must be turned off for color tracking sensor.set_auto_whitebal(False) # must be turned off for color tracking clock = time.clock() # Only blobs that with more pixels than "pixel_threshold" and more area than "area_threshold" are # returned by "find_blobs" below. Change "pixels_threshold" and "area_threshold" if you change the # camera resolution. "merge=True" merges all overlapping blobs in the image. while(True): clock.tick() img = sensor.snapshot() for blob in img.find_blobs([thresholds[threshold_index]], pixels_threshold=200, area_threshold=200, merge=True): # These values depend on the blob not being circular - otherwise they will be shaky. # if blob.elongation() > 0.5: # img.draw_edges(blob.min_corners(), color=(255,0,0)) # img.draw_line(blob.major_axis_line(), color=(0,255,0)) # img.draw_line(blob.minor_axis_line(), color=(0,0,255)) # These values are stable all the time. img.draw_rectangle(blob.rect()) img.draw_cross(blob.cx(), blob.cy()) # Note - the blob rotation is unique to 0-180 only. # img.draw_keypoints([(blob.cx(), blob.cy(), int(math.degrees(blob.rotation())))], size=20) print(clock.fps()) -
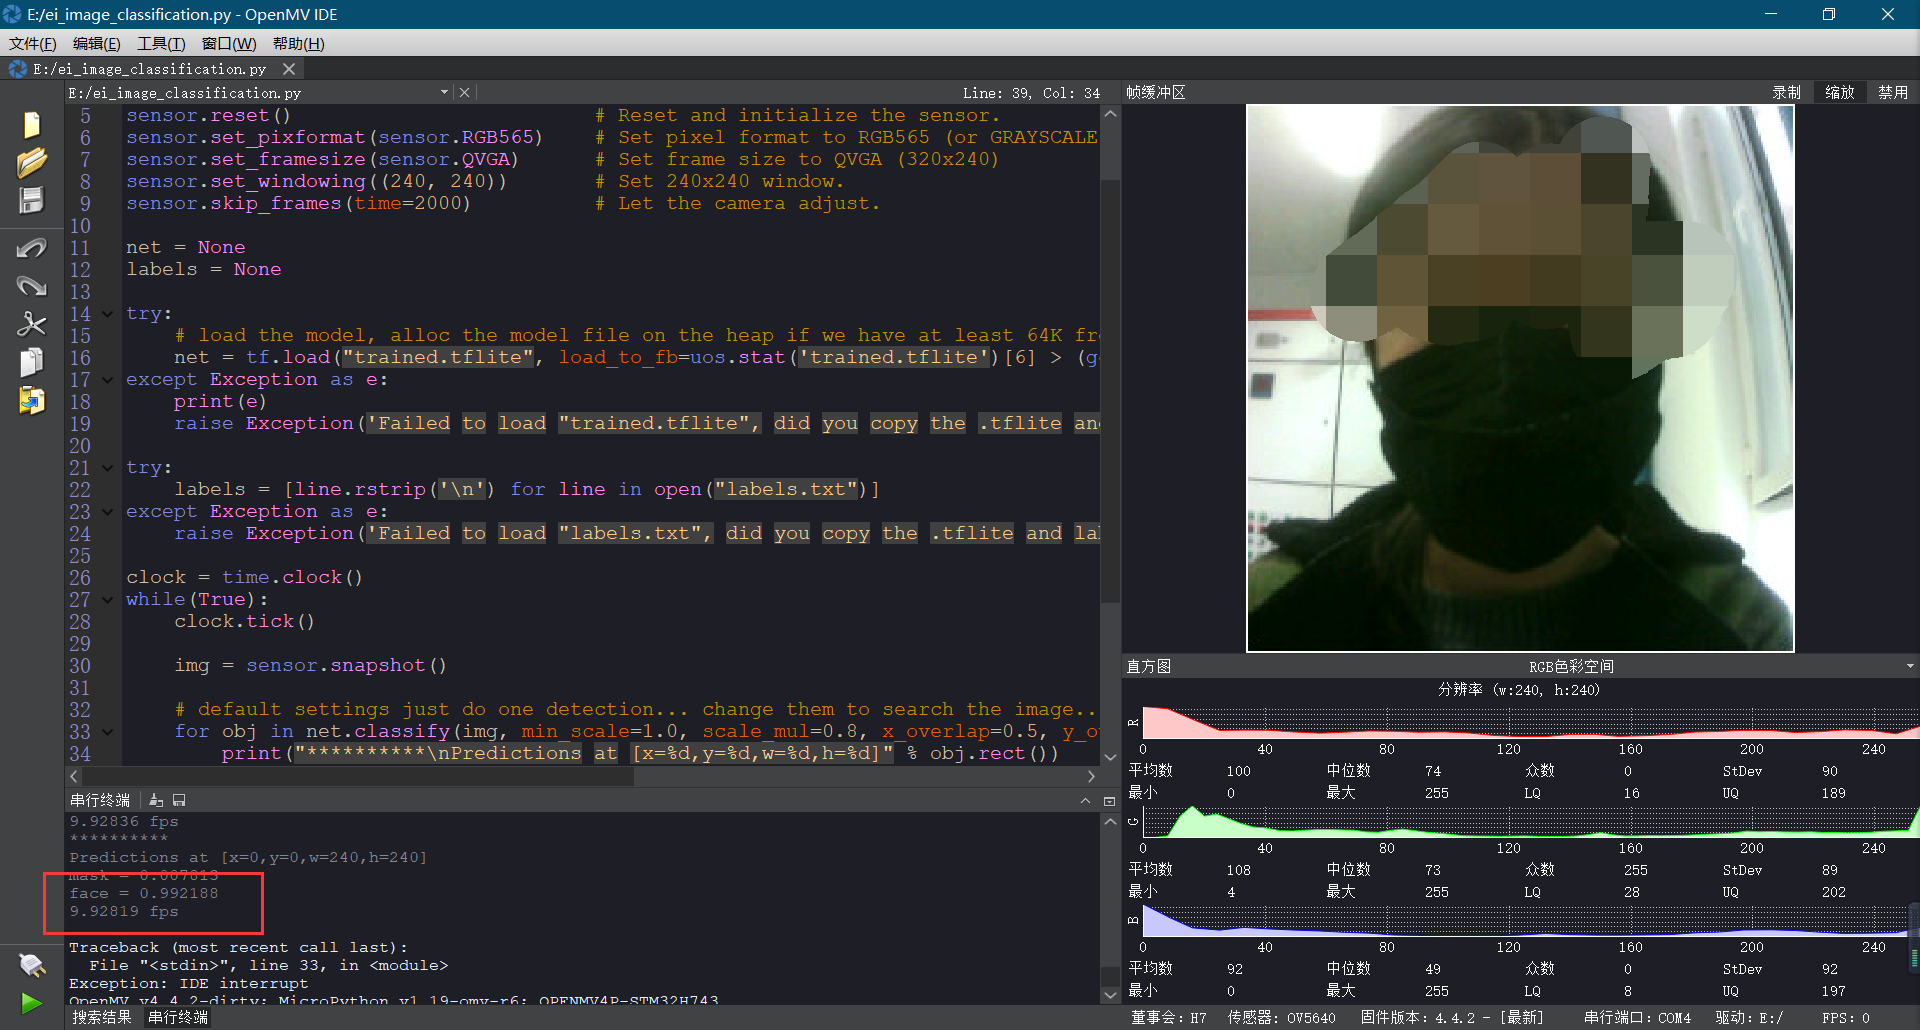
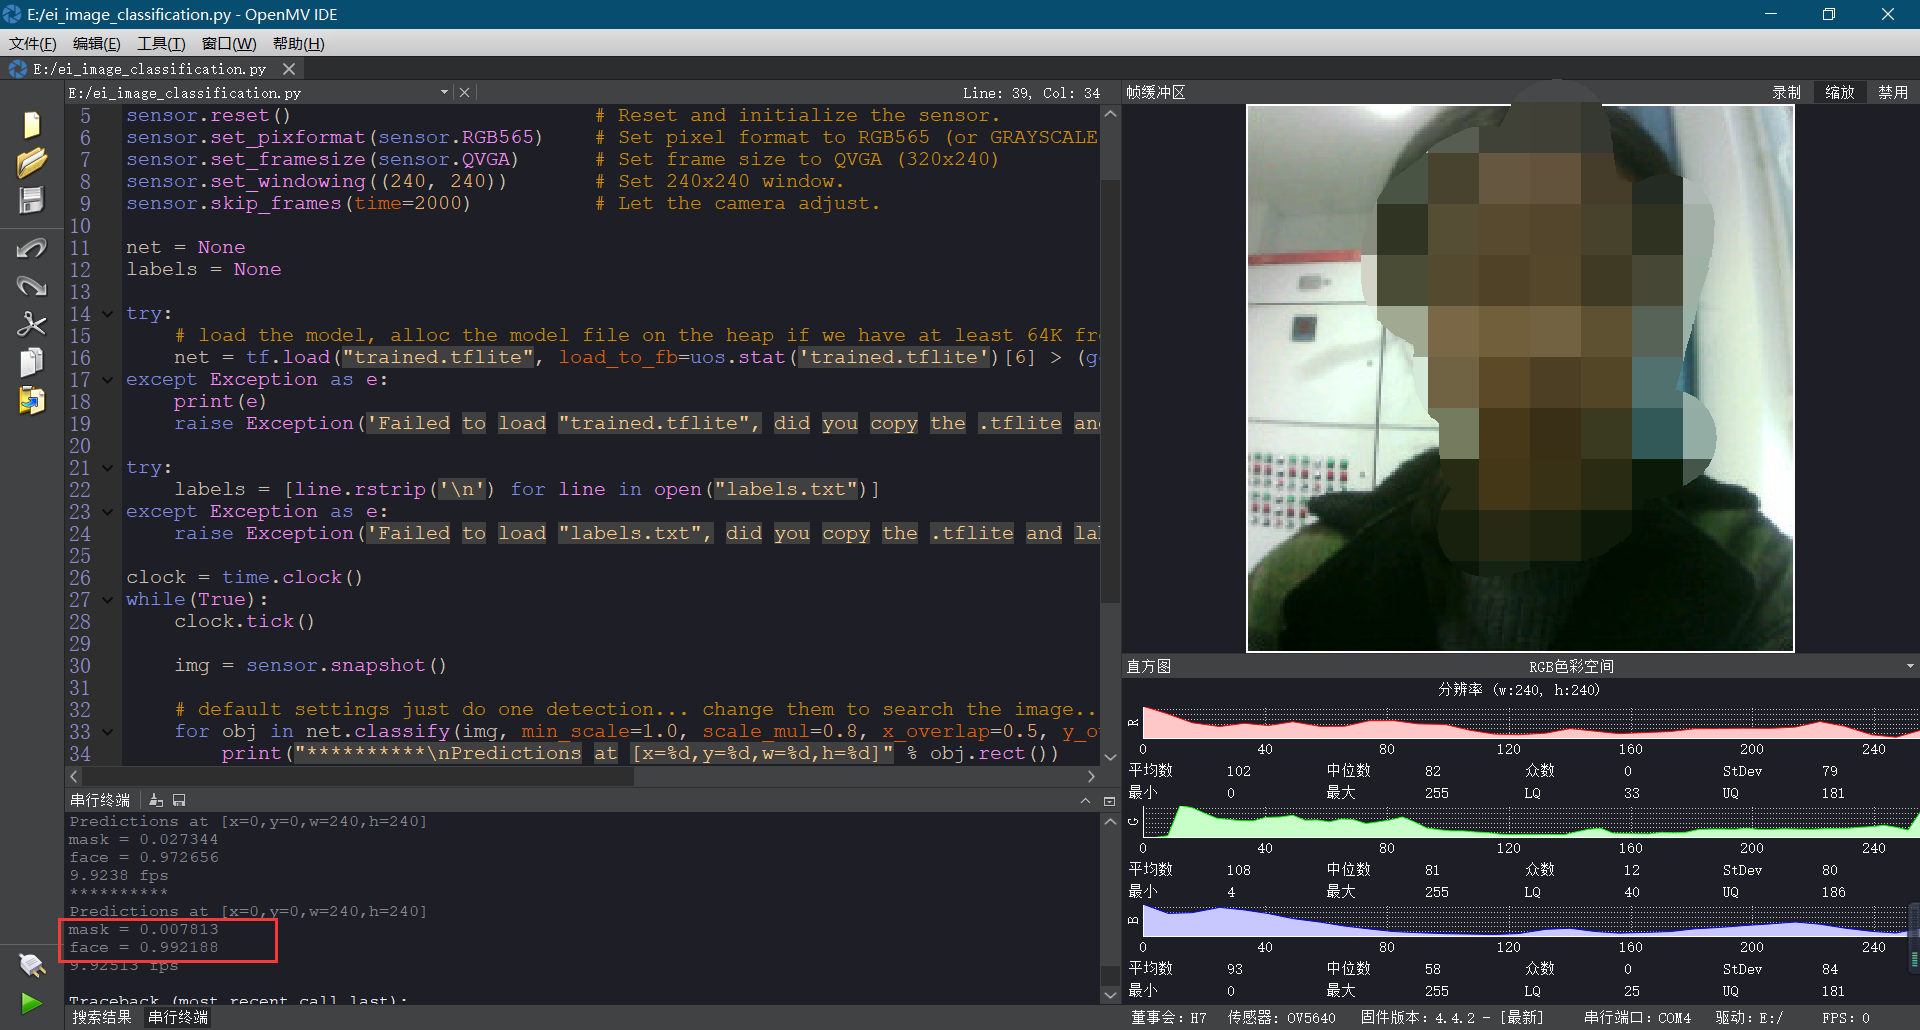
口罩识别模型训练后用edgeimpulse生成代码运行时口罩人脸识别偏差很大发布在 OpenMV Cam
进行口罩识别训练时Transfer learning和Model testing时都是百分之百没有差错但是运行代码进行口罩识别测试的时候会差很多请问下是什么原因

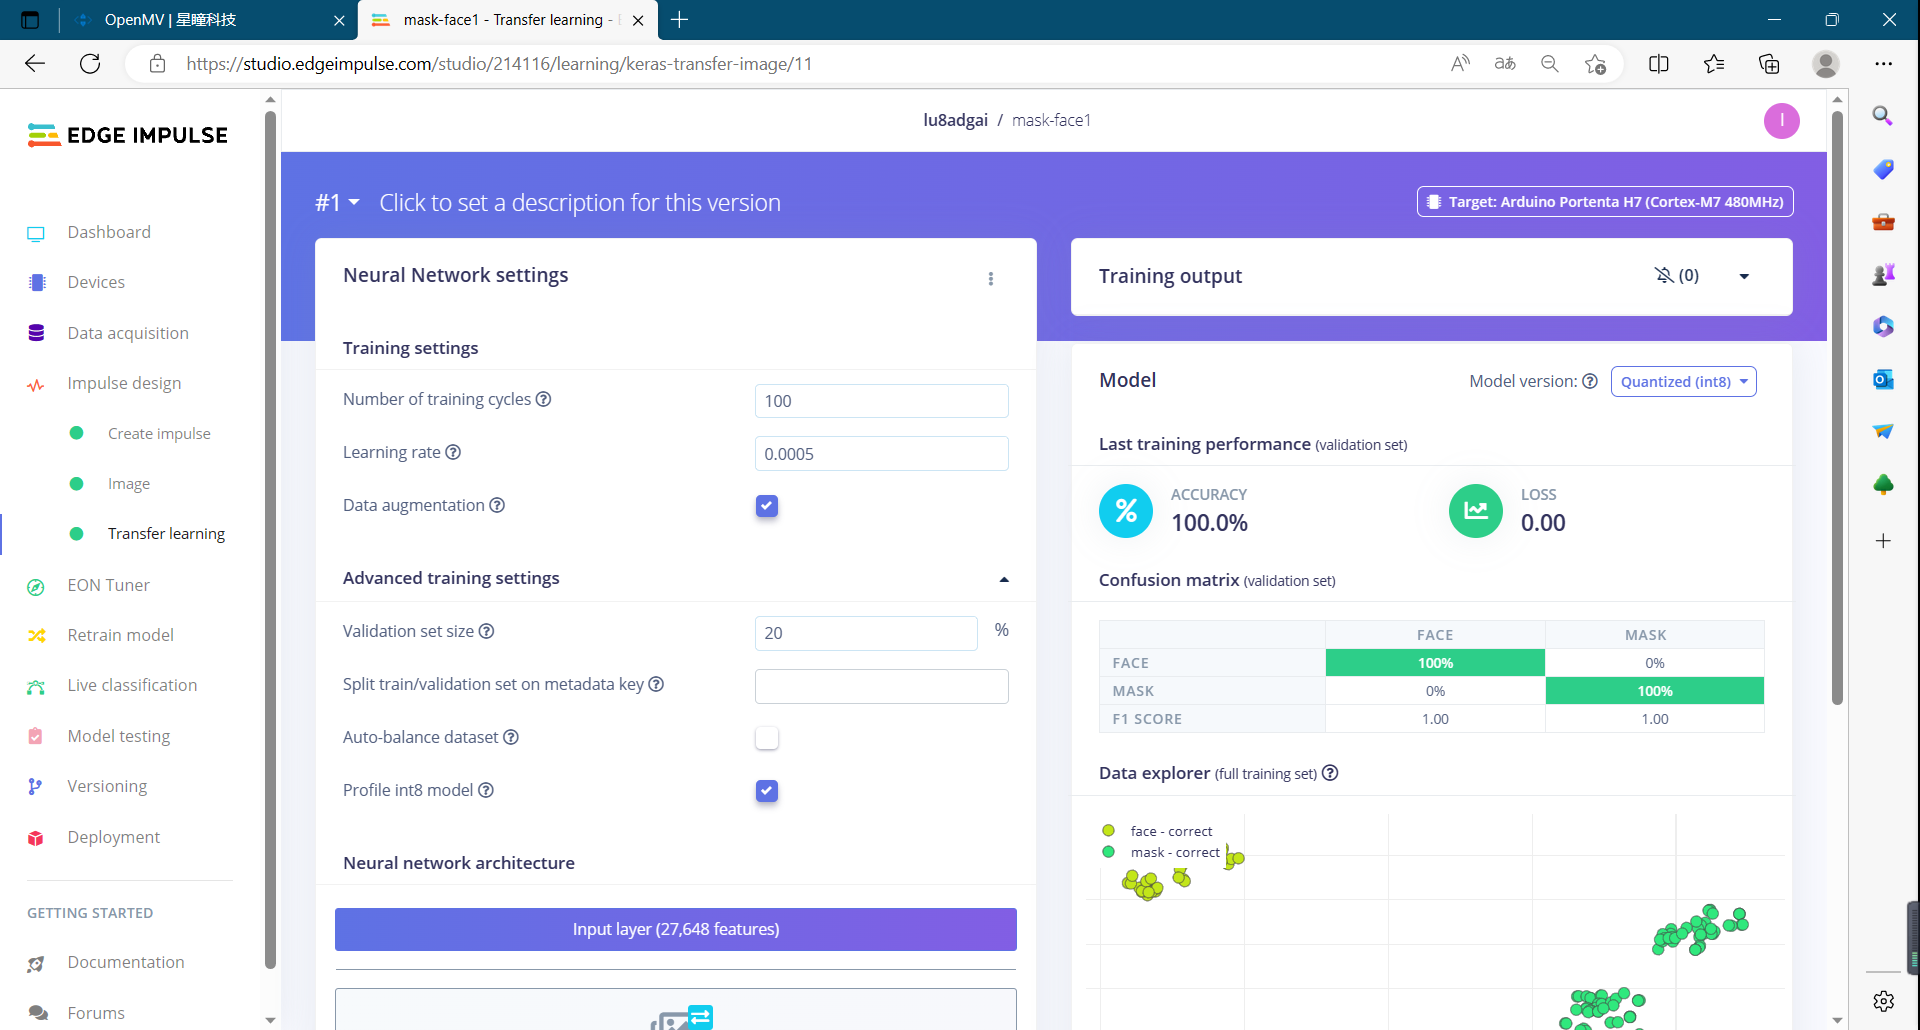
# Edge Impulse - OpenMV Image Classification Example import sensor, image, time, os, tf, uos, gc sensor.reset() # Reset and initialize the sensor. sensor.set_pixformat(sensor.RGB565) # Set pixel format to RGB565 (or GRAYSCALE) sensor.set_framesize(sensor.QVGA) # Set frame size to QVGA (320x240) sensor.set_windowing((240, 240)) # Set 240x240 window. sensor.skip_frames(time=2000) # Let the camera adjust. net = None labels = None try: # load the model, alloc the model file on the heap if we have at least 64K free after loading net = tf.load("trained.tflite", load_to_fb=uos.stat('trained.tflite')[6] > (gc.mem_free() - (64*1024))) except Exception as e: print(e) raise Exception('Failed to load "trained.tflite", did you copy the .tflite and labels.txt file onto the mass-storage device? (' + str(e) + ')') try: labels = [line.rstrip('\n') for line in open("labels.txt")] except Exception as e: raise Exception('Failed to load "labels.txt", did you copy the .tflite and labels.txt file onto the mass-storage device? (' + str(e) + ')') clock = time.clock() while(True): clock.tick() img = sensor.snapshot() # default settings just do one detection... change them to search the image... for obj in net.classify(img, min_scale=1.0, scale_mul=0.8, x_overlap=0.5, y_overlap=0.5): print("**********\nPredictions at [x=%d,y=%d,w=%d,h=%d]" % obj.rect()) img.draw_rectangle(obj.rect()) # This combines the labels and confidence values into a list of tuples predictions_list = list(zip(labels, obj.output())) for i in range(len(predictions_list)): print("%s = %f" % (predictions_list[i][0], predictions_list[i][1])) print(clock.fps(), "fps") -
草料二维码生成,用openmv进行二维码识别发布在 星瞳AI视觉模组
用草料二维码生成新的二维码,然后运行太调试,二维码简单的可以扫描出来,二维码复杂的就扫描不出来了,想问下这是因为程序 需要改动的原因还是openmv摄像头的精度不够呀?
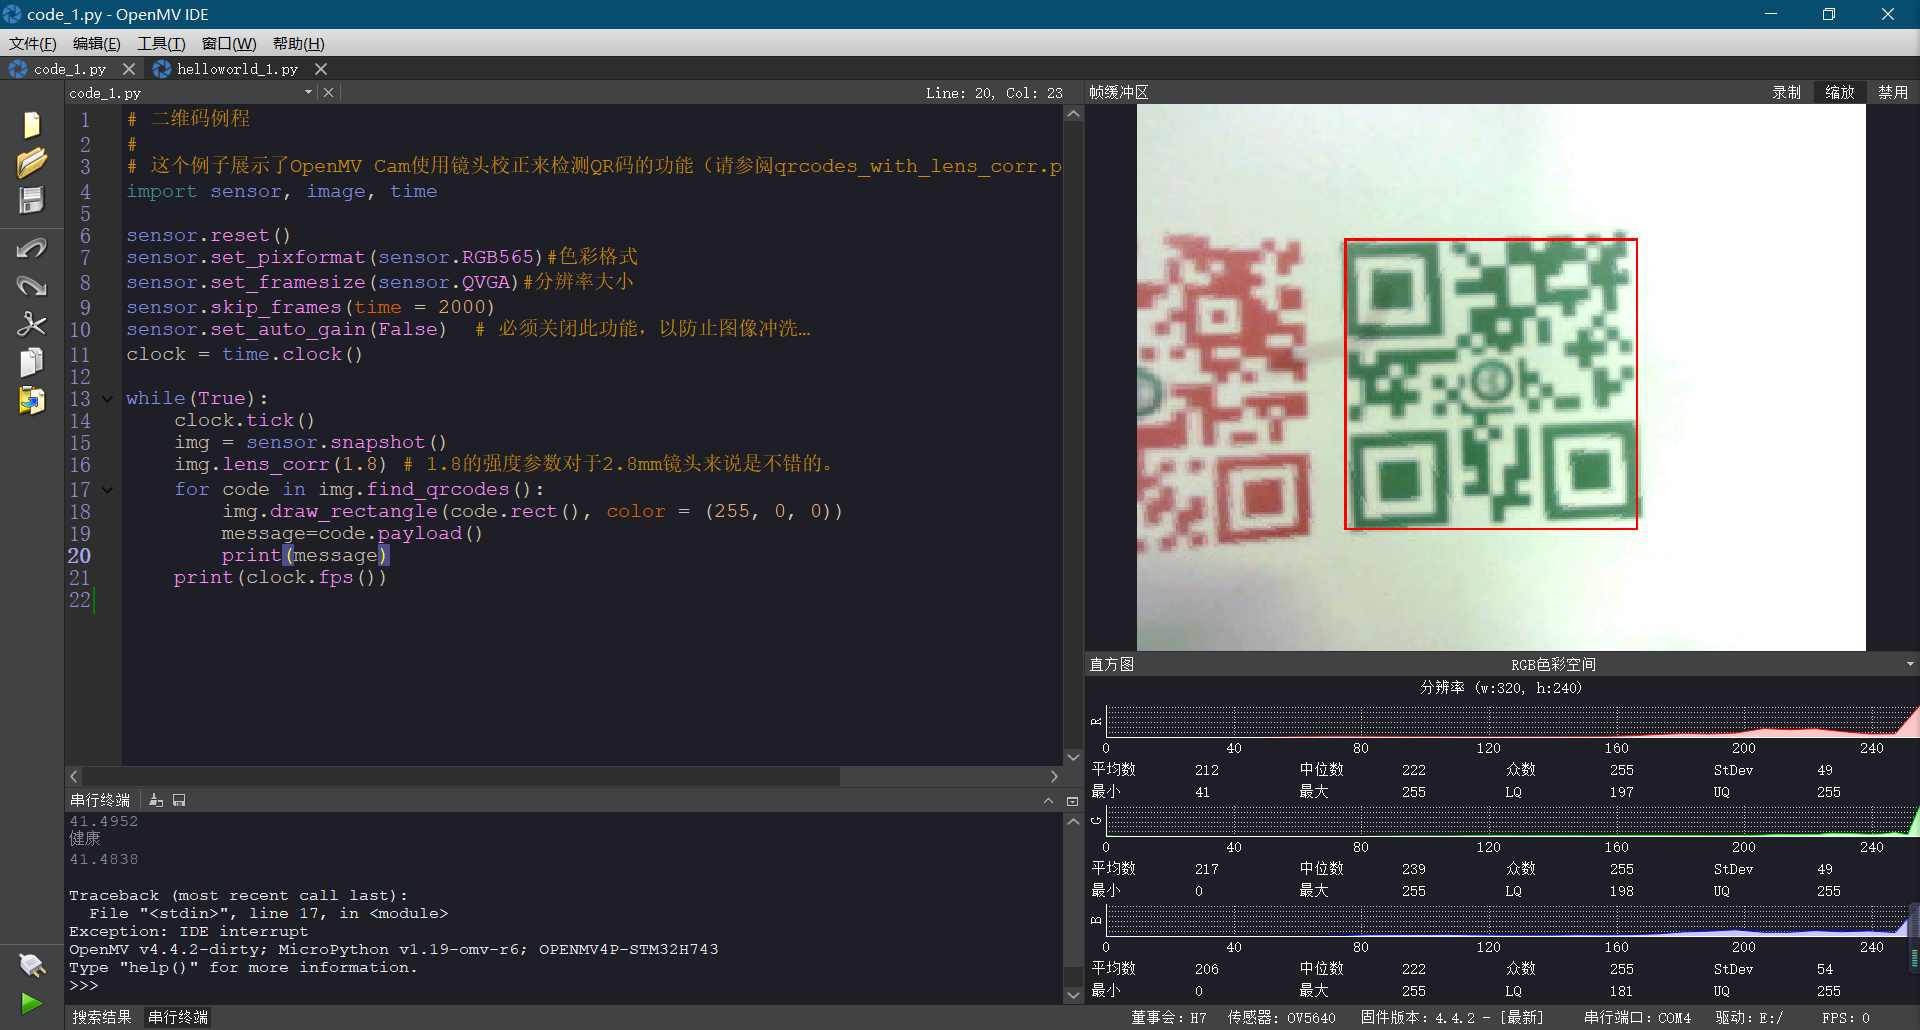

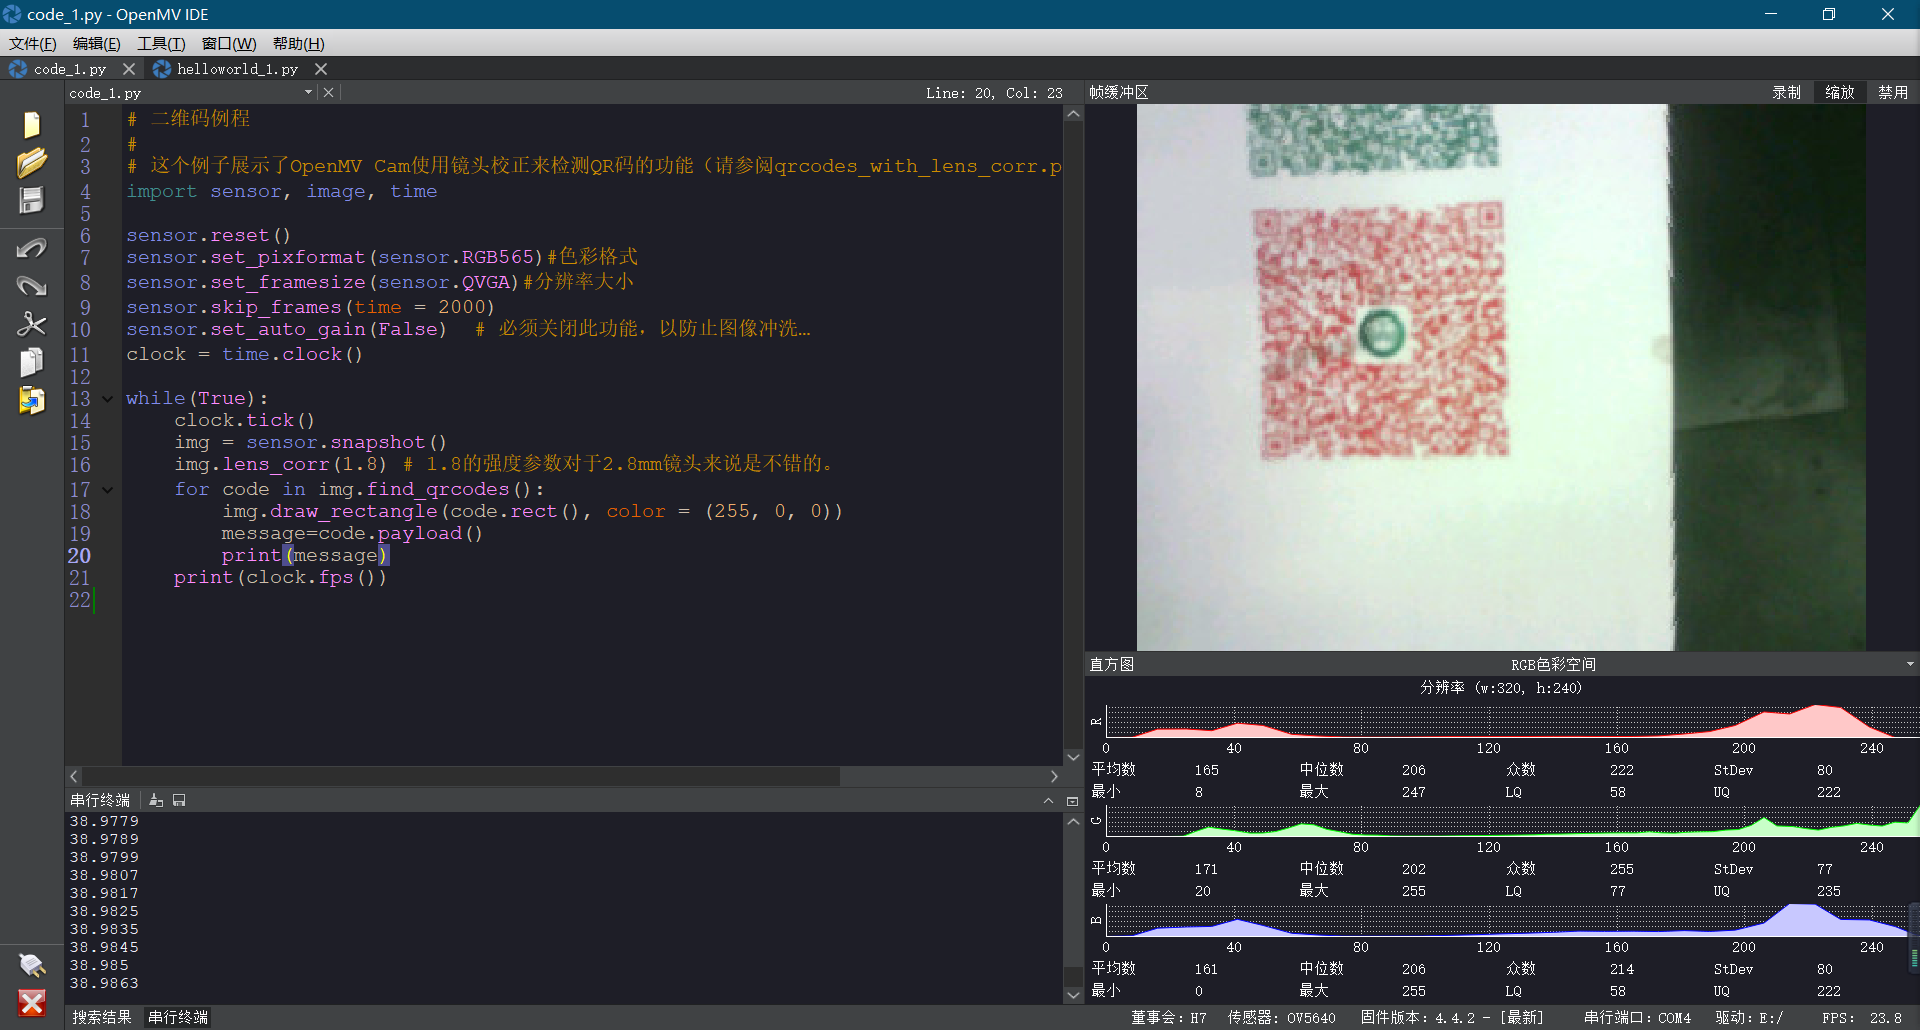
# 二维码例程
#
# 这个例子展示了OpenMV Cam使用镜头校正来检测QR码的功能(请参阅qrcodes_with_lens_corr.py脚本以获得更高的性能)。
import sensor, image, time

sensor.reset()
sensor.set_pixformat(sensor.RGB565)#色彩格式
sensor.set_framesize(sensor.QVGA)#分辨率大小
sensor.skip_frames(time = 2000)
sensor.set_auto_gain(False)  # 必须关闭此功能,以防止图像冲洗…
clock = time.clock()

while(True):
    clock.tick()
    img = sensor.snapshot()
    img.lens_corr(1.8) # 1.8的强度参数对于2.8mm镜头来说是不错的。
    for code in img.find_qrcodes():
        img.draw_rectangle(code.rect(), color = (255, 0, 0))
        message=code.payload()
        print(message)
    print(clock.fps())