你这个解决了吗 我也想加不会弄 能不能请教一下
5
5tvu
@5tvu
0
声望
11
楼层
3201
资料浏览
0
粉丝
1
关注
5tvu 发布的帖子
-
RE: 用LBP特征如何输出没有该人脸库,,而不是输出与人脸哭库差异最小的人脸编号。。。发布在 OpenMV Cam
我也在寻找这个问题的答案,请问你解决了吗?还是说这款OPENMV根本没有办法实现这个功能
-
人脸识别的应用问题?发布在 OpenMV Cam
请问这款的人脸识别可以实现只识别我添加了的人脸,并发出信号,不是我图库里面的人脸就不发出信号或者发出一个不开门的信号吗?而不是教程里面的检测图库里面的照片匹配出相似度最高那个。
就是如何实现面部解锁的功能呢? -
RE: openmv与STM32F407通信发布在 OpenMV Cam
@州山 你好,我现在也在做STM32和openMV的串口通信,请问两者之间是怎么连接的呢。我是这么连接的
RXD(10)—— TXD(P4)
TXD(9)------ RXD(P5)
GND --------- GND
3.3V -------- VIN
但是我一插上就只是闪了一下白光,就灭灯了,没有运行程序 -
RE: 人脸识别为什么无法使用?显示NameError: name '“frontalface”' is not defined发布在 OpenMV Cam
@kidswong999 引用的是例程7人脸识别的代码
复制例程里面的确实可以使用,但是我写出来的就会显示这个错误# 人脸识别例程 # # 这个例子展示了OpenMV Cam的内置人脸检测功能。 # # 人脸检测通过在图像上使用Haar Cascade特征检测器来工作。 haar级联是 # 一系列简单的区域对比检查。 对于内置的前表面探测器,有25个阶段的检查, # 每个阶段有数百个检查一块。 Haar Cascades运行速度很快,因为只有在 # 以前的阶段过去后才会评估后期阶段。 此外,您的OpenMV使用称为 # 整体图像的数据结构来在恒定时间内快速执行每个区域对比度检查 #(特征检测仅为灰度的原因是因为整体图像的空间需求)。 import sensor, time, image # Reset sensor sensor.reset() # Sensor settings sensor.set_contrast(1) sensor.set_gainceiling(16) # HQVGA and GRAYSCALE are the best for face tracking. sensor.set_framesize(sensor.HQVGA) sensor.set_pixformat(sensor.GRAYSCALE) #注意人脸识别只能用灰度图哦 # Load Haar Cascade # By default this will use all stages, lower satges is faster but less accurate. face_cascade = image.HaarCascade("frontalface", stages=25) #image.HaarCascade(path, stages=Auto)加载一个haar模型。haar模型是二进制文件, #这个模型如果是自定义的,则引号内为模型文件的路径;也可以使用内置的haar模型, #比如“frontalface” 人脸模型或者“eye”人眼模型。 #stages值未传入时使用默认的stages。stages值设置的小一些可以加速匹配,但会降低准确率。 print(face_cascade) # FPS clock clock = time.clock() while (True): clock.tick() # Capture snapshot img = sensor.snapshot() # Find objects. # Note: Lower scale factor scales-down the image more and detects smaller objects. # Higher threshold results in a higher detection rate, with more false positives. objects = img.find_features(face_cascade, threshold=0.75, scale=1.35) #image.find_features(cascade, threshold=0.5, scale=1.5),thresholds越大, #匹配速度越快,错误率也会上升。scale可以缩放被匹配特征的大小。 #在找到的目标上画框,标记出来 # Draw objects for r in objects: img.draw_rectangle(r) # Print FPS. # Note: Actual FPS is higher, streaming the FB makes it slower. print(clock.fps()) -
RE: 人脸识别为什么无法使用?显示NameError: name '“frontalface”' is not defined发布在 OpenMV Cam
我用的不是官方例程里面的代码,麻烦你认真看一下,我的问题是显示NameError: name '“frontalface”' is not defined
-
人脸识别为什么当我放一张风景照的时候也能跟录入的人脸库匹配上?程序就是用的官方例程,是精确度本身就这么低吗?发布在 OpenMV Cam
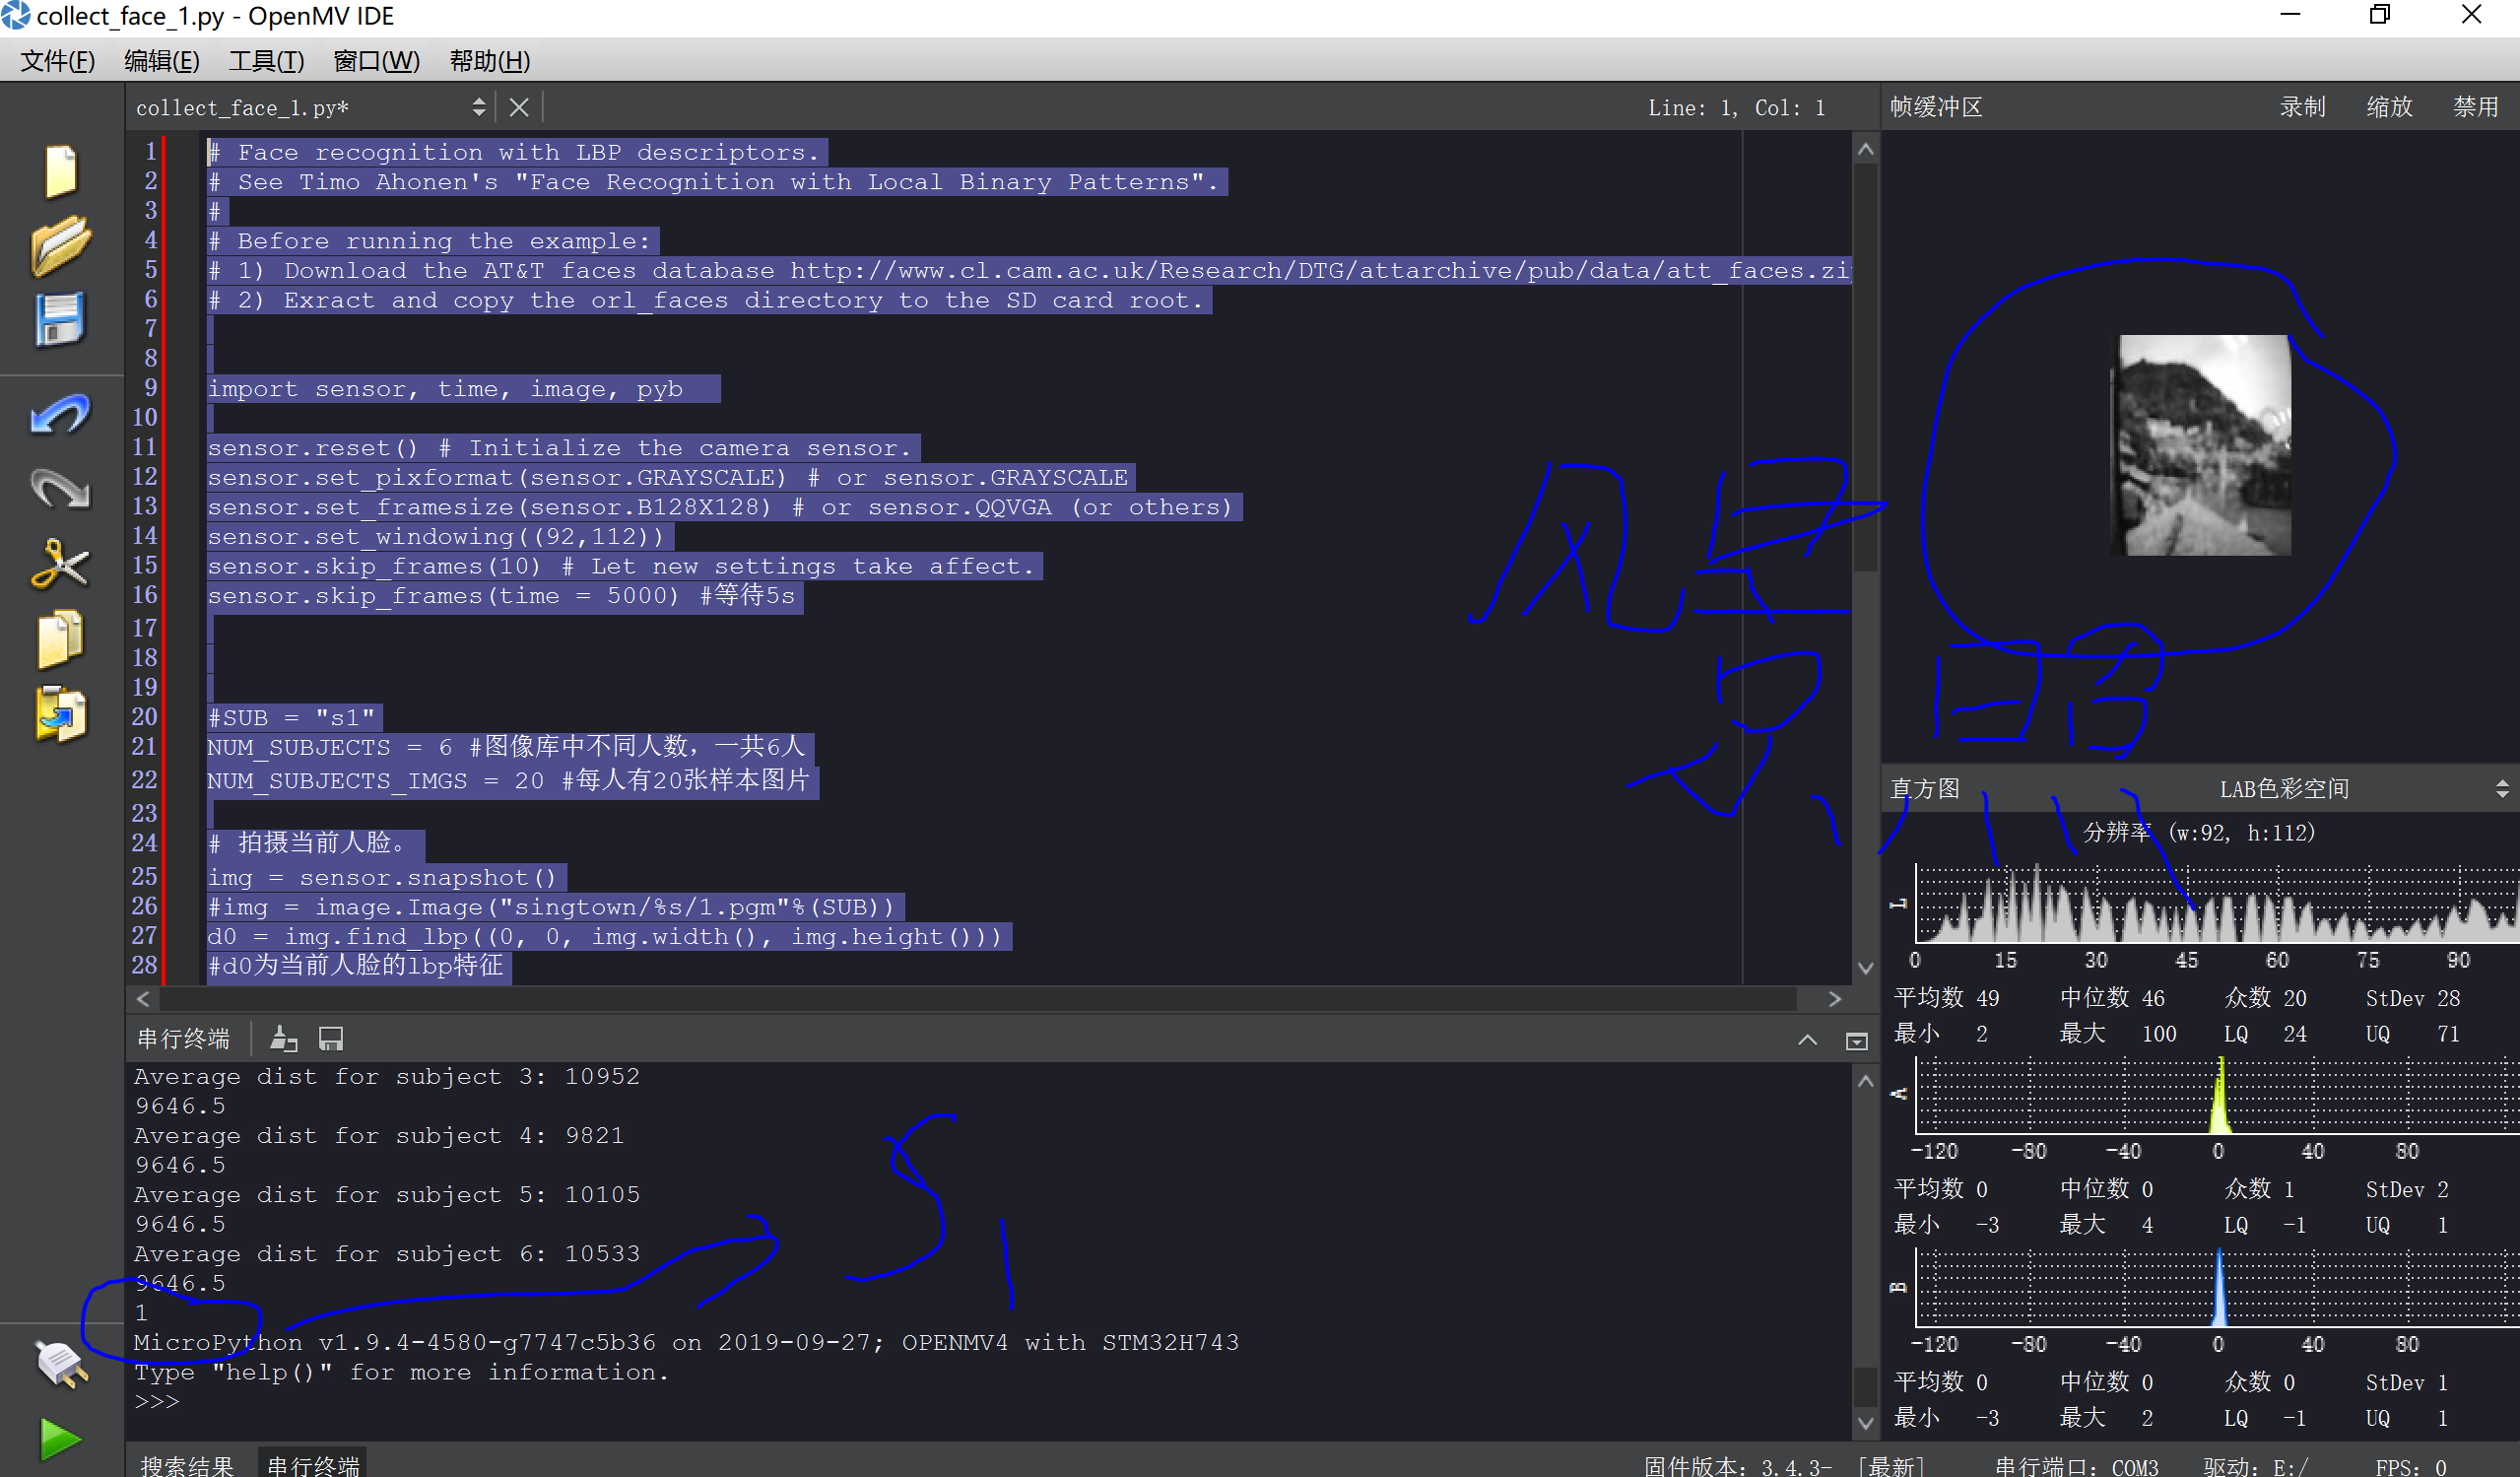
Face recognition with LBP descriptors.
See Timo Ahonen's "Face Recognition with Local Binary Patterns".
Before running the example:
1) Download the AT&T faces database http://www.cl.cam.ac.uk/Research/DTG/attarchive/pub/data/att_faces.zip
2) Exract and copy the orl_faces directory to the SD card root.
import sensor, time, image, pyb
sensor.reset() # Initialize the camera sensor.
sensor.set_pixformat(sensor.GRAYSCALE) # or sensor.GRAYSCALE
sensor.set_framesize(sensor.B128X128) # or sensor.QQVGA (or others)
sensor.set_windowing((92,112))
sensor.skip_frames(10) # Let new settings take affect.
sensor.skip_frames(time = 5000) #等待5s#SUB = "s1"
NUM_SUBJECTS = 6 #图像库中不同人数,一共6人
NUM_SUBJECTS_IMGS = 20 #每人有20张样本图片拍摄当前人脸。
img = sensor.snapshot()
#img = image.Image("singtown/%s/1.pgm"%(SUB))
d0 = img.find_lbp((0, 0, img.width(), img.height()))
#d0为当前人脸的lbp特征
img = None
pmin = 999999
num=0def min(pmin, a, s):
global num
if a<pmin:
    pmin=a
    num=s
return pmin
for s in range(1, NUM_SUBJECTS+1):
dist = 0
for i in range(2, NUM_SUBJECTS_IMGS+1):
img = image.Image("singtown/s%d/%d.pgm"%(s, i))
d1 = img.find_lbp((0, 0, img.width(), img.height()))
#d1为第s文件夹中的第i张图片的lbp特征
dist += image.match_descriptor(d0, d1)#计算d0 d1即样本图像与被检测人脸的特征差异度。
print("Average dist for subject %d: %d"%(s, dist/NUM_SUBJECTS_IMGS))
pmin = min(pmin, dist/NUM_SUBJECTS_IMGS, s)#特征差异度越小,被检测人脸与此样本更相似更匹配。
print(pmin)print(num) # num为当前最匹配的人的编号。
-
人脸识别为什么无法使用?显示NameError: name '“frontalface”' is not defined发布在 OpenMV Cam
import sensor, time, image, pyb
from pyb import UART
sensor.reset() # Initialize the camera sensor.
sensor.set_pixformat(sensor.GRAYSCALE) # or sensor.GRAYSCALE
sensor.set_framesize(sensor.B128X128) # or sensor.QQVGA (or others)
sensor.set_windowing((92,112))
sensor.skip_frames(10) # Let new settings take affect.
sensor.skip_frames(time = 5000) #等待5suart = UART(3,9600)
face_cascade = image.HaarCascade(“frontalface”, stages=25)
#红灯亮
pyb.LED(1).on()# Red LED = 1, Green LED = 2, Blue LED = 3, IR LEDs = 4.
NUM_SUBJECTS = 6 #图像库中不同人数,一共6人
NUM_SUBJECTS_IMGS = 20 #每人有20张样本图片
flag=Truewhile(flag):
拍摄当前人脸。
img = sensor.snapshot()
objects = img.find_features(face_cascade, threshold=0.75, scale_factor=1.25)
if objects:
#红灯灭
pyb.LED(1).off()# Red LED = 1, Green LED = 2, Blue LED = 3, IR LEDs = 4.
#绿灯亮
pyb.LED(2).on()# Red LED = 1, Green LED = 2, Blue LED = 3, IR LEDs = 4.
for r in objects:
img.draw_rectangle(r)
ROIimg=img.copy(r)
flag=False#img = image.Image(“singtown/%s/1.pgm”%(SUB))
d0 = ROIimg.find_lbp((0, 0, img.width(), img.height()))
#d0为当前人脸的lbp特征
img = None
pmin = 999999
num=0def min(pmin, a, s):
global num if a<pmin: pmin=a num=s return pminfor s in range(1, NUM_SUBJECTS+1): # s=1
dist = 0
for i in range(1, NUM_SUBJECTS_IMGS+1):
    img = image.Image("data/s%d/%d.pgm"%(s, i)) #.pgm or "example.bmp" (or others)
    d1 = img.find_lbp((0, 0, img.width(), img.height()))
    #d1为第s文件夹中的第i张图片的lbp特征
    dist += image.match_descriptor(d0, d1)#计算d0 d1即样本图像与被检测人脸的特征差异度。
print("Average dist for subject %d: %d"%(s, dist/NUM_SUBJECTS_IMGS))
pmin = min(pmin, dist/NUM_SUBJECTS_IMGS, s)#特征差异度越小,被检测人脸与此样本更相似更匹配。
if pmin<50000:
   message = "liujuan"
   uart.write(message)
   #绿灯灭
   pyb.LED(2).off()# Red LED = 1, Green LED = 2, Blue LED = 3, IR LEDs = 4.
   #蓝灯亮
   pyb.LED(3).on()# Red LED = 1, Green LED = 2, Blue LED = 3, IR LEDs = 4.
   print(message)
   print(pmin)

print(num) # num为当前最匹配的人的编号。