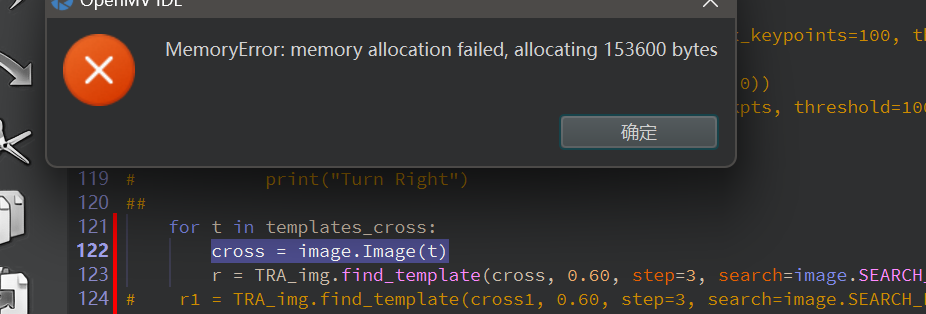
memory allocation failed, allocating 153600 bytes
-
我加载多个模板就会报错,这个要怎么解决,
#导入函数库1
#import lcd
import sensor, image, time, math
from pyb import UART
#开启时钟
clock = time.clock()# 跟踪FPS帧率
uart = UART(3, 19200)
#变量初始化
#阈值设置 根据实际情况进行更改
TRA_TH= [(160, 255)]           #巡线的灰度值 阈值[(0, 64)][(128, 255)]
TRA_AngTH=25                   #巡线时角度阈值
#ROI区域设置
#(x,y,w,h,weight)=(矩形左上顶点的坐标(x,y),矩形宽度和高度(w,h),权重)
TRA_ROIS = [ # [ROI, weight]
        (40, 200, 240, 60, 0.7), # You'll need to tweak the weights for your app
        (40, 100, 240, 60, 0.3), # depending on how your robot is setup.
        (40,   0, 240, 60, 0.1)
       ]
Weight_Sum = 0                        #权值和初始化
for r in TRA_ROIS: Weight_Sum += r[4] #计算权值和
#OBS_ROI = [(30 , 10, 100, 100)] #避障模式ROI区域
#通信数据包封装
Run     = bytearray([0xB5,
0x05, 0x00, 0x00, 0x00, 0x00, 0x00, 0x00,
0x00, 0x00, 0x00, 0x00, 0x00, 0x00, 0x00,
0xDA])# $OMV1&#  直行
Left    = bytearray([0xB5,
0x03, 0x00, 0x00, 0x00, 0x00, 0x00, 0x00,
0x00, 0x00, 0x00, 0x00, 0x00, 0x00, 0x00,
0xDA])# $OMV2&#  左转
LLeft    = bytearray([0xB5,
0x04, 0x00, 0x00, 0x00, 0x00, 0x00, 0x00,
0x00, 0x00, 0x00, 0x00, 0x00, 0x00, 0x00,
0xDA])# $OMV2&#  左转
Right   = bytearray([0xB5,
0x01, 0x00, 0x00, 0x00, 0x00, 0x00, 0x00,
0x00, 0x00, 0x00, 0x00, 0x00, 0x00, 0x00,
0xDA])# $OMV3&#  右转
RRight   = bytearray([0xB5,
0x02, 0x00, 0x00, 0x00, 0x00, 0x00, 0x00,
0x00, 0x00, 0x00, 0x00, 0x00, 0x00, 0x00,
0xDA])# $OMV3&#  右转
Stop    = bytearray([0xB5,
0x00, 0x00, 0x00, 0x00, 0x00, 0x00, 0x00,
0x00, 0x00, 0x00, 0x00, 0x00, 0x00, 0x00,
0xDA])# $OMV4&#  停止
Turn_Right    = bytearray([0xB5,
0x06, 0x00, 0x00, 0x00, 0x00, 0x00, 0x00,
0x00, 0x00, 0x00, 0x00, 0x00, 0x00, 0x00,
0xDA])
Turn_Left    = bytearray([0xB5,
0x07, 0x00, 0x00, 0x00, 0x00, 0x00, 0x00,
0x00, 0x00, 0x00, 0x00, 0x00, 0x00, 0x00,
0xDA])
#Fun1:获得最大色块的位置索引函数
#输入:N个色块(blobs) 输出:N个色块中最大色块的索引(int i)
def Get_MaxIndex(blobs):
    maxb_index=0                      #最大色块索引初始化
    max_pixels=0                      #最大像素值初始化
    for i in range(len(blobs)):       #对N个色块进行N次遍历
        if blobs[i].pixels() > max_pixels:#当某个色块像素大于最大值
            max_pixels = blobs[i].pixels()#更新最大像素
            maxb_index = i                #更新最大索引
            return  maxb_index

def Recive_data():
    global OVSys_State
    if uart.any():                  #如果串口接收到数据
        OVSys_State=int(uart.read())  #将读到的数据强制转换为整数
        if(OVSys_State[0]==0x4C) and (OVSys_State[15]==0xDA):
            print(OVSys_State)            #用于串口通信调试

def Send_data(Send_data):
    global OVSys_State
    OVSys_State = Send_data
    uart.write(OVSys_State)

##TFT-LCD初始化
#lcd.init()                #lcd函数初始化
#lcd.set_direction(1)      #设置LCD显示方向 0和2是竖屏 1和3是横屏
#摄像头初始化
sensor.reset()                     #初始化相机传感器
sensor.set_pixformat(sensor.RGB565)#设置相机模块的像素模式 16 bits/像素 GRAY为8
sensor.set_framesize(sensor.QVGA) #设置相机模块的帧大小 320x240
sensor.skip_frames(30)             #跳过30帧 让相机图像在改变相机设置后稳定下来
sensor.set_auto_gain(False)        #关闭自动增益
sensor.set_auto_whitebal(False)     #关闭默认的白平衡

cross_roi = ([40,40,240,160])
templates_cross = ["/cross0.jpg", "/cross1.jpg", "/cross3.jpg","/cross5.jpg"]
#cross = ("/cross.bmp")
#cross0 = image.Image("/cross0.jpg")
#cross1 = image.Image("/cross1.jpg")
#cross2 = image.Image("/cross3.jpg")
#cross3 = image.Image("/cross5.jpg")
##cross_copy = cross.copy(cross_roi)
#cross_copy.binary([0, 15])
#cross_kpts = cross.find_keypoints(roi=cross_roi, max_keypoints=100, threshold=8, scale_factor=1.0)


#主函数
while (1):
    clock.tick()
    sensor.set_pixformat(sensor.GRAYSCALE)#设置摄像头为灰度图
    TRA_img = sensor.snapshot().histeq()#截一帧图像 加强对比度好分割
    TRA_img.mean(1)
    TRA_img.binary([(0,55)])
    #在LCD上打印帧率和OpenMV工作模式
    TRA_img.draw_string(0, 120,"OpenMv\rMode:\rTracking\rMode")
    TRA_img.draw_string(0, 200, "FPS:\r%.2f"%(clock.fps()))
#    TRA_img.draw_rectangle(cross_roi)

#    img_kpts = TRA_img.find_keypoints(roi=cross_roi, max_keypoints=100, threshold=8, normalized=True)
#    if(img_kpts):
##        TRA_img.draw_keypoints(img_kpts,color=(255, 0, 0))
#        match = image.match_descriptor(cross_kpts, img_kpts, threshold=100)
#        if (match.count()>4):
#            Send_data(Turn_Right)
#            print("Turn Right")
##
    for t in templates_cross:
        cross = image.Image(t)
        r = TRA_img.find_template(cross, 0.60, step=3, search=image.SEARCH_EX)
#    r1 = TRA_img.find_template(cross1, 0.60, step=3, search=image.SEARCH_EX)
#    r2 = TRA_img.find_template(cross2, 0.60, step=3, search=image.SEARCH_EX)
#    r3 = TRA_img.find_template(cross3, 0.60, step=3, search=image.SEARCH_EX)
        if r:
            TRA_img.draw_rectangle(r, color=(255, 0, 0))
            Send_data(Turn_Right)
            print("Turn Right")

    #偏移角度计算
    Centroid_Sum = 0    #初始化质心和
    for r in TRA_ROIS:  #是ROI的元组
        #找到视野中ROI区域的色块,merge=true,将找到的图像区域合并
        blobs = TRA_img.find_blobs(TRA_TH, roi=r[0:4], pixels_threshold=100, area_threshold=150,merge=True)
        if blobs:#如果找到了多个色块 计算质心和
            maxb_index = Get_MaxIndex(blobs)#找到多个色块中的最大色块返回索引值
            #返回最大色块外框元组(x,y,w,h) 绘制线宽为2的矩形框 不填充矩形
            TRA_img.draw_rectangle(blobs[maxb_index].rect(), thickness = 2, fill = False)
            #最大色块的中心位置标记十字
            TRA_img.draw_cross(blobs[maxb_index].cx(),blobs[maxb_index].cy())
            #计算质心和=(ROI中最大颜色块的中心点横坐标)cx*(ROI权值)w
            Centroid_Sum += blobs[maxb_index].cx() * r[4]

    #中间公式 确定线心位置=质心和/权值和
    Center_Pos = (Centroid_Sum / Weight_Sum)
    Center_Error = Center_Pos - TRA_img.width()//2
    Deflection_Angle = 0#需要将线心Center_Pos转换为偏角 偏角初始化为0
    Deflection_Angle = -math.atan((Center_Pos-160)/60)#计算偏角 限制输出为正负53.13°
    Deflection_Angle = math.degrees(Deflection_Angle)#弧度值转换为角度
    #当偏角大于偏角阈值 且小于最大偏角 和STM32通信 小车左转
    Angle_err=Deflection_Angle
    if abs(Deflection_Angle) > 45:
        if Deflection_Angle>0:
            Send_data(RRight)
            print("RRight")
        if Deflection_Angle<0:
            Send_data(LLeft)
            print("LLeft")
    elif abs(Deflection_Angle) > TRA_AngTH:
        if Deflection_Angle>0:
                Send_data(Right)#和STM32通信 小车左转
        #time.sleep(10)
                TRA_img.draw_string(0,0,"Car:\rRight")#LCD显示小车运动状态
                print("Right")#用于程序终端调试
                print("Turn Angle: %f" % Deflection_Angle)
    #当偏角小于负的偏角阈值 且大于最小偏角
        if Deflection_Angle < 0:
                Send_data(Left)#和STM32通信 小车右转
        #time.sleep(10)
                TRA_img.draw_string(0,0,"Car:\rLeft")#LCD显示小车运动状态
                print("Left")#用于程序终端调试
                print("Turn Angle: %f" % Deflection_Angle)
    #当小车角度绝对值小于阈值
    if abs(Deflection_Angle) <= TRA_AngTH:
                Send_data(Run)#和STM32通信 小车直行
                TRA_img.draw_string(0,0,"Car:\rRun")#LCD显示小车运动状态
                print("Run")#用于程序终端调试
                print("Turn Angle: %f" % Deflection_Angle)
#            lcd.display(TRA_img)#在LCD上显示img图像
请在这里粘贴代码
    if(Center_Error>50):
        Send_data(Left)
    if(Center_Error<-50):
        Send_data(Right)
    if(-50<Center_Error<50):
        Send_data(Run)
-
模板太大了。你的模板需要153KB。正常只能用10KB左右的模板。
-
这个模版是说一个图片的大小还是所有图片的大小
-
@gdfv 单个模板的大小
-
@kidswong999 我单个模板烧的进去,同样分辨率的多个图片就会有问题