openmv无法储存采集的图片,每次采集时IDE就会卡住然后弹出U盘界面
-
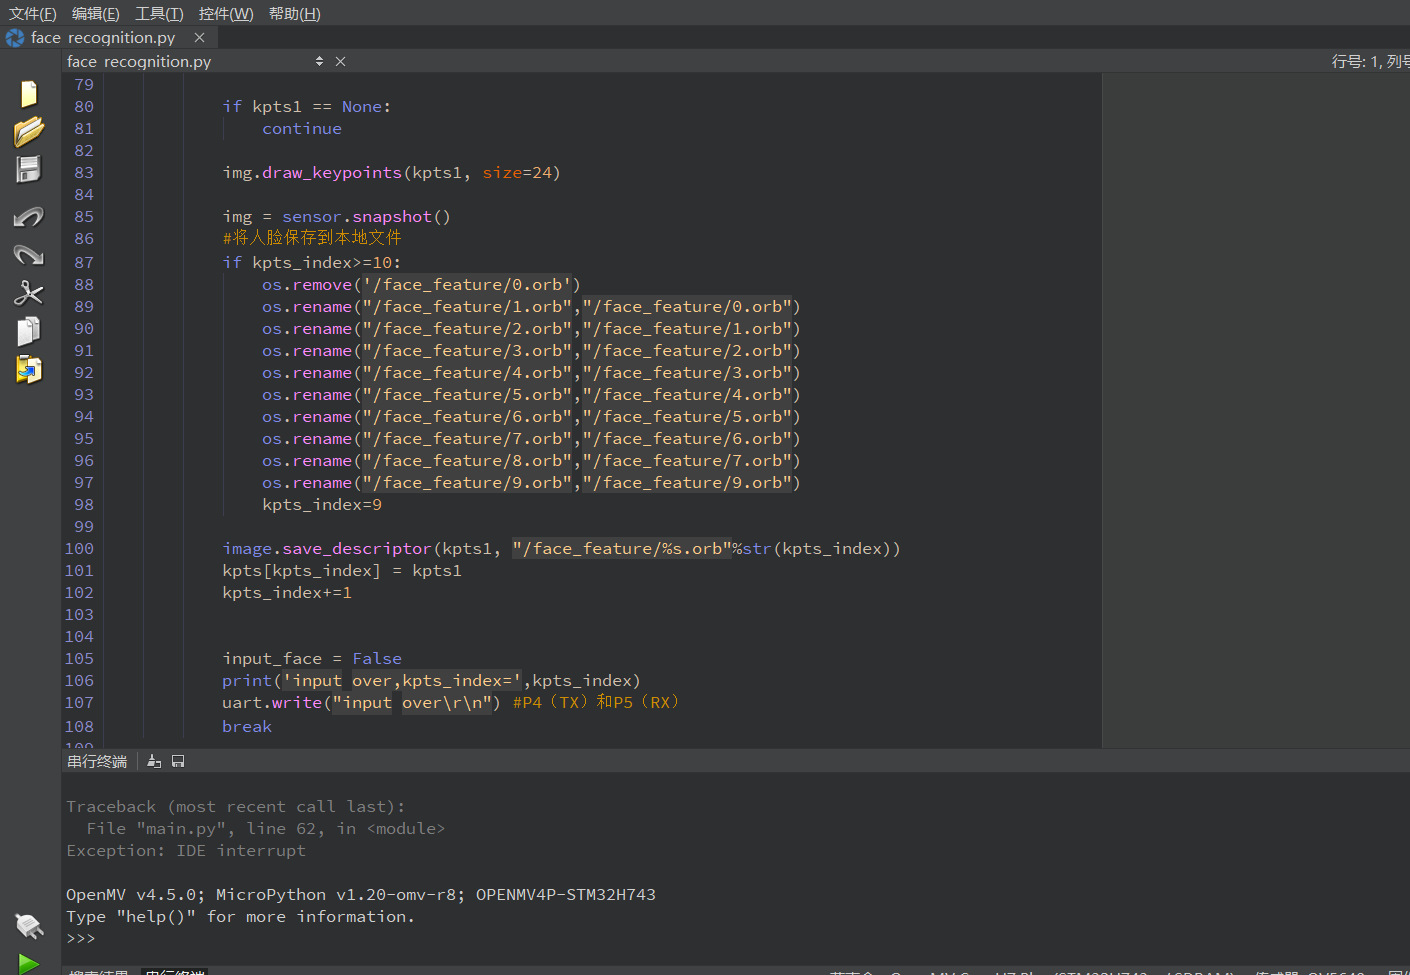
串口终端显示:{"width":24, "height":24, "n_stages":25, "n_features":2913, "n_rectangles":6383}
ktp cnt=0
input faceTraceback (most recent call last):
File "main.py", line 62, in
Exception: IDE interruptOpenMV v4.5.0; MicroPython v1.20-omv-r8; OPENMV4P-STM32H743
Type "help()" for more information.""" 人脸识别例程 第一步先使用Haar Cascade找出人脸并记录该关键点 第二步就是不停的检测当前获取图片的关键点是否匹配 """ # 导入相应的库 import sensor, image, time,os import pyb uart = pyb.UART(3, 115200, timeout_char = 1000) # 初始化摄像头 sensor.reset() # 设置相机图像的对比度为3 sensor.set_contrast(3) # 设置相机的增益上限为16 sensor.set_gainceiling(16) # 设置采集到照片的大小 sensor.set_framesize(sensor.VGA) # 在VGA(640*480)下开个小窗口,相当于数码缩放 sensor.set_windowing((320, 240)) # 设置采集到照片的格式:灰色图像 sensor.set_pixformat(sensor.GRAYSCALE) # 加载Haar Cascade 模型 # 默认使用25个步骤,减少步骤会加快速度但会影响识别成功率 face_cascade = image.HaarCascade("frontalface", stage = 25) print(face_cascade) # 特征数组 kpts=[None,None,None,None,None,None,None,None,None,None] # 特征数组下标 kpts_index=0 # 录入人脸标志 input_face=False #加载本地保存的人脸特征文件 for i in range(0,9): try: kpt_temp=image.load_descriptor("/face_feature/%s.orb"%(str(kpts_index))) except: break kpts[kpts_index]=kpt_temp kpts_index+=1 print('ktp cnt=%d'%(kpts_index)) while True: #录入人脸,由单片机发送录入命令开启 while input_face: # 拍摄图片并返回img img = sensor.snapshot() img.draw_string(0, 0, "Looking for a face...") # 寻找人脸对象 # threshold和scale_factor两个参数控制着识别的速度和准确性 # threshold(0-1.0) 值越小检测速度越快,但误报率越高 # scale_factor(大于1.0)数值越大速度越快,匹配度越差 objects = img.find_features(face_cascade, threshold=1.0, scale_factor=0.9) if objects: # 将 ROI(x, y, w, h)往各个方向扩展31像素 face = (objects[0][0]-31, objects[0][1]-31, objects[0][2]+31*2, objects[0][3]+31*2) # 使用扩展后的ROI区域(人脸)学习关键点 kpts1 = img.find_keypoints(threshold = 10, scale_factor = 1.2, max_keypoints = 150, roi = face) if kpts1 == None: continue img.draw_keypoints(kpts1, size=24) img = sensor.snapshot() #将人脸保存到本地文件 if kpts_index>=10: os.remove('/face_feature/0.orb') os.rename("/face_feature/1.orb","/face_feature/0.orb") os.rename("/face_feature/2.orb","/face_feature/1.orb") os.rename("/face_feature/3.orb","/face_feature/2.orb") os.rename("/face_feature/4.orb","/face_feature/3.orb") os.rename("/face_feature/5.orb","/face_feature/4.orb") os.rename("/face_feature/6.orb","/face_feature/5.orb") os.rename("/face_feature/7.orb","/face_feature/6.orb") os.rename("/face_feature/8.orb","/face_feature/7.orb") os.rename("/face_feature/9.orb","/face_feature/9.orb") kpts_index=9 image.save_descriptor(kpts1, "/face_feature/%s.orb"%str(kpts_index)) kpts[kpts_index] = kpts1 kpts_index+=1 input_face = False print('input over,kpts_index=',kpts_index) uart.write("input over\r\n") #P4(TX)和P5(RX) break #识别人脸 img = sensor.snapshot() # 从图像中提取关键点 kpts2 = img.find_keypoints(threshold = 10, scale_factor = 1.1, max_keypoints = 100, normalized = True) if(kpts2): for i in range(0,kpts_index): kpts1 = kpts[i] # 跟kpts1匹配 c = image.match_descriptor(kpts1, kpts2, threshold = 85) # c[6]为match值,值越大表示匹配程度越高 match = c[6] if(match > 7): img.draw_rectangle(c[2:6]) img.draw_cross(c[0], c[1], color = (255,0,0), size = 10) uart.write("recognition success,id="+str(i)+"\r\n") #P4(TX)和P5(RX) print('recognition success') print("id="+str(i)+"\r\n") cmd = uart.readline() if cmd != None: cmd=cmd.decode() if cmd=='input face\r\n': print('input face') input_face = True cmd = None现在就是不知道该怎么办,无法储存图像,但是以前可以正常储存图像和正常进行人脸识别
-
你这个代码太长了我看不了。
你加print,看kpts2是什么,看input_face是什么,看objects 是什么。