不明白编译器的错误提示,请指点一下
-
1.单独运行各个模块没有提示语法错误,但编译main.py时提示我的R_G_B方法名字定义出错
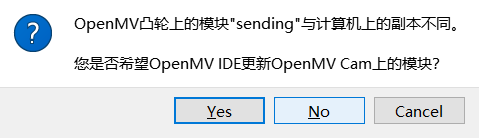
2.编译时编译器提示将我的sending模块更新,如果更了之后,又会变回以前错的那样(我编译时都选不更新才会照着新写得模块遍历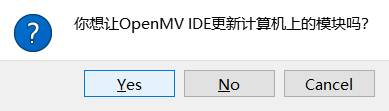
 )
)Measure.py # Untitled - By: 李俊健 - 周四 1月 24 2019 #按扫码数字顺序进行红绿蓝颜色识别 # Single Color RGB565 Blob Tracking Example # # This example shows off single color RGB565 tracking using the OpenMV Cam. import sensor,image,math,time import sending import r_g_b threshold_index = 0 # 0 for red, 1 for green, 2 for blue # Color Tracking Thresholds (L Min, L Max, A Min, A Max, B Min, B Max) # The below thresholds track in general red/green/blue things. You may wish to tune them... thresholds = [(30, 100, 15, 127, 15, 127), # generic_red_thresholds #只有红色 (30, 100, -64, -8, -32, 32), # generic_green_thresholds #只有绿色 (0, 30, 0, 64, -128, 0)] # generic_blue_thresholds #只有蓝色 #接收32的命令,1-找红色物料,2-找—绿色物料,3-找蓝色物料,并返回距离 #while (True): # View_Color() # Measure the distance # # This example shows off how to measure the distance through the size in imgage # This example in particular looks for yellow pingpong ball. # For color tracking to work really well you should ideally be in a very, very, # very, controlled enviroment where the lighting is constant... #yellow_threshold = ( 56, 83, 5, 57, 63, 80) # You may need to tweak the above settings for tracking green things... # Select an area in the Framebuffer to copy the color settings. sensor.reset() # Initialize the camera sensor. sensor.set_pixformat(sensor.RGB565) # use RGB565. sensor.set_framesize(sensor.QQVGA) # use QQVGA for speed. sensor.skip_frames(10) # Let new settings take affect. sensor.set_auto_whitebal(False) # turn this off. clock = time.clock() # Tracks FPS. m = sending.receive_data() K=500 #the value should be measured 需根据要识别物体来确定初始化比例大小 #实际大小=K*宽的像素 def measure_distance(m): clock.tick() # Track elapsed milliseconds between snapshots(). img = sensor.snapshot() # Take a picture and return the image. blobs = r_g_b.R_G_B(m) if len(blobs) == 1: # Draw a rect around the blob. b = blobs[0] img.draw_rectangle(b[0:4]) # rect img.draw_cross(b[5], b[6]) # cx, cy if abs(b[2]-b[3])>2: #判断是否为球、正方体或其他立方体 Lm = b[3] else: Lm = (b[2]+b[3])/2 length = K/Lm #距离 = k/直径的像素 return length #print(b[2]) #while True: # Measure_Distance() #print(clock.fps()) # Note: Your OpenMV Cam runs about half as fast while # connected to your computer. The FPS should increase once disconnected.main.py # Untitled - By: Lee - 周六 1月 26 2019 # 收开始命令 扫码 找色块 测距 发距离 import sensor, image, time from pyb import UART import json from sending import receive_data from sending import sending_data import Sao_Ma import Measure sensor.reset() sensor.set_pixformat(sensor.RGB565) sensor.set_framesize(sensor.QQVGA) sensor.skip_frames(time = 2000) clock = time.clock() uart = UART(3, 19200) while True: order = receive_data() if order == 1: #开始执行命令 fan_kui = Sao_Ma.ma() #扫码 uart.write('fan_kui') #反馈扫码的数字(整数) time.sleep(1000) N = receive_data() if N == 1: L = Measure.measure_distance(N) uart.write('L') #返回距离大小 elif N == 2: L = Measure.measure_distance(N) uart.write('L') if N == 3: L = Measure.measure_distance(N) uart.write('L') print(clock.fps())r_g_b.py # Untitled - By: 李俊健 - 周四 1月 24 2019 #按扫码数字顺序进行红绿蓝颜色识别 # Single Color RGB565 Blob Tracking Example # # This example shows off single color RGB565 tracking using the OpenMV Cam. import sensor, image, time threshold_index = 0 # 0 for red, 1 for green, 2 for blue # Color Tracking Thresholds (L Min, L Max, A Min, A Max, B Min, B Max) # The below thresholds track in general red/green/blue things. You may wish to tune them... thresholds = [(30, 100, 15, 127, 15, 127), # generic_red_thresholds (30, 100, -64, -8, -32, 32), # generic_green_thresholds (0, 30, 0, 64, -128, 0)] # generic_blue_thresholds sensor.reset() sensor.set_pixformat(sensor.RGB565) sensor.set_framesize(sensor.QVGA) sensor.skip_frames(time = 2000) sensor.set_auto_gain(False) # must be turned off for color tracking sensor.set_auto_whitebal(False) # must be turned off for color tracking clock = time.clock() # Only blobs that with more pixels than "pixel_threshold" and more area than "area_threshold" are # returned by "find_blobs" below. Change "pixels_threshold" and "area_threshold" if you change the # camera resolution. "merge=True" merges all overlapping blobs in the image. #分别给i赋值1,2,3 def R_G_B(j): #寻找最大色块的坐标 if j <= 3: max_size=0 clock.tick() img = sensor.snapshot() for blob in img.find_blobs([thresholds[j-1]], pixels_threshold=200, \ area_threshold=200, merge=True): #色块中心的坐标 if blob.pixels() > max_size: max_blob = blob max_size = blob.pixels() img.draw_rectangle(blob.rect()) img.draw_cross(blob.cx(), blob.cy()) print('sum :', len(blobs)) print(clock.fps()) return max_blob def R_G_B_center(k): m = R_G_B(j) x = blob.cx() y = blob.cy() return x,y #while True: # R_G_B(1)Sao_Ma.py
import sensor, image,timesensor.reset()
sensor.set_pixformat(sensor.RGB565)
sensor.set_framesize(sensor.QQVGA) # can be QVGA on M7...
sensor.skip_frames(30)
sensor.set_auto_gain(False) # must turn this off to prevent image washout...
clock = time.clock()def ma():
clock.tick()
img = sensor.snapshot()
img.lens_corr(1.8) # strength of 1.8 is good for the 2.8mm lens.
for code in img.find_qrcodes():
img.draw_rectangle(code.rect(),color = (0,0,0))
numbers = code.payload()
if code.payload() >= '0':
numbers = list(map(int, numbers))
number = numbers[0]*100+numbers[1]*10+numbers[2]
return nunmer
#print(number)
break#while (True):
print(ma())
sending.py
# Untitled - By: Lee - 周日 2月 3 2019

import time
from pyb import UART

uart = UART(3, 115200)
uart.init(115200, bits=8, parity=None, stop=1) # init with given parameters

def sending_data(jj):
    global uart
    j = jj
    uart.write('j')     #反馈字符串

def receive_data():
    global uart
    if uart.any():
        tmp_data = uart.readline()
        uart.write("RECIVED : %s\n"%tmp_data)
        print(tmp_data)
        return tmp_data
    else:
        return 1

#while(True):
#    sending_data(1)
#    receive_data()
#    time.sleep(1000)
-
可能你把旧的sending.py保存到了电脑的OpenMV项目目录里。
OpenMV的IDE会自动寻找,并检查是否与OpenMV电路板上的是否一致,如果不一致就会提醒你。所以你要在电脑上OpenMV项目目录,检查一下旧版的sending.py
-
@kidswong999 我是从自己新建的文件夹里打开.py文件的,我也试过把电路板和文件夹里的都替换掉,然后IDE还是会找回以前的sending.py文件
-
你看一下以前的sending.py保存到电脑的哪个文件里了。