请问怎么在帧缓冲区显示想要看的图像
-
我设了一个变量s=sensor.snapshot(),然后让a=s,但是发现a灰度化后,帧缓冲区显示的是灰度化的图像,等于说显示的是a的图像。但是a不是在堆区存放吗?
 # Hello World Example
#
# Welcome to the OpenMV IDE! Click on the green run arrow button below to run the script!

import sensor, image, time, pyb

sensor.reset()
sensor.set_pixformat(sensor.RGB565)
sensor.set_framesize(sensor.QVGA)#160X120
sensor.skip_frames(time=100)
clock=time.clock()

while(True):
    time_start = pyb.millis()

    scr_shot=sensor.snapshot()
    #scr_shot.lens_corr(1.8)
    a=scr_shot
    a.to_grayscale()

    duration = pyb.elapsed_millis(time_start)
    print(duration)
不知道怎么才能让想要显示的图像显示在帧缓冲区,求教!!!
另外,这是另一个错误,麻烦帮忙解释一下
-
这是第二个代码,刚刚忘了贴
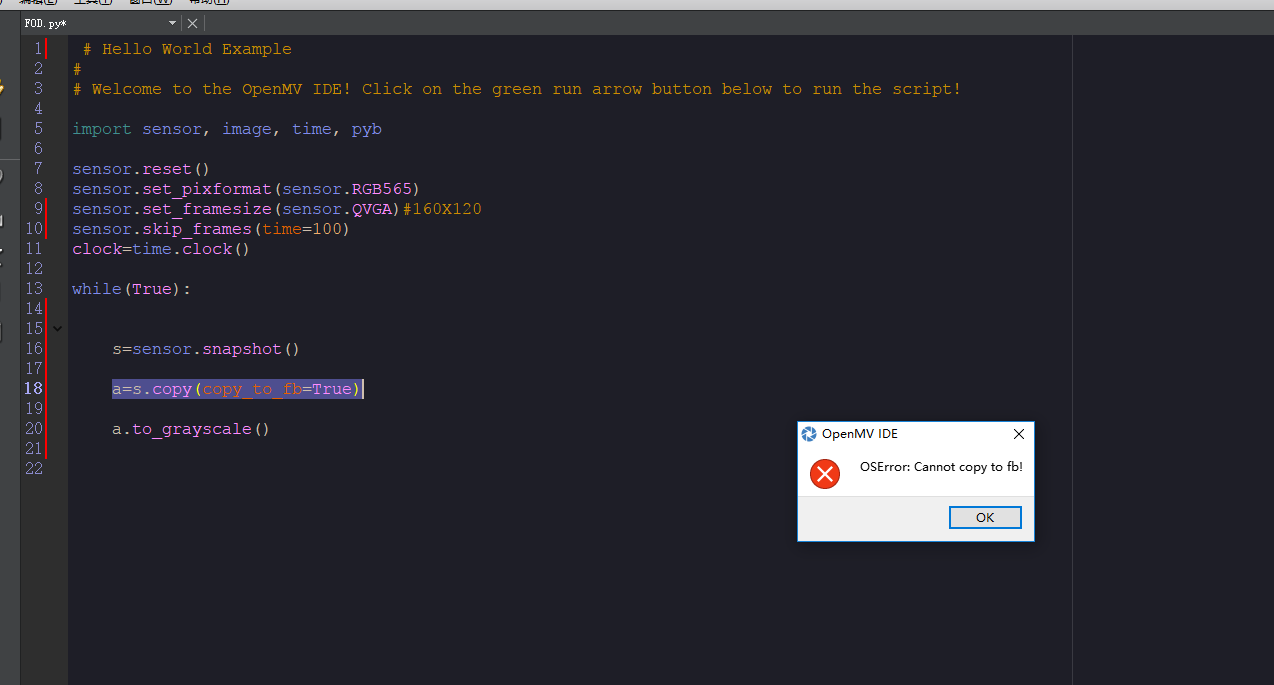
 # Hello World Example
#
# Welcome to the OpenMV IDE! Click on the green run arrow button below to run the script!

import sensor, image, time, pyb

sensor.reset()
sensor.set_pixformat(sensor.RGB565)
sensor.set_framesize(sensor.QVGA)#160X120
sensor.skip_frames(time=100)
clock=time.clock()

while(True):


    s=sensor.snapshot()

    a=s.copy(copy_to_fb=True)

    a.to_grayscale()
-
OpenMV 只有一个framebuffer用来存储图像,IDE显示的就是这个。
不能直接复制,直接操作两个图片,内存没那么大。
-
@kidswong999 请问怎么让framebuffer显示想要的图像呢?
-
IDE会一直显示frambuffer的。
你只需要操作操作图像就行。