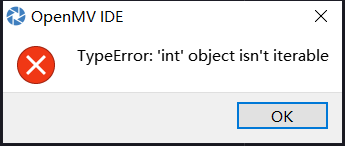
语法是正确,但这个错误是什么意思,不可迭代
-
-
import sensor, image, time
from pyb import UART
from pyb import LED
from image import SEARCH_EX,SEARCH_DS


#pink_threshold = (65, 21, 7, 67, 55, -2)
#pink_threshold =(42, 62, 67, 14, -16, 65)
pink_threshold = (65, 21, 7, 67, 55, -2)
pink_color_code = 1 # code = 2^0 = 1
uart = UART(3, 115200)
uart.init(115200, bits=8, parity=None, stop=1)  #8位数据位,无校验位,1位停止位、

sensor.reset() # 初始化摄像头
sensor.set_contrast(1)#对比度
sensor.set_gainceiling(16)#图像增益上限
sensor.set_pixformat(sensor.RGB565) # 选择像素模式 RGB565.
sensor.set_framesize(sensor.QQVGA) # use QQVGA for speed.
sensor.skip_frames(time = 2000) # Let new settings take affect.
#sensor.set_pixformat(sensor.GRAYSCALE)
sensor.set_auto_gain(False) # 颜色跟踪必须关闭自动增益
sensor.set_auto_whitebal(False) #关闭白平衡。白平衡是默认开启的,在颜色识别中,需要关闭白平衡。
templates =["111.pgm","221.pgm","333.pgm","334.pgm","335.pgm","443.pgm","444.pgm.",
"555.pgm","556.pgm","557.pgm","666.pgm","667.pgm","777.pgm","778.pgm","888.pgm"]
clock = time.clock() # Tracks FPS.

shj=0
while(shj == 0):
    clock.tick()
    img = sensor.snapshot()
    img = img.to_grayscale()
    for t in templates:
        template = image.Image(t)
        r = img.find_template(template, 0.70, step=4, search=SEARCH_EX)
        if r:
            shj=t[0]
            LED(2).on()
            time.sleep_ms(3000)
            LED(2).off()
x=[]
for i in range(len(templates)):
    if shj == templates[i][0]:
        x.append(templates[i])
flag = 1
while(True):
    clock.tick()
    img = sensor.snapshot()
    img = img.to_grayscale()
    if flag == 1:
        for t in x:
                h = image.Image(t)
                r = img.find_template(h, 0.70, step=4, search=SEARCH_EX)
                if r:
                    img.draw_rectangle(r,0)
                    if(r[0]+(r[2]/2) > sensor.width() /2):
                        uartData = bytearray([0xa5,0x2b,0x01])
                    elif(r[0]+(r[2]/2) < sensor.width()/2):
                        uartData = bytearray([0xa5,0x2b,0x02])
                    flag = 0
                    LED(1).on()
                    uart.write(uartData)

    clock.tick()
    img = sensor.snapshot()
    blobs = img.find_blobs([pink_threshold], area_threshold=100)
    if blobs:
    ##如果找到了目标颜色
        for blob in blobs:
        ##迭代找到的目标颜色区域
            x = blob[0]
            y = blob[1] #
            width = blob[2] # 色块矩形的宽度
            height = blob[3] # 色块矩形的高度

            center_x = blob[5] # 色块中心点x值
            center_y = blob[6] # 色块中心点y值

            color_code = blob[8] # 颜色代码

            ## 添加颜色说明
            if color_code == pink_color_code:
                img.draw_string(x, y - 10, "red", color = (0xFF, 0x00, 0x00))

            ##用矩形标记出目标颜色区域
            img.draw_rectangle([x, y, width, height])
            ##在目标颜色区域的中心画十字形标记
            img.draw_cross(center_x, center_y)
-
这个代码我测试不出来, 因为复现条件很复杂,一直27行的死循环出不来。
建议精简出只出错的部分,可以运行的,一运行就可以复现问题的代码。
-
@kidswong999 已经解决了,谢谢