系统迁移中,暂时无法访问,所有数据会迁移到新的网站。
OpenMV VSCode 扩展发布了,在插件市场直接搜索OpenMV就可以安装
如果有产品硬件故障问题,比如无法开机,论坛很难解决。可以直接找售后维修。
发帖子之前,请确认看过所有的视频教程,https://singtown.com/learn/ 和所有的上手教程http://book.openmv.cc/
每一个新的提问,单独发一个新帖子
帖子需要目的,你要做什么?
如果涉及代码,需要报错提示与全部代码文本,请注意不要贴代码图片
必看:玩转星瞳论坛了解一下图片上传,代码格式等问题。
形状检测和颜色检测,颜色能识别蓝色圆,形状却圈住红色的圆
-
# Single Color RGB565 Blob Tracking Example # # This example shows off single color RGB565 tracking using the OpenMV Cam. import sensor, image, time,pyb,math from pyb import UART,Pin,Timer import json uart=pyb.UART(3,115200,timeout_char=1000) threshold_index = 0 # 0 for red, 1 for green, 2 for blue # Color Tracking Thresholds (L Min, L Max, A Min, A Max, B Min, B Max) # The below thresholds track in general red/green/blue things. You may wish to tune them... thresholds = [(30, 100, 15, 127, 15, 127), # generic_red_thresholds (30, 100, -64, -8, -32, 32), # generic_green_thresholds (0, 100, -16, 127, -128, -31)] # generic_blue_thresholds #-------------------摄像头初始化----------------------------- sensor.reset() sensor.set_pixformat(sensor.RGB565) sensor.set_framesize(sensor.QVGA) sensor.skip_frames(time = 2000) sensor.set_auto_gain(False) # must be turned off for color tracking sensor.set_auto_whitebal(False) # must be turned off for color tracking clock = time.clock() #start = pyb.millis() # get value of millisecond counter 获取毫秒计数器的值 # Only blobs that with more pixels than "pixel_threshold" and more area than "area_threshold" are # returned by "find_blobs" below. Change "pixels_threshold" and "area_threshold" if you change the # camera resolution. "merge=True" merges all overlapping blobs in the image. def find_max(blobs): max_size=0 for blob in blobs: if blob[2]*blob[3]>max_size: max_blob=blob max_size=blob[2]*blob[3] return max_blob #if(blob[5]==sensor.width/2) and (blob[6]==sensor.height/2): while(True): clock.tick() img = sensor.snapshot().lens_corr(strength = 1.8, zoom = 1.0)#摄像头畸变矫正 for c in img.find_circles(threshold=3500,x_margin=20,y_margin=20, r_margin=20,r_min=2,r_max=100,r_step=2): area=(c.x()-c.r(),c.y()-c.r(),2*c.r(),2*c.r()) statistics=img.get_statistics(roi=area) #print(statistics) blobs = img.find_blobs([thresholds[2]]) #print(img.width()/2,img.height()/2) if blobs: img.draw_circle((c.x(),c.y(),c.r()),color=(0,0,255)) max_blob=find_max(blobs) #img.draw_rectangle(max_blob.rect()) img.draw_cross(max_blob.cx(),max_blob.cy()) output_str="[%d,%d]"%(max_blob.cx(),max_blob.cy()) print('you send:',output_str) uart.write( output_str+'\r\n') else: #img.draw_rectangle(area,color=(255,0,0)) print('not found!')![0_1555560618830_~GZ)[78~P(OU]CK68_RV4(N.png](https://fcdn.singtown.com/3af92be1-22c3-4058-a8ad-c0867817dddf.png)
-
代码的逻辑有一些问题。
你说的现象,直接的原因是
img.draw_circle((c.x(),c.y(),c.r()),color=(0,0,255))
这个c是上面的for c in img.find_circles里面的,而不是find_blobs里面的。改成img.draw_circle((max_blob.cx(),max_blob.cy(),max_blob.w()/2),color=(0,0,255))会圈出来蓝色的色块。
PS: 你上面的for c in img.find_circles也有很大的问题,如果画面中有两个圆,结果可能不是你预期的那样。
-
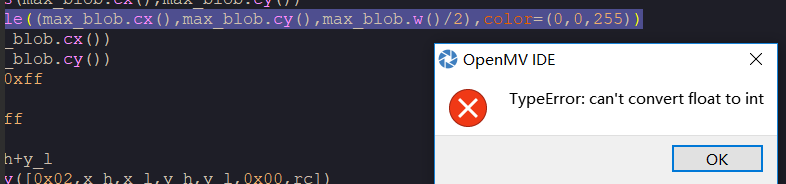 报错了,我想先颜色检测后再霍夫圆,不知道怎么解决你说的for c in img.find_circles的问题