在识别矩形的例程中,我一个大正方形的平面摆在中间,都不识别,周围的小矩形反而能识别
Z
z4l1 发布的帖子
-
不能同时输出色块与APriltag的坐标发布在 OpenMV Cam
import sensor, image, time, math,pyb import json from pyb import Pin, Timer,UART,LED green_led = LED(1) blue_led = LED(2) #rgb_gain_db=(-6.02073, -2.231719, -3.454361) sensor.reset() # Initialize the camera sensor. sensor.set_pixformat(sensor.RGB565) # use RGB565. sensor.set_framesize(sensor.QQVGA) # use QQVGA for speed. sensor.skip_frames(time=2000) # Let new settings take affect. sensor.set_auto_gain(False) #sensor.set_auto_whitebal(False,rgb_gain_db) sensor.set_auto_whitebal(False) clock = time.clock() #red_threshold=(33, 78, 6, 52, -9, 62) #red_threshold=(33, 94, -84, -30, 9, 72) red_threshold=(100, 71, 127, -39, 89, -27) #白色 uart = pyb.UART(3,500000,timeout_char=1000)#串口初始化 #pyb.delay(10) # 注意!与find_qrcodes不同,find_apriltags 不需要软件矫正畸变就可以工作。 # 注意,输出的姿态的单位是弧度,可以转换成角度,但是位置的单位是和你的大小有关,需要等比例换算 # f_x 是x的像素为单位的焦距。对于标准的OpenMV,应该等于2.8/3.984*656,这个值是用毫米为单位的焦距除以x方向的感光元件的长度,乘以x方向的感光元件的像素(OV7725) # f_y 是y的像素为单位的焦距。对于标准的OpenMV,应该等于2.8/2.952*488,这个值是用毫米为单位的焦距除以y方向的感光元件的长度,乘以y方向的感光元件的像素(OV7725) # c_x 是图像的x中心位置 # c_y 是图像的y中心位置 f_x = (2.8 / 3.984) * 160 # 默认值 f_y = (2.8 / 2.952) * 120 # 默认值 c_x = 160 * 0.5 # 默认值(image.w * 0.5) c_y = 120 * 0.5 # 默认值(image.h * 0.5) def degrees(radians): return (180 * radians) / math.pi def find_max(blobs): max_size=0 for blob in blobs: if blob[2]*blob[3] > max_size: max_blob=blob max_size = blob[2]*blob[3] return max_blob def high(x): x=x>>8 return x def low(x): x=x&0xff return x while(True): clock.tick() # Track elapsed milliseconds between snapshots(). img = sensor.snapshot() # Take a pv/.icture and return the image. blobs = img.find_blobs([red_threshold],pixels_threshold=200, area_threshold=3000) if blobs: blue_led.on() max_blob = find_max(blobs) red_x= int(max_blob[5]-img.width()/2) red_y= int(img.height()/2-max_blob[6]) img.draw_rectangle(max_blob[0:4]) img.draw_cross(max_blob[5], max_blob[6]) else: red_x = red_y =0 for tag in img.find_apriltags(fx=f_x, fy=f_y, cx=c_x, cy=c_y): # 默认为TAG36H11 img.draw_rectangle(tag.rect(), color = (255, 0, 0)) img.draw_cross(tag.cx(), tag.cy(), color = (0, 255, 0)) print_args = (tag.x_translation(), tag.y_translation(), tag.z_translation(), \ degrees(tag.x_rotation()), degrees(tag.y_rotation()), degrees(tag.z_rotation())) TX = int(tag.x_translation()*10) TY = int(tag.y_translation()*10) CZ = int(degrees(tag.z_rotation())) # 位置的单位是未知的,旋转的单位是角度 if(img.find_apriltags()): Tx = TX Ty = TY Cz = CZ else: Tx = Ty =CZ =0 uart.writechar(high(red_x)) uart.writechar(low(red_x)) uart.writechar(high(red_y)) uart.writechar(low(red_y)) uart.writechar(high(Tx)) uart.writechar(low(Tx)) uart.writechar(high(Ty)) uart.writechar(low(Ty)) uart.writechar(high(CZ)) uart.writechar(low(CZ)) uart.writechar(0x55) uart.writechar(0xAA) print("red_x",red_x,"red_y",red_y,"Tx",Tx,"Ty",Ty,"CZ",CZ) -
RE: 我的openmv3程序在不接USB情况下无法启动,只能在IDE里点开始运行才能运行,这个怎么解决?发布在 OpenMV Cam
我已经处理好了,在IDE工具一栏,重置OpenMV Cam就行了
-
RE: 我的openmv3程序在不接USB情况下无法启动,只能在IDE里点开始运行才能运行,这个怎么解决?发布在 OpenMV Cam
同问,之前用的好好的,好像是下载新的程序后就不能脱机运行了,重新下载原来的程序也不行了
-
openMV 关于find_displacement的问题,不可迭代是怎么回事?发布在 OpenMV Cam
import sensor, image, time sensor.reset() # Initialize the camera sensor. sensor.set_pixformat(sensor.GRAYSCALE) # or sensor.GRAYSCALE sensor.set_framesize(sensor.B64X64) # or B40x30 or B64x64 clock = time.clock() # Tracks FPS. old = sensor.snapshot() #先获取一张图片 while(True): clock.tick() # Track elapsed milliseconds between snapshots(). img = sensor.snapshot() # Take a picture and return the image. [delta_x, delta_y, response] = old.find_displacement(img) #delta_x delta_y分别表示 x y 方向上,这一帧图像相比上帧图像移动的像素数目。 old = img.copy() print("%0.1f X\t%0.1f Y\t%0.2f QoR\t%0.2f FPS" % \ (delta_x, delta_y, response, clock.fps())) -
为什么会提示没有定义,我上面已经定义过了呀发布在 OpenMV Cam
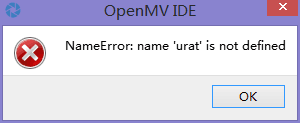
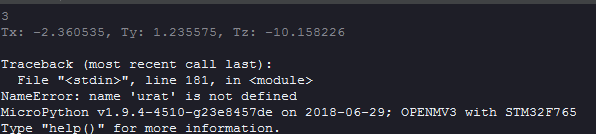
它识别了第一次之后就报错了,不识别的时候没事import sensor, image, time, math,pyb from pyb import Pin, Timer,UART uart = pyb.UART(3,9600,timeout_char=1000)#串口初始化 # Tracks a black line. Use [(128, 255)] for a tracking a white line. GRAYSCALE_THRESHOLD = [(0, 150)] ROIS = [ (0,0,64,64,0) ] #----------------------------------------寻找直线变量----------------------------------------# #---------------------------------------摄像头初始化-----------------------------------------# Sum_x=0; Sum_y=0; flag=0; i=0; #记录第几行数据 j=0; #记录直线数量 led=pyb.LED(3)#必要的时候进行红外补光 #检测圆形中心点的坐标 center_x=0; center_y=0; center_update=1;#中心圆位置更新的标志 center_x_old=0; center_y_old=0; center_pos_old=0; center_x_down=0; center_y_down=0; center_x_up=0; center_y_up=0; center_x_mid=0; center_y_mid=0; center_y_left=0; center_x_left=0; center_y_right=0; center_x_right=0; center_y_rect=0; center_x_rect=0; center_y_rect_old=0; center_x_rect_old=0; center_flag1=0;#上下 center_flag2=0;#左右 center_flag3=0;#通过roll来调整黑线的位置 通过yaw来调整机头方向 矩形1和2=0; center_flag4=0; center_flag5=0; center_flag6=0; turn_flag=0;#转弯的标志 last_x=0; last_y=0; center_pos=0; yaw_angle=0; out_str1=''; clock = time.clock() f_x = (2.8 / 3.984)*160 f_y = (2.8 / 2.952)*120 c_x = 160*0.5 c_y = 120*0.5 led=pyb.LED(2)#必要的时候进行红外补光 #定义一个定时发送数据的函数 def tick(timer):#we will receive the timer object when being called global flag flag=1 tim = Timer(4,freq=20) # create a timer object using timer 4 - trigger at 1Hz tim.callback(tick) # set the callback to our tick function #--------------------------------------while循环开始-----------------------------------------# def degrees(radians): return ((180*radians)/math.pi) while not uart.any(): pass positive_ctrl = uart.readline() positive_ctrl = int(positive_ctrl) uart.write("positive_ctrl=%d\n" % positive_ctrl) print(positive_ctrl) if(positive_ctrl == 1): sensor.reset() sensor.set_pixformat(sensor.GRAYSCALE) sensor.set_framesize(sensor.B64X64) # 颜色追踪:160*120 光流检测:40*30 sensor.skip_frames(20) sensor.set_auto_gain(False) # 颜色追踪关闭自动增益 sensor.set_auto_whitebal(False) # 颜色追踪关闭白平衡 while(1): clock.tick() if (flag==1): img=sensor.snapshot() img_old=img.copy() #--------------------------------------光流定点-----------------------------------------# img.lens_corr(1.8)#for 2.8mm lens...摄像头畸变纠正 #--------------------------------------检测直线交点的位置---------------------------------------# #img.binary(GRAYSCALE_THRESHOLD,invert=1); #--------------------------------------寻找圆心的位置--------------------------------------# #检测圆形位置 for r in ROIS: blobs=img_old.find_blobs(GRAYSCALE_THRESHOLD, roi=r[0:4], merge=True,pixels_area=10) # r[0:4] is roi tuple. if blobs:#如果找到了颜色块 largest_blob=max(blobs, key=lambda b: b.pixels()) if(largest_blob[4]>=10 and largest_blob[4]<=1500):#像素点个数 if(largest_blob[3]>=3 and largest_blob[3]<=60): if(largest_blob[2]>=3 and largest_blob[2]<=60): center_y_rect=largest_blob.cy(); center_x_rect=largest_blob.cx(); img.draw_rectangle(largest_blob.rect()) img.draw_cross(center_x_rect,center_y_rect,2) #50ms发送一次数据到飞控 if(yaw_angle<0): out_str1='-' out_str1+= '%.2d'% int(-yaw_angle) #寻找黑线中心位置计算出偏转角度 else: out_str1='+' out_str1+= '%.2d'% int(yaw_angle) #寻找黑线中心位置计算出偏转角度 if(Sum_x<0): out_str1+='-' out_str1+='%.2d'% int(-Sum_x); #光流数据 else: out_str1+='+' out_str1+='%.2d'% int(Sum_x) #寻找黑线中心位置计算出偏转角度 if(Sum_y<0): out_str1+='-' out_str1+= '%.2d'% int(-Sum_y); #光流数据 else: out_str1+='+' out_str1+= '%.2d'% int(Sum_y); #光流数据 out_str1+='%.2d'% int(center_pos); out_str1+='%.2d'% int(center_x_rect); #圆心的位置 out_str1+='%.2d'% int(center_y_rect); out_str1+='%.2d'% int(turn_flag); #直角标志位 out_str1+='%.2d'% int(last_x); #直角交点位置 out_str1+='%.2d'% int(last_y); uart.write('s'+out_str1+'#') #像素位移之和清零 turn_flag=0; Sum_x=0 Sum_y=0 out_str1=''#清除之前的数据 flag=0; #-----------------------------------串口打印数据-----------------------------------------# if(positive_ctrl == 3): sensor.reset() sensor.set_pixformat(sensor.RGB565) sensor.set_framesize(sensor.QQVGA) # 颜色追踪:160*120 光流检测:40*30 sensor.skip_frames(20) sensor.set_auto_gain(False) # 颜色追踪关闭自动增益 sensor.set_auto_whitebal(False) # 颜色追踪关闭白平衡 while(1): clock.tick() led.on() img=sensor.snapshot() img.lens_corr(1.5)#for 2.8mm lens...摄像头畸变纠正 for tag in img.find_apriltags(fx=f_x, fy=f_y, cx=c_x, cy=c_y): img.draw_rectangle(tag.rect(), color = (255,0,0)) img.draw_cross(tag.cx(), tag.cy(), color = (0,255,0)) #画框,画中心十字 #print_args = (tag.x_translation(), tag.y_translation(), tag.z_translation(),\ #degrees(tag.x_rotation()), degees(tag.y_rotation()), degrees(tag.z_rotation())) #位置的单位是未知的,旋转单位是角度 print_args = (tag.x_translation(), tag.y_translation(), tag.z_translation()) print("Tx: %f, Ty: %f, Tz: %f" % print_args) Tx = tag.x_translation() #距标签的X轴长度 Ty = tag.y_translation() output_str = "%d%d"%(Tx,Ty) #标签的中心坐标 urat.write(output_str+'\r\n') print(clock.fps()) -
RE: OEPNMV可不可以在同一个程序换两个环境发布在 OpenMV Cam
import sensor, image, time, math,pyb from pyb import Pin, Timer,UART uart = pyb.UART(3,9600,timeout_char=1000)#串口初始化 # Tracks a black line. Use [(128, 255)] for a tracking a white line. GRAYSCALE_THRESHOLD = [(0, 150)] ROIS = [ (0,0,64,64,0) ] #----------------------------------------寻找直线变量----------------------------------------# #---------------------------------------摄像头初始化-----------------------------------------# Sum_x=0; Sum_y=0; flag=0; i=0; #记录第几行数据 j=0; #记录直线数量 led=pyb.LED(3)#必要的时候进行红外补光 #检测圆形中心点的坐标 center_x=0; center_y=0; center_update=1;#中心圆位置更新的标志 center_x_old=0; center_y_old=0; center_pos_old=0; center_x_down=0; center_y_down=0; center_x_up=0; center_y_up=0; center_x_mid=0; center_y_mid=0; center_y_left=0; center_x_left=0; center_y_right=0; center_x_right=0; center_y_rect=0; center_x_rect=0; center_y_rect_old=0; center_x_rect_old=0; center_flag1=0;#上下 center_flag2=0;#左右 center_flag3=0;#通过roll来调整黑线的位置 通过yaw来调整机头方向 矩形1和2=0; center_flag4=0; center_flag5=0; center_flag6=0; turn_flag=0;#转弯的标志 last_x=0; last_y=0; center_pos=0; yaw_angle=0; out_str1=''; positive_ctrl = 0; clock = time.clock() f_x = (2.8 / 3.984)*160 f_y = (2.8 / 2.952)*120 c_x = 160*0.5 c_y = 120*0.5 def degrees(radians): return (180*randians)/math.pi led=pyb.LED(2)#必要的时候进行红外补光 led1=pyb.LED(3) #定义一个定时发送数据的函数 def tick(timer):#we will receive the timer object when being called global flag flag=1 tim = Timer(4,freq=20) # create a timer object using timer 4 - trigger at 1Hz tim.callback(tick) # set the callback to our tick function #--------------------------------------while循环开始-----------------------------------------# if uart.any(): positive_ctrl = uart.readline() positive_ctrl = int(positive_ctrl) uart.write("positive_ctrl=%d\n" % positive_ctrl) print(positive_ctrl) while(positive_ctrl == 1): sensor.reset() sensor.set_pixformat(sensor.GRAYSCALE) sensor.set_framesize(sensor.B64X64) # 颜色追踪:160*120 光流检测:40*30 sensor.skip_frames(20) sensor.set_auto_gain(False) # 颜色追踪关闭自动增益 sensor.set_auto_whitebal(False) # 颜色追踪关闭白平衡 if(flag==1): img=sensor.snapshot() img_old=img.copy() #--------------------------------------光流定点-----------------------------------------# img.lens_corr(1.8)#for 2.8mm lens...摄像头畸变纠正 #--------------------------------------检测直线交点的位置---------------------------------------# #img.binary(GRAYSCALE_THRESHOLD,invert=1); #--------------------------------------寻找圆心的位置--------------------------------------# #检测圆形位置 for r in ROIS: blobs=img_old.find_blobs(GRAYSCALE_THRESHOLD, roi=r[0:4], merge=True,pixels_area=10) # r[0:4] is roi tuple. if blobs:#如果找到了颜色块 largest_blob=max(blobs, key=lambda b: b.pixels()) if(largest_blob[4]>=10 and largest_blob[4]<=1500):#像素点个数 if(largest_blob[3]>=3 and largest_blob[3]<=60): if(largest_blob[2]>=3 and largest_blob[2]<=60): center_y_rect=largest_blob.cy(); center_x_rect=largest_blob.cx(); img.draw_rectangle(largest_blob.rect()) img.draw_cross(center_x_rect,center_y_rect,2) #50ms发送一次数据到飞控 if(yaw_angle<0): out_str1='-' out_str1+= '%.2d'% int(-yaw_angle) #寻找黑线中心位置计算出偏转角度 else: out_str1='+' out_str1+= '%.2d'% int(yaw_angle) #寻找黑线中心位置计算出偏转角度 if(Sum_x<0): out_str1+='-' out_str1+='%.2d'% int(-Sum_x); #光流数据 else: out_str1+='+' out_str1+='%.2d'% int(Sum_x) #寻找黑线中心位置计算出偏转角度 if(Sum_y<0): out_str1+='-' out_str1+= '%.2d'% int(-Sum_y); #光流数据 else: out_str1+='+' out_str1+= '%.2d'% int(Sum_y); #光流数据 out_str1+='%.2d'% int(center_pos); out_str1+='%.2d'% int(center_x_rect); #圆心的位置 out_str1+='%.2d'% int(center_y_rect); out_str1+='%.2d'% int(turn_flag); #直角标志位 out_str1+='%.2d'% int(last_x); #直角交点位置 out_str1+='%.2d'% int(last_y); uart.write('s'+out_str1+'#') #像素位移之和清零 turn_flag=0; Sum_x=0 Sum_y=0 out_str1=''#清除之前的数据 flag=0; #-----------------------------------串口打印数据-----------------------------------------# print(clock.fps()) while(positive_ctrl==3): sensor.reset() sensor.set_pixformat(sensor.RGB565) sensor.set_framesize(sensor.QQVGA) # 颜色追踪:160*120 光流检测:40*30 sensor.skip_frames(20) sensor.set_auto_gain(False) # 颜色追踪关闭自动增益 sensor.set_auto_whitebal(False) # 颜色追踪关闭白平衡 img=sensor.snapshot() img.lens_corr(1.5)#for 2.8mm lens...摄像头畸变纠正 for tag in img.find_apriltags(fx=f_x, fy=f_y, cx=c_x, cy=c_y): img.draw_rectangle(tag.rect(), color = (255,0,0)) img.draw_cross(tag.cx(), tag.cy(), color = (0,255,0)) #画框,画中心十字 print_args = (tag.x_translation(), tag.y_translation(), tag.z_translation(),\ degrees(tag.x_rotation()), degees(tag.y_rotation()), degrees(tag.z_rotation())) #位置的单位是未知的,旋转单位是角度 print("Tx: %f, Ty: %f, Tz: %f, Rx: %f, Ry: %f, Rz: %f" % print_args) Tx = tag.x_translation() #距标签的X轴长度 Ty = tag.y_translation() output_str = "[%d,%d]"%(Tx,Ty) #标签的中心坐标 urat.write(output_str+'\r\n') print(clock.fps()) -
RE: OEPNMV可不可以在同一个程序换两个环境发布在 OpenMV Cam
@kidswong999 这个也是我问的..................,但是这次不是这个问题,是我切换后,摄像头可不可以再初始化一次。因为光流用的是sensor.GRAYSCALE,颜色识别用的是sensor.RGB565
-
RE: OEPNMV可不可以在同一个程序换两个环境发布在 OpenMV Cam
@kidswong999 就像我上面写的意思呀,当我串口给openmv发送1的时候,运行sensor.GRAYSCALE
当我串口发送2的时候,运行sensor.RGB565 -
OEPNMV可不可以在同一个程序换两个环境发布在 OpenMV Cam
if(x==1) sensor.reset() sensor.set_pixformat(sensor.GRAYSCALE) sensor.set_framesize(sensor.B64X64) # 颜色追踪:160*120 光流检测:40*30 sensor.skip_frames(20) sensor.set_auto_gain(False) # 颜色追踪关闭自动增益 sensor.set_auto_whitebal(False) # 颜色追踪关闭白平衡 if(x==2) sensor.reset() sensor.set_pixformat(sensor.RGB565) sensor.set_framesize(sensor.QQVGA) # 颜色追踪:160*120 光流检测:40*30 sensor.skip_frames(20) sensor.set_auto_gain(False) # 颜色追踪关闭自动增益 sensor.set_auto_whitebal(False) # 颜色追踪关闭白平衡 -
关于串口输出数据发布在 OpenMV Cam
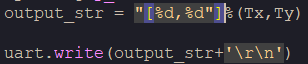
这样子发出的数组是output_str[0]='Tx',output_str[1]='Ty'还是output_str[0]='[',output_str[1]='Tx',output_str[2]=',',output_str[3]='Ty',output_str[4]=']'.