请问用openmv神经网络识别垃圾后,怎么返回垃圾的坐标值?
2
2fmh
@2fmh
0
声望
4
楼层
533
资料浏览
0
粉丝
0
关注
2fmh 发布的帖子
-
为什么出现ValueError: invalid syntax for integer with base 10 错误发布在 OpenMV Cam
## Hello World Example‘ # # Welcome to the OpenMV IDE! Click on the green run arrow button below to run the script! import sensor, image, time import json from pyb import UART sensor.reset() # Reset and initialize the sensor. sensor.set_pixformat(sensor.GRAYSCALE) # Set pi 1xel format to RGB565 (or GRAYSCALE) sensor.set_framesize(sensor.QVGA) # Set frame size to QVGA (320x240) sensor.skip_frames(10) # Wait for settings take effect. clock = time.clock() # Create a clock object to track the FPS. uart = UART(3, 9600) #sensor.set_auto_exposure() string = "hello string!" rect_tuple = (140, 100, 40, 40) ROI = (140, 100, 40, 40) threshold = (112, 0) t = 0 while(True): clock.tick() # Update the FPS clock. image = sensor.snapshot() # Take a picture and return the image. image.binary([threshold], invert = 1) statistics=image.get_statistics(roi=ROI) avg = json.dumps(statistics.mean()) image.draw_circle(160,120,50) image.draw_cross(160, 120, size=5, color = (255, 0, 0)) image.draw_rectangle(rect_tuple) #在图像中画一个矩形框 #print(clock.fps()) # Note: OpenMV Cam runs about half as fast when connected # to the IDE. The FPS should increase once disconnected. if uart.any(): t = int(uart.read()) if t == 1: uart.write(avg + '\n') print('you send:',avg) -
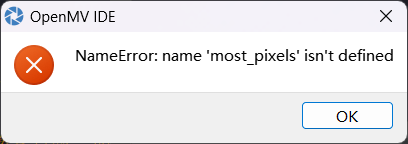
完全复制的例程讲解10机器人寻线官网代码,但出现most_pixels没有定义发布在 OpenMV Cam
# 机器人巡线例程 # # 跟随机器人做一条线需要很多努力。 本示例脚本显示了如何执行跟随机器人的 # 机器视觉部分。 您可以使用此脚本的输出来驱动差分驱动机器人遵循一条线。 # 这个脚本只是产生一个转动的值,告诉你的机器人向左或向右。 # # 为了使这个脚本正常工作,你应该把摄像机指向45度左右的一条线。请确保只有线在相机的视野内。 import sensor, image, time, math # 跟踪一条黑线。使用[(128,255)]来跟踪白线。 GRAYSCALE_THRESHOLD = [(0, 64)] #设置阈值,如果是黑线,GRAYSCALE_THRESHOLD = [(0, 64)]; #如果是白线,GRAYSCALE_THRESHOLD = [(128,255)] # 每个roi为(x, y, w, h),线检测算法将尝试找到每个roi中最大的blob的质心。 # 然后用不同的权重对质心的x位置求平均值,其中最大的权重分配给靠近图像底部的roi, # 较小的权重分配给下一个roi,以此类推。 ROIS = [ # [ROI, weight] (0, 100, 160, 20, 0.7), # 你需要为你的应用程序调整权重 (0, 050, 160, 20, 0.3), # 取决于你的机器人是如何设置的。 (0, 000, 160, 20, 0.1) ] #roi代表三个取样区域,(x,y,w,h,weight),代表左上顶点(x,y)宽高分别为w和h的矩形, #weight为当前矩形的权值。注意本例程采用的QQVGA图像大小为160x120,roi即把图像横分成三个矩形。 #三个矩形的阈值要根据实际情况进行调整,离机器人视野最近的矩形权值要最大, #如上图的最下方的矩形,即(0, 100, 160, 20, 0.7) # Compute the weight divisor (we're computing this so you don't have to make weights add to 1). weight_sum = 0 #权值和初始化 for r in ROIS: weight_sum += r[4] # r[4] is the roi weight. #计算权值和。遍历上面的三个矩形,r[4]即每个矩形的权值。 sensor.reset() # 初始化sensor sensor.set_pixformat(sensor.GRAYSCALE) # use grayscale. #设置图像色彩格式,有RGB565色彩图和GRAYSCALE灰度图两种 sensor.set_framesize(sensor.QQVGA) # 使用QQVGA的速度。 #设置图像像素大小 sensor.skip_frames(30) # 让新的设置生效。 sensor.set_auto_gain(False) # 颜色跟踪必须关闭自动增益 sensor.set_auto_whitebal(False) # 颜色跟踪必须关闭白平衡 clock = time.clock() # 跟踪FPS帧率 while(True): clock.tick() # 追踪两个snapshots()之间经过的毫秒数. img = sensor.snapshot() # 拍一张照片并返回图像。 centroid_sum = 0 #利用颜色识别分别寻找三个矩形区域内的线段 for r in ROIS: blobs = img.find_blobs(GRAYSCALE_THRESHOLD, roi=r[0:4], merge=True) # r[0:4] is roi tuple. #找到视野中的线,merge=true,将找到的图像区域合并成一个 #目标区域找到直线 if blobs: # 查找像素最多的blob的索引。 largest_blob = 0 for i in range(len(blobs)): #目标区域找到的颜色块(线段块)可能不止一个,找到最大的一个,作为本区域内的目标直线 if blobs[i].pixels() > most_pixels: most_pixels = blobs[i].pixels() #merged_blobs[i][4]是这个颜色块的像素总数,如果此颜色块像素总数大于 #most_pixels,则把本区域作为像素总数最大的颜色块。更新most_pixels和largest_blob largest_blob = i # 在色块周围画一个矩形。 img.draw_rectangle(blobs[largest_blob].rect()) # 将此区域的像素数最大的颜色块画矩形和十字形标记出来 img.draw_cross(blobs[largest_blob].cx(), blobs[largest_blob].cy()) centroid_sum += blobs[largest_blob].cx() * r[4] # r[4] is the roi weight. #计算centroid_sum,centroid_sum等于每个区域的最大颜色块的中心点的x坐标值乘本区域的权值 center_pos = (centroid_sum / weight_sum) # Determine center of line. #中间公式 # 将center_pos转换为一个偏角。我们用的是非线性运算,所以越偏离直线,响应越强。 # 非线性操作很适合用于这样的算法的输出,以引起响应“触发器”。 deflection_angle = 0 #机器人应该转的角度 # 80是X的一半,60是Y的一半。 # 下面的等式只是计算三角形的角度,其中三角形的另一边是中心位置与中心的偏差,相邻边是Y的一半。 # 这样会将角度输出限制在-45至45度左右。(不完全是-45至45度)。 deflection_angle = -math.atan((center_pos-80)/60) #角度计算.80 60 分别为图像宽和高的一半,图像大小为QQVGA 160x120. #注意计算得到的是弧度值 deflection_angle = math.degrees(deflection_angle) #将计算结果的弧度值转化为角度值 # 现在你有一个角度来告诉你该如何转动机器人。 # 通过该角度可以合并最靠近机器人的部分直线和远离机器人的部分直线,以实现更好的预测。 print("Turn Angle: %f" % deflection_angle) #将结果打印在terminal中 print(clock.fps()) # 注意: 当连接电脑后,OpenMV会变成一半的速度。当不连接电脑,帧率会增加。 # 打印当前的帧率。 