如何把程序放进openmv,通电就运行,并上传数据
18892337362 发布的帖子
-
RE: 识别黑色的阈值问题发布在 OpenMV Cam
我需要做的就是让openmv识别一条宽为0.5cm的黑线,然后上传数据```
请在这里粘贴代码
import sensor, image, time, pyb
from pyb import UART
import json
import mathblack_threshold =(100,59,33,-100,-128,30)
#black_threshold =(100,50,97,-126,-128,93)
sensor.reset() # Initialize the camera sensor.
sensor.set_pixformat(sensor.RGB565) # use RGB565.
sensor.set_framesize(sensor.QVGA) # use QQVGA for speed.
sensor.skip_frames(10) # Let new settings take affect.
sensor.set_auto_whitebal(False) # turn this off.
clock = time.clock() # Tracks FPS.uart = UART(3, 9600)
uart.init(9600, bits=8, parity=None, stop=1)
while(True):
clock.tick()
img = sensor.snapshot()
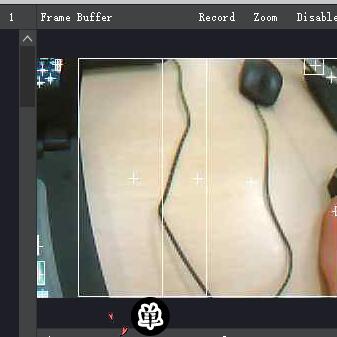
img.draw_cross(160,120)blobs = img.find_blobs([black_threshold]) if blobs: print('sum : %d'% len(blobs)) out_str = '[' for b in blobs: img.draw_rectangle(b[0:4]) # rect img.draw_cross(b[5], b[6]) # cx, cy x = b[5] y = b[6] img.get_pixel(x,y) out_str += '(%d,%d)' % (x,y) out_str += ']' print(out_str) if x<160: text = "right\n" elif x>160: text = "left\n" else: text = "stop\n" for b in blobs: img.draw_rectangle(b[0:4]) # rect img.draw_cross(b[5], b[6]) # cx, cy x = b[5] y = b[6] p1=Point(b[5],b[6]) p2=Point(160,120) l=Getlen(p1,p2) #获取两点之间直线的长度 print(l.getlen()) img.get_pixel(x,y) out_str += '(%d,%d)' % (x,y) out_str += ']' print(out_str) uart.write(out_str+'\r\n') uart = UART(3, 9600) for i in (0,360): if x<160: uart.write(string1+'\r\n') elif x>160: uart.write(string2+'\r\n') else: uart.write(string5+'\r\n') for j in (0,240): if x<120: uart.write(string3+'\r\n') elif x>120: uart.write(string4+'\r\n') else: uart.write(string5+'\r\n') while(True): clock.tick() img = sensor.snapshot() img.draw_cross(160,120) blobs = img.find_blobs([black_threshold]) if blobs: print('sum : %d'% len(blobs)) out_str = '[' for b in blobs: img.draw_rectangle(b[0:4]) # rect img.draw_cross(b[5], b[6]) # cx, cy x = b[5] y = b[6] a=b[0]+b[1] c=b[1]+b[3] out_str += '(%d,%d)' % (x,y) out_str += ']' print(out_str) if b[2]>b[3]: if 160<a: uart.write(string1+'\r\n') elif 160>a: uart.write(string2+'\r\n') else: uart.write(string5+'\r\n') else: if 120<c: uart.write(string4+'\r\n') elif 120>c: uart.write(string3+'\r\n') else: uart.write(string5+'\r\n') 这个图片是彩色图的黑线识别,但是识别不了
这个图片是您说的那个直线识别的程序跑出来的,openmv图像上标出的直线是乱的 -
识别黑色的阈值问题发布在 OpenMV Cam
识别黑色,设置阈值,是使用black_threshold =(100,59,33,-100,-128,30),还是GRAYSCALE_THRESHOLD = [(0, 64)],如果用灰度图的话,就红色也会当成黑色识别,这个问题怎么解决。同时,如何在不同颜色的干扰下识别指定宽度的黑色直线,如0.5cm的黑色直线
-
openmv与arduino之间的uart串口通信怎么写发布在 OpenMV Cam
就是先从arduino向openmv发送数据,openmv就收到信号后执行程序,然后上传数据给arduino,我能用的语句都用了,还是出错,就是arduino发出的信号openmv无法接受,请教一下
Untitled - By: xuping - 周日 5月 20 2018
import sensor, image, time, pyb
from pyb import UART
import json
import mathblack_threshold =(100,59,33,-100,-128,30)
red_threshold =(0,100,8,127,-128,127)
sensor.reset() # Initialize the camera sensor.
sensor.set_pixformat(sensor.RGB565) # use RGB565.
sensor.set_framesize(sensor.QVGA) # use QQVGA for speed.
sensor.skip_frames(10) # Let new settings take affect.
sensor.set_auto_whitebal(False) # turn this off.
clock = time.clock() # Tracks FPS.uart = UART(3, 9600)
uart.init(9600, bits=8, parity=None, stop=1)
while(True):if uart.any(): #判断是否有数据, 有的话就读入 tmp_data = uart.readall() print(tmp_data)string1="R"
string2="L"
string3="U"
string5="S"
string4="D"
#定义点的函数
class Point:
def init(self,x=0,y=0):
self.x=x
self.y=y
def getx(self):
return self.x
def gety(self):
return self.yclass Getlen:
def init(self,p1,p2):
self.x=p1.getx()-p2.getx()
self.y=p1.gety()-p2.gety()
#用math.sqrt()求平方根
self.len= math.sqrt((self.x2)+(self.y2))
#定义得到直线长度的函数
def getlen(self):
return self.lenif tmp_data:
while(True):
clock.tick()
img = sensor.snapshot()
img.draw_cross(160,120)
blobs = img.find_blobs([red_threshold], area_threshold=128)
if blobs:
print('sum : %d'% len(blobs))
out_str = '['
for b in blobs:
img.draw_rectangle(b[0:4]) # rect
img.draw_cross(b[5], b[6]) # cx, cy
x = b[5]
y = b[6]
p1=Point(b[5],b[6])
p2=Point(160,120)
l=Getlen(p1,p2)
#获取两点之间直线的长度print(l.getlen()) img.get_pixel(x,y) out_str += '(%d,%d)' % (x,y) out_str += ']' print(out_str) uart.write(out_str+'\r\n') uart.write(l.getlen()) uart = UART(3, 9600) for i in (0,360): if x<160: uart.write(string1+'\r\n') elif x>160: uart.write(string2+'\r\n') else: uart.write(string5+'\r\n') for j in (0,240): if x<120: uart.write(string3+'\r\n') elif x>120: uart.write(string4+'\r\n') else: uart.write(string5+'\r\n')else:
while(True):
    clock.tick()
    img = sensor.snapshot()
    img.draw_cross(160,120)

    blobs = img.find_blobs([black_threshold])
    if blobs:
        print('sum : %d'% len(blobs))
        out_str = '['
        for b in blobs:
            img.draw_rectangle(b[0:4]) # rect
            img.draw_cross(b[5], b[6]) # cx, cy
            x = b[5]
            y = b[6]
            img.get_pixel(x,y)
            out_str += '(%d,%d)' % (x,y)

        out_str += ']'
        print(out_str)


        if x<160:
           text = "right\n"
        elif x>160:
           text = "left\n"
        else:
           text = "stop\n"
        for b in blobs:
            img.draw_rectangle(b[0:4]) # rect
            img.draw_cross(b[5], b[6]) # cx, cy
            x = b[5]
            y = b[6]
            p1=Point(b[5],b[6])
            p2=Point(160,120)
            l=Getlen(p1,p2)
               #获取两点之间直线的长度

            print(l.getlen())
            img.get_pixel(x,y)
            out_str += '(%d,%d)' % (x,y)

        out_str += ']'
        print(out_str)

        uart.write(out_str+'\r\n')
        uart.write(l.getlen())

        uart = UART(3, 9600)
        for i in (0,360):
           if x<160:
               uart.write(string1+'\r\n')
           elif x>160:
               uart.write(string2+'\r\n')
           else:
               uart.write(string5+'\r\n')
           for j in (0,240):
               if x<120:
                   uart.write(string3+'\r\n')
               elif x>120:
                   uart.write(string4+'\r\n')
               else:
                   uart.write(string5+'\r\n')


while(True):
    clock.tick()
    img = sensor.snapshot()

    img.draw_cross(160,120)
    blobs = img.find_blobs([black_threshold])
    if blobs:
        print('sum : %d'% len(blobs))
        out_str = '['
        for b in blobs:
            img.draw_rectangle(b[0:4]) # rect
            img.draw_cross(b[5], b[6]) # cx, cy
            x = b[5]
            y = b[6]
            a=b[0]+b[1]
            c=b[1]+b[3]
            out_str += '(%d,%d)' % (x,y)
        out_str += ']'
        print(out_str)

        if b[2]>b[3]:

           if 160<a:
               uart.write(string1+'\r\n')
           elif 160>a:
               uart.write(string2+'\r\n')
           else:
               uart.write(string5+'\r\n')
        else:

           if 120<c:
               uart.write(string4+'\r\n')
           elif 120>c:
               uart.write(string3+'\r\n')
           else:
               uart.write(string5+'\r\n')
#uart.write(out_str+'\r\n')
#uart.write()
#print(out_str)arduino程序
#include <SoftwareSerial.h>SoftwareSerial softSerial(10, 11); // RX, TX
typedef struct
{
int data[50][2] = {{0,0}};
int len = 0;
}List;
List list;void setup() {
// put your setup code here, to run once:
softSerial.begin(9600);
Serial.begin(9600);
}void loop() {
//Serial.write(45);
// int bytesSent = Serial.write("hello");
if(softSerial.available())
{
getList();
for (int i=0; i<list.len; i++)
{
Serial.print(list.data[i][0]);
Serial.print('\t');
Serial.println(list.data[i][1]);
}
Serial.println("============");
clearList();
}}
String detectString()
{
while(softSerial.read() != '{');
return(softSerial.readStringUntil('}'));
}
void clearList()
{
memset(list.data, sizeof(list.data),0);
list.len = 0;
}
void getList()
{
String s = detectString();
String numStr = "";
for(int i = 0; i<s.length(); i++)
{
if(s[i]=='('){
numStr = "";
}
else if(s[i] == ','){
list.data[list.len][0] = numStr.toInt();
numStr = "";
}
else if(s[i]==')'){
list.data[list.len][1] = numStr.toInt();
numStr = "";
list.len++;
}
else{
numStr += s[i];
}
}
} -
RE: NameError:name 'pyb'is not found.这是错误提示。怎样用I2C和arduino进行交流,发布在 OpenMV Cam
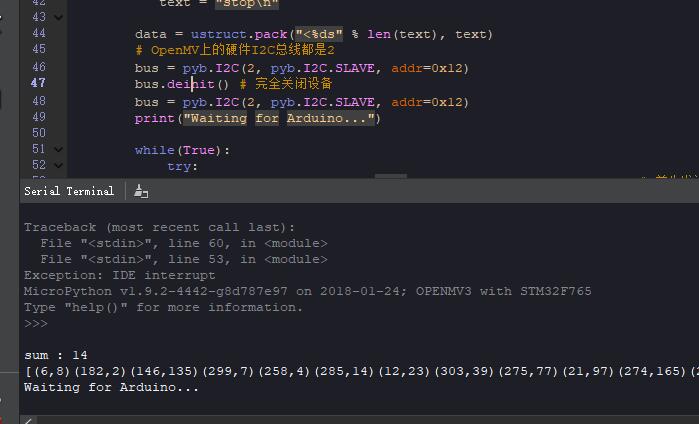
加上了,是可以的 但是后面用I2C传送数据,由于程序的问题,出了错误,一直图像不更新,信息无法上传,程序运行的时候出现‘I2C’is not defind.并且运行程序后一直显示waiting for arduino...就走不下去了```
请在这里粘贴代码Untitled - By: xuping - 周日 5月 27 2018
import sensor, image, time
import pyb
from pyb import I2C
import ustructsensor.reset() # Initialize the camera sensor.
sensor.set_pixformat(sensor.RGB565) # use RGB565.
sensor.set_framesize(sensor.QVGA) # use QVGA for speed.
sensor.skip_frames(10) # Let new settings take affect.
sensor.set_auto_whitebal(False) # turn this off.
clock = time.clock() # Tracks FPS.red_threshold =(0,100,8,127,-128,127)
black_threshold =(100,59,33,-100,-128,30)data = i2c.recv(3) # 建立一个缓存区
#data=1
if data:
while(True):
    clock.tick()
    img = sensor.snapshot()
    img.draw_cross(160,120)
    blobs = img.find_blobs([red_threshold], area_threshold=128)
    if blobs:
        print('sum : %d'% len(blobs))
        out_str = '['
        for b in blobs:
            img.draw_rectangle(b[0:4]) # rect
            img.draw_cross(b[5], b[6]) # cx, cy
            x = b[5]
            y = b[6]
            img.get_pixel(x,y)
            out_str += '(%d,%d)' % (x,y)

        out_str += ']'
        print(out_str)

        if x<160:
           text = "right\n"
        elif x>160:
           text = "left\n"
        else:
           text = "stop\n"
        data = ustruct.pack("<%ds" % len(text), text)
        # OpenMV上的硬件I2C总线都是2
        bus = pyb.I2C(2, pyb.I2C.SLAVE, addr=0x12)
        bus.deinit() # 完全关闭设备
        bus = pyb.I2C(2, pyb.I2C.SLAVE, addr=0x12)
        print("Waiting for Arduino...")
        while(True):
            try:
                bus.send(ustruct.pack("<h", len(data)), timeout=10000) # 首先发送长度 (16-bits).
                try:
                    bus.send(data, timeout=10000) # 然后发送数据
                    print("Sent Data!") # 没有遇到错误时,会显示
                except OSError as err:
                    pass # 不用担心遇到错误,会跳过
                    # 请注意,有3个可能的错误。 超时错误(timeout error),
                    # 通用错误(general purpose error)或繁忙错误
                    #(busy error)。 “err.arg[0]”的错误代码分别
                    # 为116,5,16。
            except OSError as err:
                pass
        if y<120:
           text = "up\n"
        if y<120:
           text = "down\n"
        else:
           text = "stop\n"
        data = ustruct.pack("<%ds" % len(text), text)
        # OpenMV上的硬件I2C总线都是2
        bus = pyb.I2C(2, pyb.I2C.SLAVE, addr=0x12)
        bus.deinit() # 完全关闭设备
        bus = pyb.I2C(2, pyb.I2C.SLAVE, addr=0x12)
        print("Waiting for Arduino...")
        while(True):
            try:
                bus.send(ustruct.pack("<h", len(data)), timeout=10000) # 首先发送长度 (16-bits).
                try:
                    bus.send(data, timeout=10000) # 然后发送数据
                    print("Sent Data!") # 没有遇到错误时,会显示
                except OSError as err:
                    pass
            except OSError as err:
                pass
print(out_str)
else:
while(True):
clock.tick()
img = sensor.snapshot()img.draw_cross(160,120) blobs = img.find_blobs(black_threshold) if blobs: print('sum : %d'% len(blobs)) out_str = '[' for b in blobs: img.draw_rectangle(b[0:4]) # rect img.draw_cross(b[5], b[6]) # cx, cy x = b[5] y = b[6] img.get_pixel(x,y) out_str += '(%d,%d)' % (x,y) out_str += ']' print(out_str) if x<160: text = "right\n" elif x>160: text = "left\n" else: text = "stop\n" data = ustruct.pack("<%ds" % len(text), text) # OpenMV上的硬件I2C总线都是2 bus = pyb.I2C(2, pyb.I2C.SLAVE, addr=0x12) bus.deinit() # 完全关闭设备 bus = pyb.I2C(2, pyb.I2C.SLAVE, addr=0x12) print("Waiting for Arduino...") while(True): try: bus.send(ustruct.pack("<h", len(data)), timeout=10000) # 首先发送长度 (16-bits). try: bus.send(data, timeout=10000) # 然后发送数据 print("Sent Data!") # 没有遇到错误时,会显示 except OSError as err: pass except OSError as err: pass if y<120: text = "up\n" if y>120: text = "down\n" else: text = "stop\n" data = ustruct.pack("<%ds" % len(text), text) # OpenMV上的硬件I2C总线都是2 bus = pyb.I2C(2, pyb.I2C.SLAVE, addr=0x12) bus.deinit() # 完全关闭设备 bus = pyb.I2C(2, pyb.I2C.SLAVE, addr=0x12) print("Waiting for Arduino...") while(True): try: bus.send(ustruct.pack("<h", len(data)), timeout=10000) # 首先发送长度 (16-bits). try: bus.send(data, timeout=10000) # 然后发送数据 print("Sent Data!") # 没有遇到错误时,会显示 except OSError as err: pass except OSError as err: pass while(True): clock.tick() img = sensor.snapshot() img.draw_cross(160,120) blobs = img.find_blobs([GRAYSCALE_THRESHOLD]) if blobs: print('sum : %d'% len(blobs)) out_str = '[' for b in blobs: img.draw_rectangle(b[0:4]) # rect img.draw_cross(b[5], b[6]) # cx, cy x = b[5] y = b[6] img.get_pixel(x,y) out_str += '(%d,%d)' % (x,y) out_str += ']' print(out_str) if b[2]>b[3]: a=b[0]+b[1] if 160<a: text = "right\n" elif 160>a: text = "left\n" else: text = "stop\n" else: c=b[1]+b[3] if 120<c: text = "down\n" elif 120>c: text = "up\n" else: text = "stop\n" data = ustruct.pack("<%ds" % len(text), text) # OpenMV上的硬件I2C总线都是2 bus = pyb.I2C(2, pyb.I2C.SLAVE, addr=0x12) bus.deinit() # 完全关闭设备 bus = pyb.I2C(2, pyb.I2C.SLAVE, addr=0x12) print("Waiting for Arduino...") while(True): try: bus.send(ustruct.pack("<h", len(data)), timeout=10000) # 首先发送长度 (16-bits). try: bus.send(data, timeout=10000) # 然后发送数据 print("Sent Data!") # 没有遇到错误时,会显示 except OSError as err: pass except OSError as err: pass
-
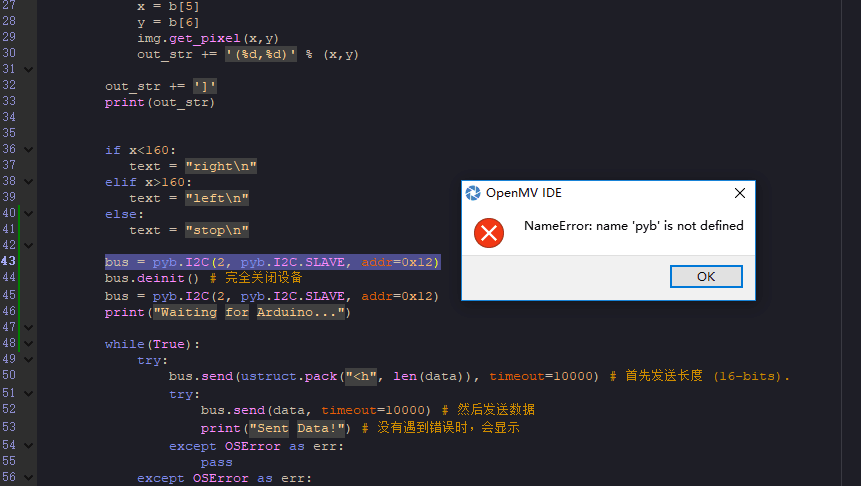
NameError:name 'pyb'is not found.这是错误提示。怎样用I2C和arduino进行交流,发布在 OpenMV Cam
import sensor, image, time
from pyb import I2C
import ustruct
sensor.reset()
sensor.set_pixformat(sensor.RGB565) # grayscale is faster
sensor.set_framesize(sensor.QVGA)
sensor.skip_frames(time = 2000)
clock = time.clock()
black_threshold =(100,59,33,-100,-128,30)while(True):
clock.tick()
img = sensor.snapshot()img.draw_cross(160,120) blobs = img.find_blobs([black_threshold]) if blobs: print('sum : %d'% len(blobs)) out_str = '[' for b in blobs: img.draw_rectangle(b[0:4]) # rect img.draw_cross(b[5], b[6]) # cx, cy x = b[5] y = b[6] img.get_pixel(x,y) out_str += '(%d,%d)' % (x,y) out_str += ']' print(out_str) if x<160: text = "right\n" elif x>160: text = "left\n" else: text = "stop\n" bus = pyb.I2C(2, pyb.I2C.SLAVE, addr=0x12) bus.deinit() # 完全关闭设备 bus = pyb.I2C(2, pyb.I2C.SLAVE, addr=0x12) print("Waiting for Arduino...") while(True): try: bus.send(ustruct.pack("<h", len(data)), timeout=10000) # 首先发送长度 (16-bits). try: bus.send(data, timeout=10000) # 然后发送数据 print("Sent Data!") # 没有遇到错误时,会显示 except OSError as err: pass except OSError as err: pass if y<120: text = "up\n" if y<120: text = "down\n" else: text = "stop\n" data = ustruct.pack("<%ds" % len(text), text) # OpenMV上的硬件I2C总线都是2 bus = pyb.I2C(2, pyb.I2C.SLAVE, addr=0x12) bus.deinit() # 完全关闭设备 bus = pyb.I2C(2, pyb.I2C.SLAVE, addr=0x12) print("Waiting for Arduino...") while(True): try: bus.send(ustruct.pack("<h", len(data)), timeout=10000) # 首先发送长度 (16-bits). try: bus.send(data, timeout=10000) # 然后发送数据 print("Sent Data!") # 没有遇到错误时,会显示 except OSError as err: pass except OSError as err: passwhile(True):
clock.tick()
img = sensor.snapshot()img.draw_cross(160,120) blobs = img.find_blobs([GRAYSCALE_THRESHOLD]) if blobs: print('sum : %d'% len(blobs)) out_str = '[' for b in blobs: img.draw_rectangle(b[0:4]) # rect img.draw_cross(b[5], b[6]) # cx, cy x = b[5] y = b[6] img.get_pixel(x,y) out_str += '(%d,%d)' % (x,y) out_str += ']' print(out_str) if b[2]>b[3]: a=b[0]+b[1] if 160<a: text = "right\n" elif 160>a: text = "left\n" else: text = "stop\n" else: c=b[1]+b[3] if 120<c: text = "down\n" elif 120>c: text = "up\n" else: text = "stop\n" data = ustruct.pack("<%ds" % len(text), text) # OpenMV上的硬件I2C总线都是2 bus = pyb.I2C(2, pyb.I2C.SLAVE, addr=0x12) bus.deinit() # 完全关闭设备 bus = pyb.I2C(2, pyb.I2C.SLAVE, addr=0x12) print("Waiting for Arduino...") while(True): try: bus.send(ustruct.pack("<h", len(data)), timeout=10000) # 首先发送长度 (16-bits). try: bus.send(data, timeout=10000) # 然后发送数据 print("Sent Data!") # 没有遇到错误时,会显示 except OSError as err: pass except OSError as err: pass
请在这里粘贴代码
 就是这个图片