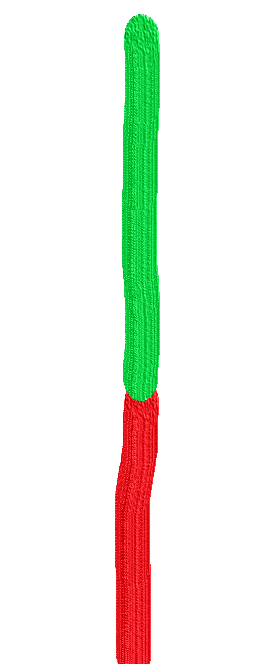
请问像是一条线上两种颜色的巡线该如何实现?
-

R_THRESHOLD = (59, 25, 127, 19, -128, 89)
G_THRESHOLD = (0, 100, -69, -32, -47, 82)
import sensor, image, time,lcd
from pyb import LED
from pyb import UART
import ustruct


LED(1).on()
LED(2).on()
LED(3).on()

uart = UART(3,115200,bits=8, parity=None, stop=1, timeout_char = 1000)
sensor.reset()
sensor.set_pixformat(sensor.RGB565)
sensor.set_framesize(sensor.QQQVGA) # 80x60 (4,800 pixels) - O(N^2) max = 2,3040,000.
lcd.init() # Initialize the lcd screen.
sensor.set_vflip(True)
sensor.set_hmirror(True)
#sensor.set_windowing([0,20,80,40])
sensor.skip_frames(time = 2000)     # WARNING: If you use QQVGA it may take seconds
clock = time.clock()
              # to process a frame sometimes.
def sending_data(data1,data2):
    global uart;
    data=bytearray([0xA5,data1,data2,0XA6])
    '''data1= ustruct.pack("<bbb",      #格式为俩个字符俩个短整型(2字节)
                   0xA5,                      #帧头
                   data1,
                   data2,
                   0xA6
                   )     '''   #数组大小为7,其中2,3,4,5为有效数据,0,1,6为帧头帧尾
    uart.write(data);   #必须要传入一个字节数组
    #print("head",data[0],"status",data[1],"tail",data[2])

while(True):
    clock.tick()
    img = sensor.snapshot().binary([R_THRESHOLD] )
    #img.mean(0)
    line = img.get_regression([(100,100)], robust = True)

    #img.midpoint(1, bias=0.5, threshold=True, offset=5, invert=True)
    if (line):
        '''rho_err = abs(line.rho())-img.width()/2
        if line.theta()>90:
            theta_err = line.theta()-180
        else:
            theta_err = line.theta()
        img.draw_line(line.line(), color = 127)
        print(rho_err,theta_err)
        if line.magnitude()>8:
          sending_data((int)(rho_err),(int)(theta_err))'''

        rho_err = abs(line.rho())
        theta_err = line.theta()
        img.draw_line(line.line(), color = 127)

        if line.magnitude()>8:
            sending_data((int)(rho_err),(int)(theta_err))
        rho_err_temp = abs(line.rho())-img.width()/2
        if line.theta()>90:
            theta_err_temp = line.theta()-180
        else:
            theta_err_temp = line.theta()
        print(rho_err_temp,theta_err_temp,line.magnitude())

        pass
    lcd.display(img)
    #print(clock.fps())
-
binary本来就支持多个阈值,阈值数组设置成[(蓝色阈值),(红色阈值)],就完事了。
-
请问是如何操作呢?直接thresholds = [(颜色阈值),颜色阈值,颜色阈值]的话
img = sensor.snapshot().binary([THRESHOLDS])
这里就是报错TypeError: can't convert tuple to int
-
R_THRESHOLD = (59, 25, 127, 19, -128, 89)
G_THRESHOLD = (0, 100, -69, -32, -47, 82)img = sensor.snapshot().binary([R_THRESHOLD, G_THRESHOLD] )