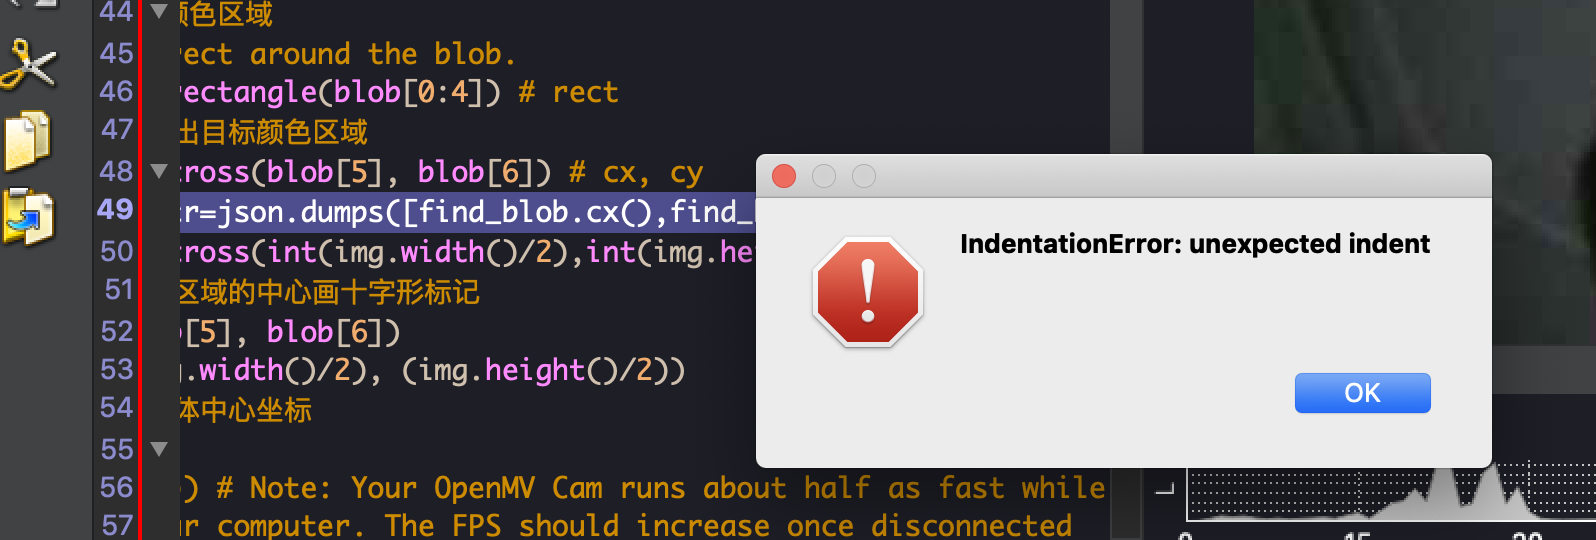
给arduino发送色块中心的坐标 提示代码有错误?
-
我想给arduino发送色块中心的坐标 提示错误?
for blob in blobs:
#迭代找到的目标颜色区域
# Draw a rect around the blob.
img.draw_rectangle(blob[0:4]) # rect
#用矩形标记出目标颜色区域
img.draw_cross(blob[5], blob[6]) # cx, cy
output_str="[%d,%d]" % (blob.cx(),blob.cy()) #方式1
img.draw_cross(int(img.width()/2),int(img.height()/2))
#在目标颜色区域的中心画十字形标记
print(blob[5], blob[6])
print((img.width()/2), (img.height()/2))
#输出目标物体中心坐标
-
如果涉及代码,需要报错提示与全部代码文本,请注意不要贴代码图片
-
全部代码文本,我可以运行的那种。
-
此回复已被删除!
-
@kidswong999 # Blob Detection Example
这个例子展示了如何使用find_blobs函数来查找图像中的颜色色块。这个例子特别寻找深绿色的物体。
import sensor, image, time
from pyb import UART
import json为了使色彩追踪效果真的很好,你应该在一个非常受控制的照明环境中。
green_threshold = (30, 100, 15, 127, 15, 127)
#设置绿色的阈值,括号里面的数值分别是L A B 的最大值和最小值(minL, maxL, minA,maxA, minB, maxB),LAB的值在图像左侧三个坐标图中选取。如果是灰度图,则只需
#设置(min, max)两个数字即可。
You may need to tweak the above settings for tracking green things...
Select an area in the Framebuffer to copy the color settings.
sensor.reset() # Initialize the camera sensor.
sensor.set_pixformat(sensor.RGB565) # use RGB565.
sensor.set_framesize(sensor.QQVGA) # use QQVGA for speed.
sensor.skip_frames(10) # Let new settings take affect.
sensor.set_auto_whitebal(False) # turn this off.
#关闭白平衡。白平衡是默认开启的,在颜色识别中,需要关闭白平衡。
clock = time.clock() # Tracks FPS.uart = UART(3, 115200)
while(True):
clock.tick() # Track elapsed milliseconds between snapshots().
img = sensor.snapshot() # Take a picture and return the image.blobs = img.find_blobs([green_threshold]) #find_blobs(thresholds, invert=False, roi=Auto),thresholds为颜色阈值, #是一个元组,需要用括号[ ]括起来。invert=1,反转颜色阈值,invert=False默认 #不反转。roi设置颜色识别的视野区域,roi是一个元组, roi = (x, y, w, h),代表 #从左上顶点(x,y)开始的宽为w高为h的矩形区域,roi不设置的话默认为整个图像视野。 #这个函数返回一个列表,[0]代表识别到的目标颜色区域左上顶点的x坐标,[1]代表 #左上顶点y坐标,[2]代表目标区域的宽,[3]代表目标区域的高,[4]代表目标 #区域像素点的个数,[5]代表目标区域的中心点x坐标,[6]代表目标区域中心点y坐标, #[7]代表目标颜色区域的旋转角度(是弧度值,浮点型,列表其他元素是整型), #[8]代表与此目标区域交叉的目标个数,[9]代表颜色的编号(它可以用来分辨这个 #区域是用哪个颜色阈值threshold识别出来的)。 if blobs: #如果找到了目标颜色 for blob in blobs: #迭代找到的目标颜色区域 # Draw a rect around the blob. img.draw_rectangle(blob[0:4]) # rect #用矩形标记出目标颜色区域 img.draw_cross(blob[5], blob[6]) # cx, cy output_str=json.dumps([find_blob.cx(),find_blob.cy()]) #方式2 img.draw_cross(int(img.width()/2),int(img.height()/2)) #在目标颜色区域的中心画十字形标记 print(blob[5], blob[6]) print((img.width()/2), (img.height()/2)) #输出目标物体中心坐标 #print(clock.fps()) # Note: Your OpenMV Cam runs about half as fast while # connected to your computer. The FPS should increase once disconnected
-

很明显缩进问题