如何修改云台來跟踪數字?
-
我只嘗試將兩個代碼合併在一起。template_matching.py
blobs = img.find_blobs([red_threshold])->
blobs = img.find_template(template, 0.70, step=4, search=SEARCH_EX) #, roi=(10, 0, 60, 60))但它有幾個錯誤。max_blob, cx,cy
find_blobs and find_template return 不同的參數......import sensor, image, time
from pid import PID
from pyb import Servopan_servo=Servo(1)
tilt_servo=Servo(2)red_threshold = (13, 49, 18, 61, 6, 47)
pan_pid = PID(p=0.07, i=0, imax=90) #脱机运行或者禁用图像传输,使用这个PID
tilt_pid = PID(p=0.05, i=0, imax=90) #脱机运行或者禁用图像传输,使用这个PID
#pan_pid = PID(p=0.1, i=0, imax=90)#在线调试使用这个PID
#tilt_pid = PID(p=0.1, i=0, imax=90)#在线调试使用这个PIDsensor.reset() # Initialize the camera sensor.
sensor.set_pixformat(sensor.RGB565) # use RGB565.
sensor.set_framesize(sensor.QQVGA) # use QQVGA for speed.
sensor.skip_frames(10) # Let new settings take affect.
sensor.set_auto_whitebal(False) # turn this off.
clock = time.clock() # Tracks FPS.def find_max(blobs):
max_size=0
for blob in blobs:
if blob[2]*blob[3] > max_size:
max_blob=blob
max_size = blob[2]*blob[3]
return max_blobwhile(True):
clock.tick() # Track elapsed milliseconds between snapshots().
img = sensor.snapshot() # Take a picture and return the image.blobs = img.find_blobs([blue_threshold]) if blobs: max_blob = find_max(blobs) pan_error = max_blob.cx()-img.width()/2 tilt_error = max_blob.cy()-img.height()/2 print("pan_error: ", pan_error) img.draw_rectangle(max_blob.rect()) # rect img.draw_cross(max_blob.cx(), max_blob.cy()) # cx, cy pan_output=pan_pid.get_pid(pan_error,1)/2 tilt_output=tilt_pid.get_pid(tilt_error,1) print("pan_output",pan_output) pan_servo.angle(pan_servo.angle()+pan_output) tilt_servo.angle(tilt_servo.angle()-tilt_output)
-
视频教程24 - 追其他物体的云台(人脸、Apriltag、圆形等):https://singtown.com/video
看一下如何追踪其他物体。
-
謝謝,我昨天看過它,而且我使用了find_keypoint。 但反應並不好。
我可以使用find_number嗎?
-
並且find_point並不容易,在我開始之前,需要在相機前放一個數字。
-
find_number目前3.0.0的固件已经删除这个函数了。可以用模版匹配试试。
-
模版匹配需要固定距離和大小...
find_keypoint 可以接受的。 但是我可以提前保存關鍵點而不是每次設置嗎?
下面是使用find_keypoint的代碼。 它工作正常import sensor, image, time
from pid import PID
from pyb import Servopan_servo=Servo(1)
tilt_servo=Servo(2)red_threshold = (13, 49, 18, 61, 6, 47)
#pan_pid = PID(p=0.07, i=0, imax=90) #脱机运行或者禁用图像传输,使用这个PID
#tilt_pid = PID(p=0.05, i=0, imax=90) #脱机运行或者禁用图像传输,使用这个PID
pan_pid = PID(p=0.1, i=0, imax=90)#在线调试使用这个PID
tilt_pid = PID(p=0.1, i=0, imax=90)#在线调试使用这个PIDReset sensor
sensor.reset()
#sensor.set_vflip(True)
#sensor.set_hmirror(True)
#sensor.rotation()Sensor settings
sensor.set_contrast(3)
sensor.set_gainceiling(16)
sensor.set_framesize(sensor.VGA)
sensor.set_windowing((320, 240))
sensor.set_pixformat(sensor.GRAYSCALE)sensor.skip_frames(time = 2000)
sensor.set_auto_gain(False, value=100)def draw_keypoints(img, kpts):
if kpts:
print(kpts)
img.draw_keypoints(kpts)
img = sensor.snapshot()
time.sleep(1000)kpts1 = None
NOTE: uncomment to load a keypoints descriptor from file
#kpts1 = image.load_descriptor("/desc.orb")
#img = sensor.snapshot()
#draw_keypoints(img, kpts1)clock = time.clock()
print("Test_start")
while(True):
clock.tick() # Track elapsed milliseconds between snapshots().
img = sensor.snapshot() # Take a picture and return the image.if (kpts1 == None): # NOTE: By default find_keypoints returns multi-scale keypoints extracted from an image pyramid. kpts1 = img.find_keypoints(max_keypoints=150, threshold=10, scale_factor=1.2) draw_keypoints(img, kpts1) else: # NOTE: When extracting keypoints to match the first descriptor, we use normalized=True to extract # keypoints from the first scale only, which will match one of the scales in the first descriptor. kpts2 = img.find_keypoints(max_keypoints=150, threshold=10, normalized=True) if (kpts2): match = image.match_descriptor(kpts1, kpts2, threshold=85) if (match.count()>10): # If we have at least n "good matches" # Draw bounding rectangle and cross. img.draw_rectangle(match.rect()) img.draw_cross(match.cx(), match.cy(), size=10) pan_error = match.cx()-img.width()/2 tilt_error = match.cy()-img.height()/2print("pan_error: ", pan_error)
            pan_output=pan_pid.get_pid(pan_error,1)/2
            tilt_output=tilt_pid.get_pid(tilt_error,1)
print("pan_output",pan_output)
            pan_servo.angle(pan_servo.angle()+pan_output)
            tilt_servo.angle(tilt_servo.angle()-tilt_output)
print(kpts2, "matched:%d dt:%d"%(match.count(), match.theta()))
        # NOTE: uncomment if you want to draw the keypoints
        #img.draw_keypoints(kpts2, size=KEYPOINTS_SIZE, matched=True)

# Draw FPS
img.draw_string(0, 0, "FPS:%.2f"%(clock.fps()))
-
但如果背景混亂,keypoint功能並不好. find_number 即將推出?
-
find_keypoint可以提前保存特征,例程里有写到。
因为3.0.0固件支持了cnn lenet数字识别神经网络,所以删除了find_number函数。
但是OpenMV ide内置的lenet模型对于OpenMV3 F7来说比较大,会超内存。
以前的find_number函数效果也不是很好,容易误判。如果背景复杂,你可以先采用其他算法大致确定数字的区域,在区域roi内再进行特征点匹配。
-
blob and keypoint 是不同的。 如何使用最大尺寸?
def find_max(kpts2):
max_size=0
for blob in kpts2:
if blob.size() > max_size:
max_blob=blob
max_size = blob.size()
return max_blob
-

-
import sensor, image, time

from pid import PID
from pyb import Servo

pan_servo=Servo(1)
tilt_servo=Servo(2)

red_threshold  = (13, 49, 18, 61, 6, 47)

pan_pid = PID(p=0.07, i=0, imax=90) #脱机运行或者禁用图像传输,使用这个PID
tilt_pid = PID(p=0.05, i=0, imax=90) #脱机运行或者禁用图像传输,使用这个PID
#pan_pid = PID(p=0.1, i=0, imax=90)#在线调试使用这个PID
#tilt_pid = PID(p=0.1, i=0, imax=90)#在线调试使用这个PID

sensor.reset() # Initialize the camera sensor.
sensor.set_contrast(1)
sensor.set_gainceiling(16)
sensor.set_pixformat(sensor.RGB565) # use RGB565.
sensor.set_framesize(sensor.QQVGA) # use QQVGA for speed.
sensor.skip_frames(10) # Let new settings take affect.
sensor.set_auto_whitebal(False) # turn this off.
clock = time.clock() # Tracks FPS.

face_cascade = image.HaarCascade("frontalface", stages=25)

def find_max(blobs):
    max_size=0
    for blob in blobs:
        if blob[2]*blob[3] > max_size:
            max_blob=blob
            max_size = blob[2]*blob[3]
    return max_blob


while(True):
    clock.tick() # Track elapsed milliseconds between snapshots().
    img = sensor.snapshot() # Take a picture and return the image.

    blobs = img.find_features(face_cascade, threshold=0.75, scale=1.35)
    if blobs:
        max_blob = find_max(blobs)
        pan_error = max_blob[0]+max_blob[2]/2-img.width()/2
        tilt_error = max_blob[1]+max_blob[3]/2-img.height()/2

        print("pan_error: ", pan_error)

        img.draw_rectangle(max_blob) # rect
        img.draw_cross(max_blob[0]+max_blob[2]/2, max_blob[1]+max_blob[3]/2) # cx, cy

        pan_output=pan_pid.get_pid(pan_error,1)/2
        tilt_output=tilt_pid.get_pid(tilt_error,1)
        print("pan_output",pan_output)
        pan_servo.angle(pan_servo.angle()+pan_output)
        tilt_servo.angle(tilt_servo.angle()-tilt_output)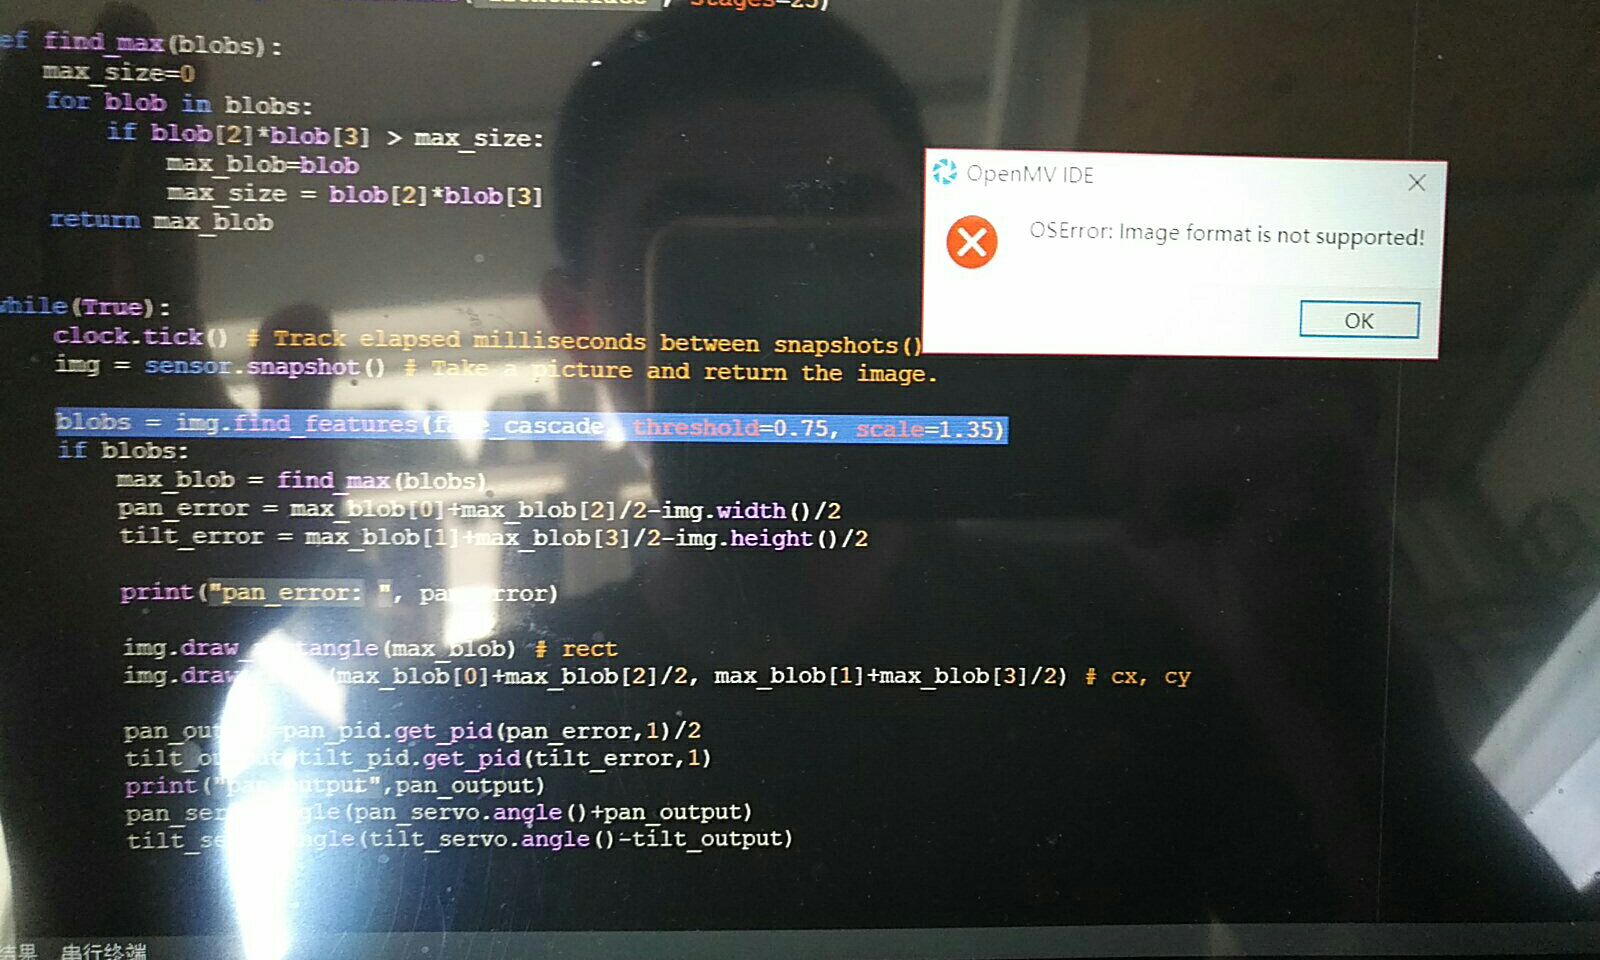
-
想问楼主最后是用什么实现精准识别的哇