系统迁移中,暂时无法访问,所有数据会迁移到新的网站。
OpenMV VSCode 扩展发布了,在插件市场直接搜索OpenMV就可以安装
如果有产品硬件故障问题,比如无法开机,论坛很难解决。可以直接找售后维修。
发帖子之前,请确认看过所有的视频教程,https://singtown.com/learn/ 和所有的上手教程http://book.openmv.cc/
每一个新的提问,单独发一个新帖子
帖子需要目的,你要做什么?
如果涉及代码,需要报错提示与全部代码文本,请注意不要贴代码图片
必看:玩转星瞳论坛了解一下图片上传,代码格式等问题。
图像太亮怎么办
-
获取的图像太亮,导致有颜色的物体也显示成了白色
图: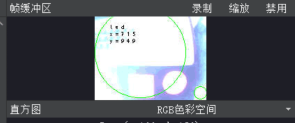
前几天亮度还是正常的
连窗户都能照
但是现在连桌子都照不清楚了
求解答!
-
请先提供出现问题的代码。
你需要先用hello world测试和教程里的程序测试。
-
# Find Rects Example
#
# This example shows off how to find rectangles in the image using the quad threshold
# detection code from our April Tags code. The quad threshold detection algorithm
# detects rectangles in an extremely robust way and is much better than Hough
# Transform based methods. For example, it can still detect rectangles even when lens
# distortion causes those rectangles to look bent. Rounded rectangles are no problem!
# (But, given this the code will also detect small radius circles too)...

import sensor, image, time, lcd

threshold_index = 0 # 0 for red, 1 for green, 2 for blue

# Color Tracking Thresholds (L Min, L Max, A Min, A Max, B Min, B Max)
# The below thresholds track in general red/green/blue things. You may wish to tune them...
thresholds = [(21, 28, -14, -2, -11, 11),# generic_black_thresholds
              (64, 73, 31, 52, 14, 39), # generic_red_thresholds
              (30, 100, -64, -8, -32, 32), # generic_green_thresholds
              (98, 100, -6, 5, -5, 5),# generic_white_thresholds
              (0, 30, 0, 64, -128, 0)] # generic_blue_thresholds
lcd.init() # Initialize the lcd screen.

sensor.reset()
sensor.set_pixformat(sensor.RGB565) # grayscale is faster (160x120 max on OpenMV-M7)
sensor.set_framesize(sensor.QQVGA)
sensor.skip_frames(time = 2000)
clock = time.clock()

sensor.set_auto_gain(False) # must be turned off for color tracking
sensor.set_auto_whitebal(False) # must be turned off for color tracking

while(True):
    clock.tick()
    img = sensor.snapshot()

    # `threshold` below should be set to a high enough value to filter out noise
    # rectangles detected in the image which have low edge magnitudes. Rectangles
    # have larger edge magnitudes the larger and more contrasty they are...
    img.draw_cross(80, 60)

    for c in img.find_circles(threshold = 3900, x_margin = 10, y_margin = 10, r_margin = 10):
        circle_roi = [c.x()-c.r(),c.y()-c.r(),c.x()+c.r(),c.y()+c.r()]
        #for blob in img.find_blobs([thresholds[1]], roi=circle_roi, pixels_threshold=200, area_threshold=200, merge=True):
        img.draw_circle(c.x(), c.y(), c.r(), color = (255, 0, 0))
        img.draw_cross(c.x(), c.y())
        img.draw_string(90,80,'circle',color=(0,0,0))
        img.draw_string(90,90,'r=' + str(c.r()),color=(0,0,0))
        img.draw_string(90,100,'x=' + str(c.x()-80),color=(0,0,0))
        img.draw_string(90,110,'y=' + str(-c.y()+60),color=(0,0,0))

    for r in img.find_rects(threshold = 15000):
        if (r.w()-r.h())<10 and (r.w()-r.h())>-10 :
            img.draw_rectangle(r.rect(), color = (255, 0, 0))
            for p in r.corners(): img.draw_circle(p[0], p[1], 5, color = (0, 255, 0))
            img.draw_string(20,80,'square',color=(0,0,0))
            img.draw_string(20,90,'a=' + str((r.h()+r.w())/2),color=(0,0,0))
            img.draw_string(20,100,'x=' + str(-r.x()+60),color=(0,0,0))
            img.draw_string(20,110,'y=' + str(-r.y()+40),color=(0,0,0))
        print(r)

    for blob in img.find_blobs([thresholds[3]], pixels_threshold=200, area_threshold=200, merge=True):
        img.draw_circle(blob.cx(), blob.cy(), int((blob.h()+blob.w())/4), color = (0, 255, 0))
        img.draw_string(20,10,'led',color=(0,0,0))
        img.draw_string(20,20,'x=' + str(+blob.cx()-80),color=(0,0,0))
        img.draw_string(20,30,'y=' + str(-blob.cy()+60),color=(0,0,0))


    lcd.display(img)
    print("FPS %f" % clock.fps())
-
和环境有关系
sensor.reset()
sensor.set_pixformat(sensor.RGB565) # grayscale is faster (160x120 max on OpenMV-M7)
sensor.set_framesize(sensor.QQVGA)
sensor.skip_frames(time = 2000)

sensor.set_auto_gain(False) # must be turned off for color tracking
sensor.set_auto_whitebal(False) # must be turned off for color tracking
我们仔细看一下这个代码。
首先sensor.reset(),这个时候sensor是什么都不知道的,颜色肯定是不对的。事实上应该是很红。
然后设置RGB565和QQVGA。
然后skip_frames,也就是等待了2s的时间,这段时间内是用来让设置生效,其实也是自动设置sensor的颜色。
最后,关闭自动gain和whitebal。所以,感光元件是有2s的时间来自动调节亮度和颜色的。
经过我的测试,如果我把OpenMV用手盖住,然后运行程序,那么由于2s的自动调节颜色,就会很亮。
如果我照灯给OpenMV,然后运行程序,那么就会暗一些。