为什么关闭了自动曝光,设置了固定曝光时间,但是曝光还是一直在变化
-
程序里关闭了自动曝光,设置了固定的曝光值,但是曝光不是一直按照设置的曝光时间而是有些背景下是很小的曝光很暗的画面,有些时候背景变化就会按照设置的较大曝光值显示亮的画面,请问我想一直保持固定较大的曝光值还要设置些什么吗
import time, sensor, image from image import SEARCH_EX, SEARCH_DS from pyb import UART import json #从imgae模块引入SEARCH_EX和SEARCH_DS。使用from import仅仅引入SEARCH_EX, #SEARCH_DS两个需要的部分,而不把image模块全部引入。 # Reset sensor sensor.reset() # Set sensor settings sensor.set_contrast(1) sensor.set_gainceiling(16) # Max resolution for template matching with SEARCH_EX is QQVGA sensor.set_framesize(sensor.QQVGA) # You can set windowing to reduce the search image. #sensor.set_windowing(((640-80)//2, (480-60)//2, 80, 60)) sensor.set_pixformat(sensor.GRAYSCALE) # Load template. # Template should be a small (eg. 32x32 pixels) grayscale image. template = image.Image("/6.pgm") #加载模板图片 sensor.skip_frames(10) # Let new settings take affect. sensor.set_auto_whitebal(False) # turn this off. sensor.set_auto_exposure(False, \ exposure_us = 20000) sensor.set_auto_gain(True, gain_db_ceiling = 16.0) # Default gain. 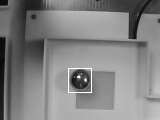
-
-
你的代码不全啊。没法测试。
-
# Template Matching Example - Normalized Cross Correlation (NCC)
#
# This example shows off how to use the NCC feature of your OpenMV Cam to match
# image patches to parts of an image... expect for extremely controlled enviorments
# NCC is not all to useful.
#
# WARNING: NCC supports needs to be reworked! As of right now this feature needs
# a lot of work to be made into somethin useful. This script will reamin to show
# that the functionality exists, but, in its current state is inadequate.

import time, sensor, image
from image import SEARCH_EX, SEARCH_DS
from pyb import UART
import json
#从imgae模块引入SEARCH_EX和SEARCH_DS。使用from import仅仅引入SEARCH_EX,
#SEARCH_DS两个需要的部分,而不把image模块全部引入。

# Reset sensor
sensor.reset()

# Set sensor settings
sensor.set_contrast(1)
sensor.set_gainceiling(16)
# Max resolution for template matching with SEARCH_EX is QQVGA
sensor.set_framesize(sensor.QQVGA)
# You can set windowing to reduce the search image.
#sensor.set_windowing(((640-80)//2, (480-60)//2, 80, 60))
sensor.set_pixformat(sensor.GRAYSCALE)

# Load template.
# Template should be a small (eg. 32x32 pixels) grayscale image.
template = image.Image("/6.pgm")
#加载模板图片
sensor.skip_frames(10) # Let new settings take affect.
sensor.set_auto_whitebal(False) # turn this off.
sensor.set_auto_exposure(False, \
    exposure_us = 5000)

sensor.set_auto_gain(True, gain_db_ceiling = 16.0) # Default gain.


clock = time.clock() # Tracks FPS.


uart = UART(3, 115200)
def find_max(blobs):
    max_size=0
    for blob in blobs:
        if blob.pixels() > max_size:
            max_blob=blob
            max_size = blob.pixels()
    return max_blob
# Run template matching
while (True):
    clock.tick()
    img = sensor.snapshot()

    # find_template(template, threshold, [roi, step, search])
    # ROI: The region of interest tuple (x, y, w, h).
    # Step: The loop step used (y+=step, x+=step) use a bigger step to make it faster.
    # Search is either image.SEARCH_EX for exhaustive search or image.SEARCH_DS for diamond search
    #
    # Note1: ROI has to be smaller than the image and bigger than the template.
    # Note2: In diamond search, step and ROI are both ignored.
    r = img.find_template(template, 0.60, step=4, search=SEARCH_EX) #, roi=(10, 0, 60, 60))
    #find_template(template, threshold, [roi, step, search]),threshold中
    #的0.7是相似度阈值,roi是进行匹配的区域(左上顶点为(10,0),长80宽60的矩形),
    #注意roi的大小要比模板图片大,比frambuffer小。
    #把匹配到的图像标记出来

    if uart.any():
# 判断是否有数据, 有的话就读入
        tmp_data = uart.read(8)
        print(tmp_data)
        print("\r\n")

    if r:
        img.draw_rectangle(r)
        print('sum :', len(r))
        output_str="[%d,%d]" % (r[0],r[1]) #方式1
        #output_str=json.dumps([max_blob.cx(),max_blob.cy()]) #方式2
        print('you send:',output_str)
        uart.write(output_str+'\r\n')
    else:
        print('not found!')
这是一个模板匹配的程序,但是问题是在上面的手动设置曝光那一块,我想曝光稳定在我手动设置的时间上,但是这个曝光会随着背景变化而改变,当我正对着白色背景时不管我设多大的曝光都一直是很暗的画面
-
第37行,自动增益你也得关掉。你的代码没关掉。
你运行一下这个代码;
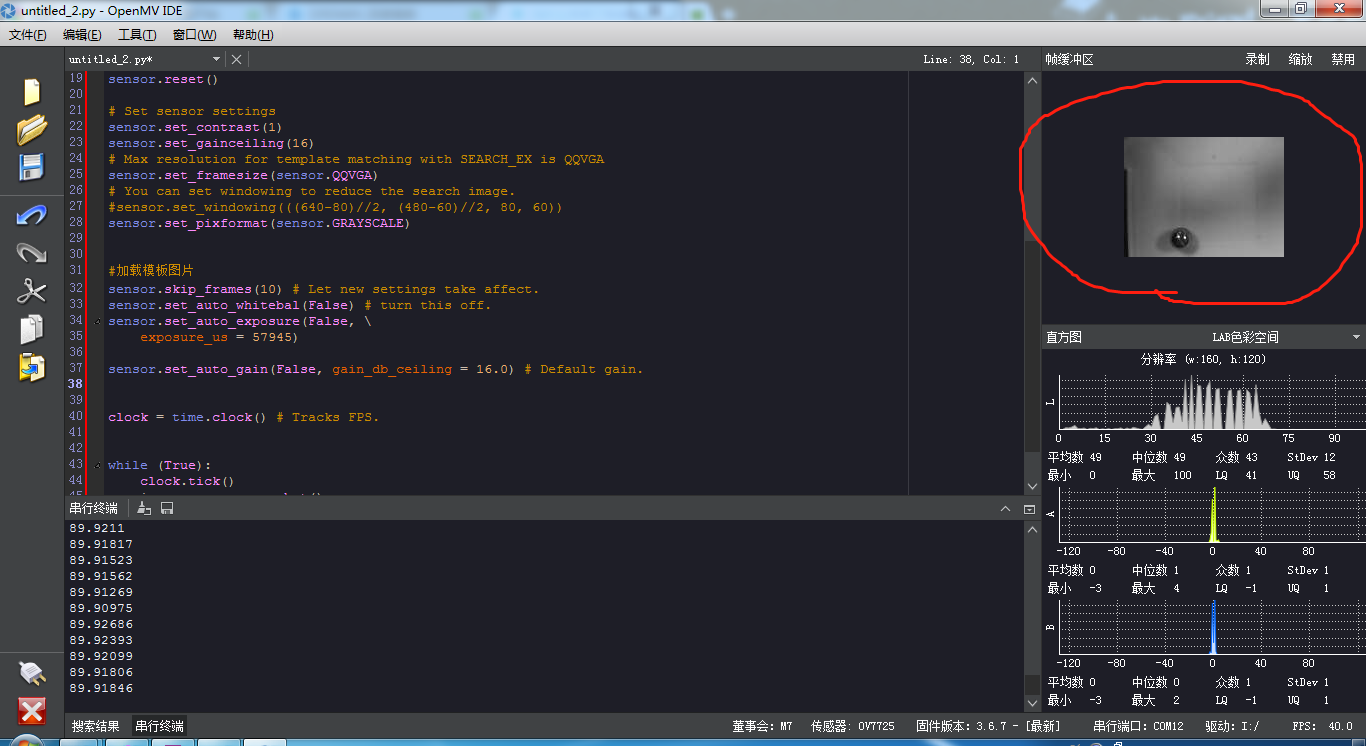
# Template Matching Example - Normalized Cross Correlation (NCC)
#
# This example shows off how to use the NCC feature of your OpenMV Cam to match
# image patches to parts of an image... expect for extremely controlled enviorments
# NCC is not all to useful.
#
# WARNING: NCC supports needs to be reworked! As of right now this feature needs
# a lot of work to be made into somethin useful. This script will reamin to show
# that the functionality exists, but, in its current state is inadequate.

import time, sensor, image
from image import SEARCH_EX, SEARCH_DS
from pyb import UART
import json
#从imgae模块引入SEARCH_EX和SEARCH_DS。使用from import仅仅引入SEARCH_EX,
#SEARCH_DS两个需要的部分,而不把image模块全部引入。

# Reset sensor
sensor.reset()

# Set sensor settings
sensor.set_contrast(1)
sensor.set_gainceiling(16)
# Max resolution for template matching with SEARCH_EX is QQVGA
sensor.set_framesize(sensor.QQVGA)
# You can set windowing to reduce the search image.
#sensor.set_windowing(((640-80)//2, (480-60)//2, 80, 60))
sensor.set_pixformat(sensor.GRAYSCALE)


#加载模板图片
sensor.skip_frames(10) # Let new settings take affect.
sensor.set_auto_whitebal(False) # turn this off.
sensor.set_auto_exposure(False, \
    exposure_us = 37945)

sensor.set_auto_gain(False, gain_db_ceiling = 16.0) # Default gain.


clock = time.clock() # Tracks FPS.


while (True):
    clock.tick()
    img = sensor.snapshot()
    print(clock.fps())
-
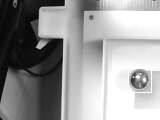
不行,用你的代码还是不管曝光设置多大,照出来的还是很暗,相片里那个白色的底座都没法像我最开始发的第二张图那样变的很亮,上面那两张图移到中间就很暗,移到边上就很亮,就感觉曝光还是在变并且没法达到我想要的亮度
-
你可以改一下第37行的增益。