对于Machine神经网络区域中心识别代码
-
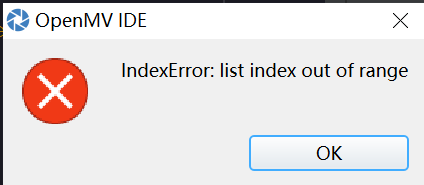 我没运行多久就出现这个问题了
-
如果涉及代码,需要报错提示与全部代码文本,请注意不要贴代码图片
-
而且你用的是什么模型和label。是不是匹配的。
-
# CIFAR-10 Search Just Center Example
#
# CIFAR is a convolutional nueral network designed to classify it's field of view into several
# different object types and works on RGB video data.
#
# In this example we slide the LeNet detector window over the image and get a list of activations
# where there might be an object. Note that use a CNN with a sliding window is extremely compute
# expensive so for an exhaustive search do not expect the CNN to be real-time.

import sensor, image, time, os, nn

sensor.reset()                         # Reset and initialize the sensor.
sensor.set_pixformat(sensor.RGB565)    # Set pixel format to RGB565 (or GRAYSCALE)
sensor.set_framesize(sensor.QVGA)      # Set frame size to QVGA (320x240)
sensor.set_windowing((128, 128))       # Set 128x128 window.
sensor.skip_frames(time=750)           # Don't let autogain run very long.
sensor.set_auto_gain(False)            # Turn off autogain.
sensor.set_auto_exposure(False)        # Turn off whitebalance.

# Load cifar10 network (You can get the network from OpenMV IDE).
#net = nn.load('/cifar10.network')
# Faster, smaller and less accurate.
net = nn.load('/cifar10_fast.network')
labels = ['basketball', 'volleyball', 'Football']

clock = time.clock()
while(True):
    clock.tick()

    img = sensor.snapshot()

    # net.search() will search an roi in the image for the network (or the whole image if the roi is not
    # specified). At each location to look in the image if one of the classifier outputs is larger than
    # threshold the location and label will be stored in an object list and returned. At each scale the
    # detection window is moved around in the ROI using x_overlap (0-1) and y_overlap (0-1) as a guide.
    # If you set the overlap to 0.5 then each detection window will overlap the previous one by 50%. Note
    # the computational work load goes WAY up the more overlap. Finally, for mult-scale matching after
    # sliding the network around in the x/y dimensions the detection window will shrink by scale_mul (0-1)
    # down to min_scale (0-1). For example, if scale_mul is 0.5 the detection window will shrink by 50%.
    # Note that at a lower scale there's even more area to search if x_overlap and y_overlap are small...
    # contrast_threshold skips running the CNN in areas that are flat.

    # Setting x_overlap=-1 forces the window to stay centered in the ROI in the x direction always. If
    # y_overlap is not -1 the method will search in all vertical positions.

    # Setting y_overlap=-1 forces the window to stay centered in the ROI in the y direction always. If
    # x_overlap is not -1 the method will serach in all horizontal positions.

    for obj in net.search(img, threshold=0.6, min_scale=0.4, scale_mul=0.8, \
            x_overlap=-1, y_overlap=-1, contrast_threshold=0.5):
        print("Detected %s - Confidence %f%%" % (labels[obj.index()], obj.value()))
        img.draw_rectangle(obj.rect(), color=(255, 0, 0))
    print(clock.fps())
-
-
@kidswong999 难不成不能改吗,emmmmmm
-
可以改,但是你的mobilenet和lable不匹配。