只要是移动的物体都可以画框,即不需要具有形状,颜色等特征。如何实现?请给个思路
W
wgqv 发布的帖子
-
RE: 人形(不是人脸)检测如何返回人形在画面中的位置?如果用.rect()例程中返回的x,y为何都是0发布在 OpenMV Cam
# TensorFlow Lite Person Dection Example # # Google's Person Detection Model detects if a person is in view. # # In this example we slide the detector window over the image and get a list # of activations. Note that use a CNN with a sliding window is extremely compute # expensive so for an exhaustive search do not expect the CNN to be real-time. import sensor, image, time, os, tf sensor.reset() # Reset and initialize the sensor. sensor.set_pixformat(sensor.GRAYSCALE) # Set pixel format to RGB565 (or GRAYSCALE) sensor.set_framesize(sensor.QVGA) # Set frame size to QVGA (320x240) sensor.set_windowing((240, 240)) # Set 240x240 window. sensor.skip_frames(time=2000) # Let the camera adjust. # Load the built-in person detection network (the network is in your OpenMV Cam's firmware). net = tf.load('person_detection') labels = ['unsure', 'person', 'no_person'] clock = time.clock() while(True): clock.tick() img = sensor.snapshot() # net.classify() will run the network on an roi in the image (or on the whole image if the roi is not # specified). A classification score output vector will be generated for each location. At each scale the # detection window is moved around in the ROI using x_overlap (0-1) and y_overlap (0-1) as a guide. # If you set the overlap to 0.5 then each detection window will overlap the previous one by 50%. Note # the computational work load goes WAY up the more overlap. Finally, for multi-scale matching after # sliding the network around in the x/y dimensions the detection window will shrink by scale_mul (0-1) # down to min_scale (0-1). For example, if scale_mul is 0.5 the detection window will shrink by 50%. # Note that at a lower scale there's even more area to search if x_overlap and y_overlap are small... # default settings just do one detection... change them to search the image... for obj in net.classify(img, min_scale=1.0, scale_mul=0.5, x_overlap=0.0, y_overlap=0.0): print("**********\nDetections at [x=%d,y=%d,w=%d,h=%d]" % obj.rect()) for i in range(len(obj.output())): print("%s = %f" % (labels[i], obj.output()[i])) img.draw_rectangle(obj.rect()) img.draw_string(obj.x()+3, obj.y()-1, labels[obj.output().index(max(obj.output()))], mono_space = False) print(clock.fps(), "fps") -
串口通讯接收数据错误,只能接收到65字节左右?发布在 OpenMV Cam
为什么不能连续两次进行读取数据,连续两次读取及只能接收65字节。
如果只读取一次就是正常的,但是我的程序需要读一次发一次再读一次发一次这样。import time from pyb import UART uart = UART(3,115200) uart.init(115200,bits=8,parity=None,stop=1) while True: if uart.any(): a=uart.read().decode() print(a) time.sleep(1000) if uart.any(): a=uart.read().decode() print(a)发送的数据是1234567891011121314151617181920212223242526272829303132333435363738394041424344454647484950
接收到的只有12345678910111213141516171819202122232425262728293031323334353637
应该如何解决? -
RE: 官网追踪其他物体的云台教程视频是否有问题?发布在 OpenMV Cam
@yuan 你们自己的视频教程让设置的垂直翻转。
现在又不让设置垂直翻转,那请问倒着的人脸能识别???
很多视频教程又水,错误又多,不知道教复制粘贴的视频教程有什么用,还误导新手。
PID自己从网上抄的也不写注释,还乱改,明明位置式PID,偏偏喜欢抄个速度PID的壳 -
官网追踪其他物体的云台教程视频是否有问题?发布在 OpenMV Cam
import sensor, image, time

from pid import PID
from pyb import Servo

pan_servo=Servo(1)
tilt_servo=Servo(2)

pan_pid = PID(p=0.07, i=0, imax=90) #脱机运行或者禁用图像传输,使用这个PID
tilt_pid = PID(p=0.05, i=0, imax=90) #脱机运行或者禁用图像传输,使用这个PID
#pan_pid = PID(p=0.1, i=0, imax=90)#在线调试使用这个PID
#tilt_pid = PID(p=0.1, i=0, imax=90)#在线调试使用这个PID

sensor.reset() # 初始化元件
sensor.set_contrast(1)#自动调节对比度
sensor.set_gainceiling(16)#自动增益
sensor.set_pixformat(sensor.RGB565) # 使用RGB656彩图模式
sensor.set_framesize(sensor.QVGA) # 使用QVGA大小
sensor.set_vflip(True)#画面垂直翻转
sensor.skip_frames(10) # 跳过一些帧,使元器件稳定,设置生效
sensor.set_auto_whitebal(True) # 自动白平衡
clock = time.clock() # 初始化时钟
face_cascade = image.HaarCascade("frontalface", stages=25)#图像处理中使用人脸识别

'''定义寻找最大块函数'''
def find_max(blobs):
    max_size=0
    for blob in blobs:
        if blob[2]*blob[3] > max_size:#如果面积大于上一个色块面积
            max_blob=blob
            max_size = blob[2]*blob[3]
    return max_blob#返回色块对象


while(True):
    clock.tick() # 开始追踪运行时间
    img = sensor.snapshot() # Take a picture and return the image.
    blobs =img.find_features(face_cascade, threshold=0.75, scale=1.35)
    #在帧中寻找人脸
    if blobs:
        max_blob = find_max(blobs)
        pan_error = max_blob[0]+max_blob[2]/2-img.width()/2
        tilt_error = max_blob[1]+max_blob[3]/2-img.height()/2

        print("pan_error: ", pan_error)

        img.draw_rectangle(max_blob)
        img.draw_cross(int(max_blob[0]+max_blob[2]/2), int(max_blob[1]+max_blob[3]/2))

        pan_output=pan_pid.get_pid(pan_error,1)/2
        tilt_output=tilt_pid.get_pid(tilt_error,1)
        print("pan_output",pan_output)
        pan_servo.angle(pan_servo.angle()+pan_output)
        tilt_servo.angle(tilt_servo.angle()-tilt_output)
from pyb import millis from math import pi, isnan class PID: _kp = _ki = _kd = _integrator = _imax = 0 _last_error = _last_derivative = _last_t = 0 _RC = 1/(2 * pi * 20) def __init__(self, p=0, i=0, d=0, imax=0): self._kp = float(p) self._ki = float(i) self._kd = float(d) self._imax = abs(imax) self._last_derivative = float('nan') def get_pid(self, error, scaler): tnow = millis() dt = tnow - self._last_t output = 0 if self._last_t == 0 or dt > 1000: dt = 0 self.reset_I() self._last_t = tnow delta_time = float(dt) / float(1000) output += error * self._kp if abs(self._kd) > 0 and dt > 0: if isnan(self._last_derivative): derivative = 0 self._last_derivative = 0 else: derivative = (error - self._last_error) / delta_time derivative = self._last_derivative + \ ((delta_time / (self._RC + delta_time)) * \ (derivative - self._last_derivative)) self._last_error = error self._last_derivative = derivative output += self._kd * derivative output *= scaler if abs(self._ki) > 0 and dt > 0: self._integrator += (error * self._ki) * scaler * delta_time if self._integrator < -self._imax: self._integrator = -self._imax elif self._integrator > self._imax: self._integrator = self._imax output += self._integrator return output def reset_I(self): self._integrator = 0 self._last_derivative = float('nan')以上为参照官网视频改的代码,设置了垂直翻转。所有文件均按官网方法存至sd卡,其中pid的代码没有改过。但是运行以后发现水平移动无问题,但垂直方向云台会往相反的方向移动,麻烦看一下是什么原因
-
RE: wifi模块将拍摄的单张图片传至网页上的图片能否直接下载?能否控制拍摄的单张图片而不仅限于第一张图?发布在 OpenMV Cam
@bmgr 你好,大佬,你这个做出来了吗?可否留个联系方式交流一下
-
如何实现让openmv检测到人像,报警给目标手机并附带抓拍图像?发布在 OpenMV Cam
麻烦大佬提供一下思路。
就是如何让openmv识别到人像以后,使目标手机接受到提醒并收到抓拍到的图片。app不会做的话,应当如何来实现会简单一点。 -
拍摄移动物体时出错,具体情况见正文发布在 OpenMV Cam
# 拍摄移动物体
#
# 注意:您将需要SD卡来运行此示例。
#
# 此示例演示如何使用OpenMV的帧差异来进行运动检测。运动检测后,您的
# OpenMV将拍摄照片。

import sensor, image, pyb, os

RED_LED_PIN = 1
BLUE_LED_PIN = 3

sensor.reset() # Initialize the camera sensor.
sensor.set_pixformat(sensor.RGB565) # or sensor.GRAYSCALE
sensor.set_framesize(sensor.QVGA) # or sensor.QQVGA (or others)
sensor.skip_frames(time = 2000) # Let new settings take affect.
sensor.set_auto_whitebal(False) # Turn off white balance.

if not "temp" in os.listdir(): os.mkdir("temp") # Make a temp directory

while(True):

    pyb.LED(RED_LED_PIN).on()
    print("About to save background image...")
    sensor.skip_frames(time = 2000) # Give the user time to get ready.

    pyb.LED(RED_LED_PIN).off()
    sensor.snapshot().save("temp/bg.bmp")
    print("Saved background image - Now detecting motion!")
    pyb.LED(BLUE_LED_PIN).on()

    diff = 10 # We'll say we detected motion after 10 frames of motion.
    while(diff):
        img = sensor.snapshot()
        img.difference("temp/bg.bmp")
        stats = img.statistics()
        # state[5]是照明颜色通道的最大值。当整个图像的最大光照高于20时
        # 触发下面的代码。
        # 照明差异最大值应该为零。
        if (stats[5] > 20):
            diff -= 1

    pyb.LED(BLUE_LED_PIN).off()
    print("Movement detected! Saving image...")
    sensor.snapshot().save("temp/snapshot-%d.jpg" % pyb.rng()) # Save Pic.
该代码为官网代码,侦测到移动物体后,openmv一直在拍照,即使在而后静止状态下也在不断拍照,且ide窗口显示不正常,如图所示:
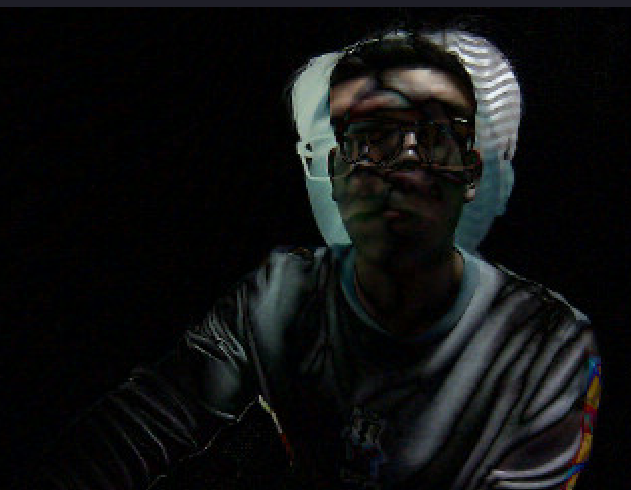 这种情况如何解决?