# 人脸追踪例程
#
# 这个例子展示了使用OpenMV Cam的关键点功能来跟踪一个被Haar Cascade
# 检测到的人脸。 该脚本的第一部分使用前面Haar Cascade在图像中找到一张
# 脸。 之后,脚本使用关键点功能自动学习你的脸并跟踪它。 关键点可以
# 用来自动追踪任何东西。
import sensor, time, image

# Reset sensor
sensor.reset()
sensor.set_contrast(3)
sensor.set_gainceiling(16)
sensor.set_framesize(sensor.VGA)
sensor.set_windowing((320, 240))
sensor.set_pixformat(sensor.GRAYSCALE)

# Skip a few frames to allow the sensor settle down
sensor.skip_frames(time = 2000)

# Load Haar Cascade
# 默认情况下,这将使用所有阶段,较低的阶段更快但不太准确。
face_cascade = image.HaarCascade("frontalface", stages=25)
print(face_cascade)

# First set of keypoints
kpts1 = None

# Find a face!
while (kpts1 == None):
    img = sensor.snapshot()
    img.draw_string(0, 0, "Looking for a face...")
    # Find faces
    objects = img.find_features(face_cascade, threshold=0.5, scale=1.25)
    if objects:
        # 在每个方向上将ROI扩大31个像素
        face = (objects[0][0]-31, objects[0][1]-31,objects[0][2]+31*2, objects[0][3]+31*2)
        # 使用检测面大小作为ROI提取关键点
        kpts1 = img.find_keypoints(threshold=10, scale_factor=1.1, max_keypoints=100, roi=face)
        # Draw a rectangle around the first face
        img.draw_rectangle(objects[0])

# Draw keypoints
print(kpts1)
img.draw_keypoints(kpts1, size=24)
img = sensor.snapshot()
time.sleep(2000)

# FPS clock
clock = time.clock()

while (True):
    clock.tick()
    img = sensor.snapshot()
    # 从整个帧中提取关键点
    kpts2 = img.find_keypoints(threshold=10, scale_factor=1.1, max_keypoints=100, normalized=True)

    if (kpts2):
        # 将第一组关键点与第二组关键点匹配
        c=image.match_descriptor(kpts1, kpts2, threshold=85)
        match = c[6] # C[6] contains the number of matches.
        if (match>5):
            img.draw_rectangle(c[2:6])
            img.draw_cross(c[0], c[1], size=10)
            print(kpts2, "matched:%d dt:%d"%(match, c[7]))

    # Draw FPS
    img.draw_string(0, 0, "FPS:%.2f"%(clock.fps()))
H
htrl
@htrl
0
声望
8
楼层
841
资料浏览
0
粉丝
0
关注
htrl 发布的帖子
-
下面是人脸跟踪的源代码 怎么加程序才能够保存跟踪过程的视频(整个界面右上角的视频)发布在 OpenMV Cam
-
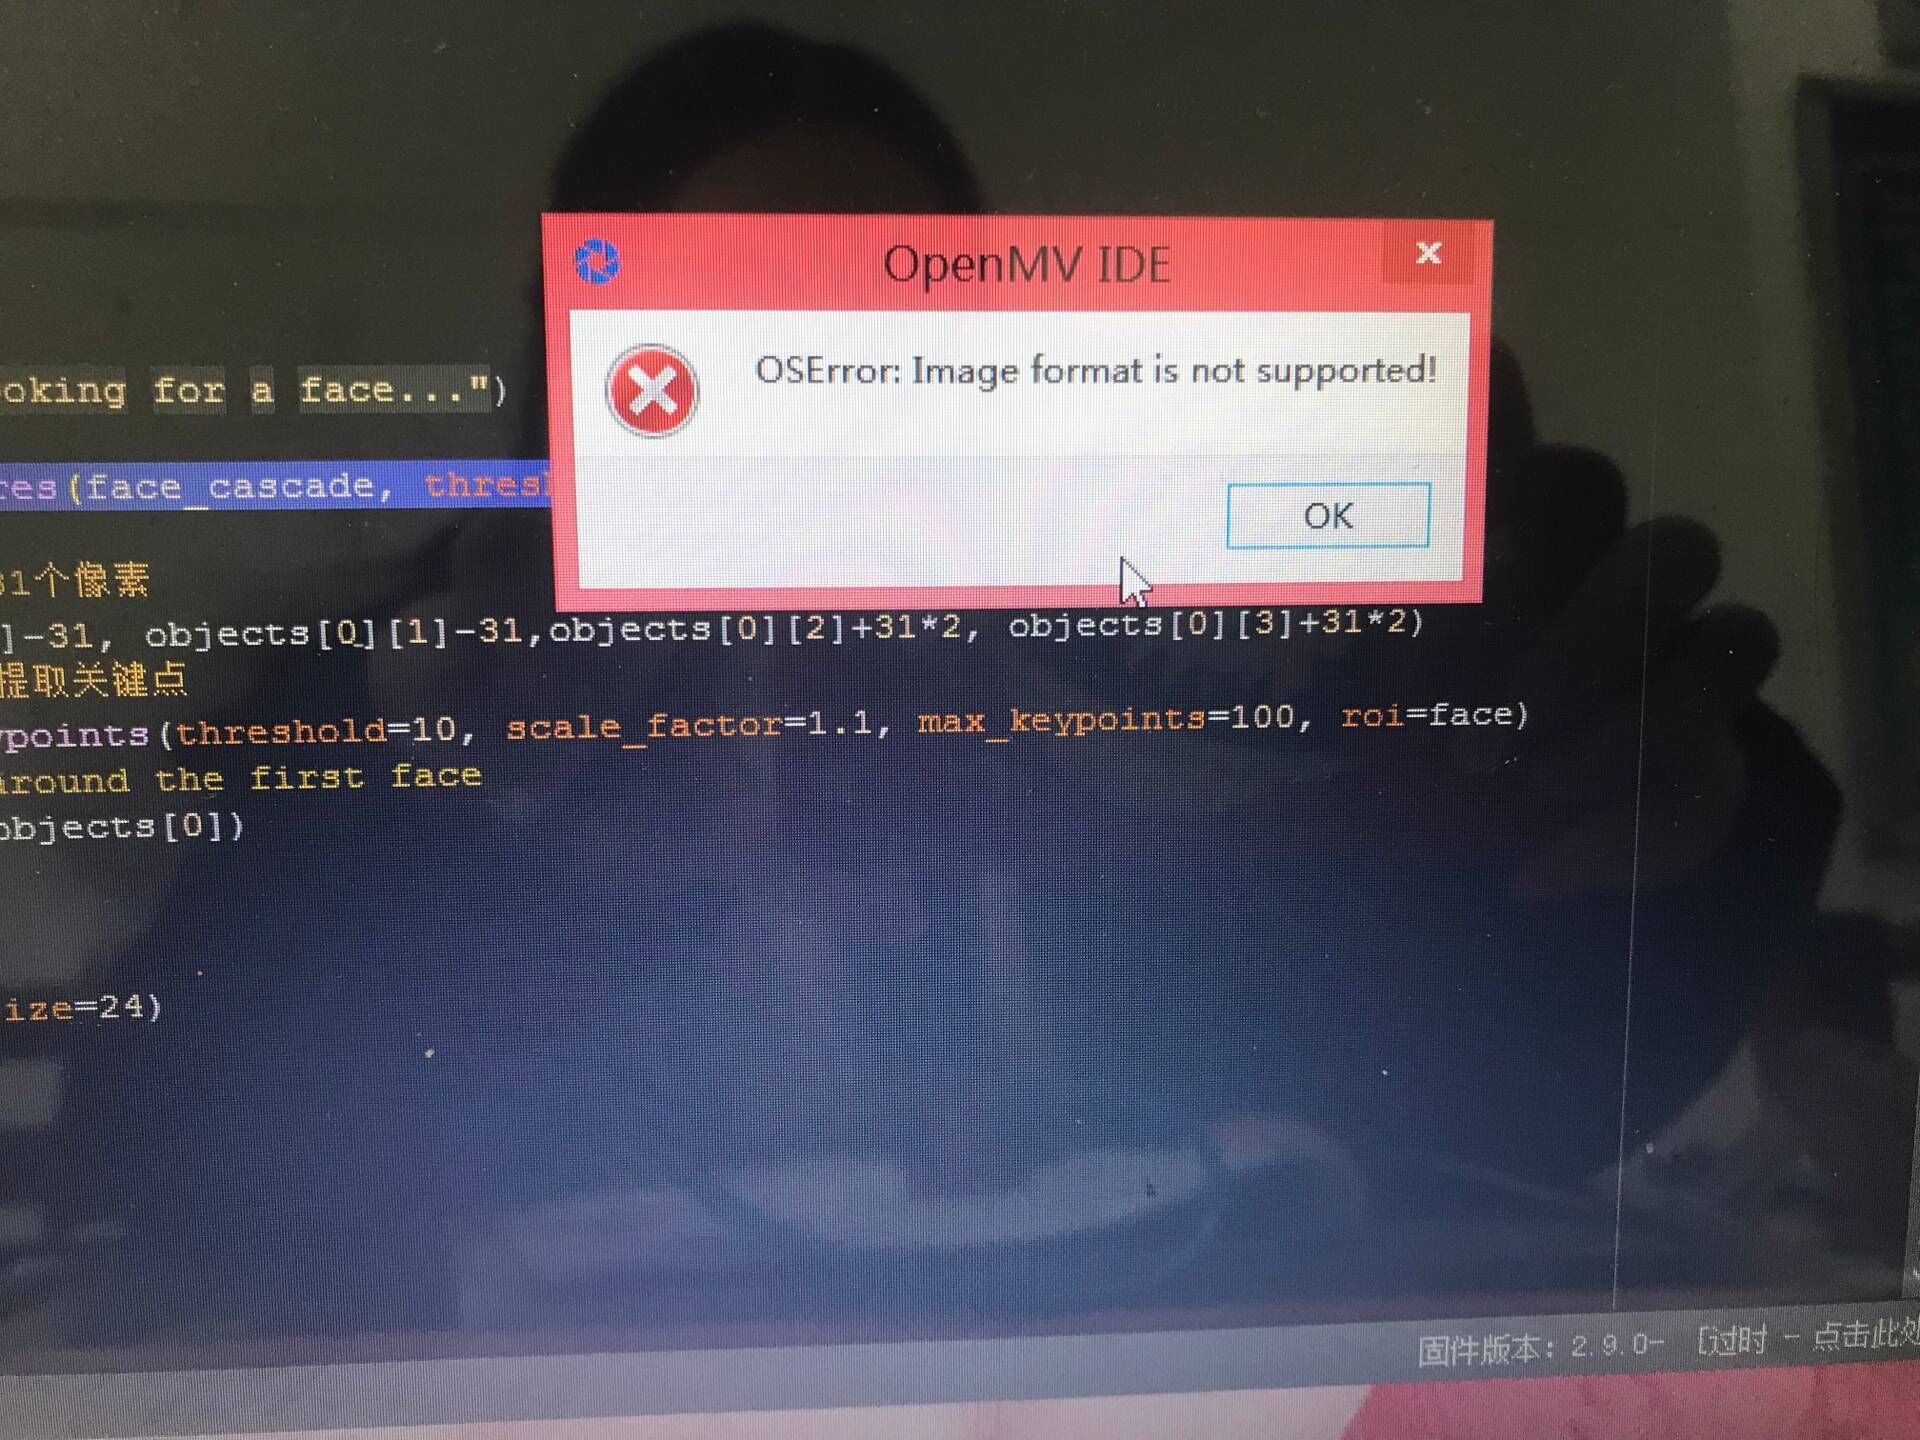
RE: 如何实现人脸跟踪出来不是灰度图?看到实例给的都是灰度图,是需要用组合算法吗?具体该怎么组合呢,可否有详细教程发布在 OpenMV Cam
@kidswong999 那个上面提示不可以,所以我想要问下你,我该怎么弄才能有颜色呢,亲
-
如何实现人脸跟踪出来不是灰度图?看到实例给的都是灰度图,是需要用组合算法吗?具体该怎么组合呢,可否有详细教程发布在 OpenMV Cam
如何实现人脸跟踪出来不是灰度图?看到实例给的都是灰度图,是需要用组合算法吗?具体该怎么组合呢,可否有详细教程
