@kidswong999
我想用IO中断唤醒睡眠
G
gfgy
@gfgy
0
声望
5
楼层
816
资料浏览
0
粉丝
0
关注
gfgy 发布的帖子
-
RT1062中machine模块配置外部中断的wake参数等于machine.SLEEP时,提示没有这个参数发布在 OpenMV Cam

import sensor
import time
import machine

def ExtInt_IRQHandler(pin):
    Red.on()
    time.sleep_ms(5000)
    Red.off()

sensor.reset()  # Reset and initialize the sensor.
sensor.set_pixformat(sensor.RGB565)  # Set pixel format to RGB565 (or GRAYSCALE)
sensor.set_framesize(sensor.VGA)  # Set frame size to QVGA (320x240)
sensor.skip_frames(time=2000)  # Wait for settings take effect.
clock = time.clock()  # Create a clock object to track the FPS.
Pin_Ext = machine.Pin("P7",machine.Pin.IN,pull = machine.Pin.PULL_UP)# 初始化外部中断
Pin_Ext.irq(ExtInt_IRQHandler,trigger = machine.Pin.IRQ_RISING,wake=machine.SLEEP)#初始化外部中断,配置唤醒源为Pin
Red = machine.LED("LED_RED")

machine.lightsleep()

while True:
    clock.tick()  # Update the FPS clock.
    img = sensor.snapshot()  # Take a picture and return the image.
    img.lens_corr(strength=1.8,zoom=1.0)
    print(clock.fps())  # Note: OpenMV Cam runs about half as fast when connected
    # to the IDE. The FPS should increase once disconnected.
-
用openmv m3运行FOMO人检测例程时,提示tf模块没有load_builtin_model方法?发布在 OpenMV Cam
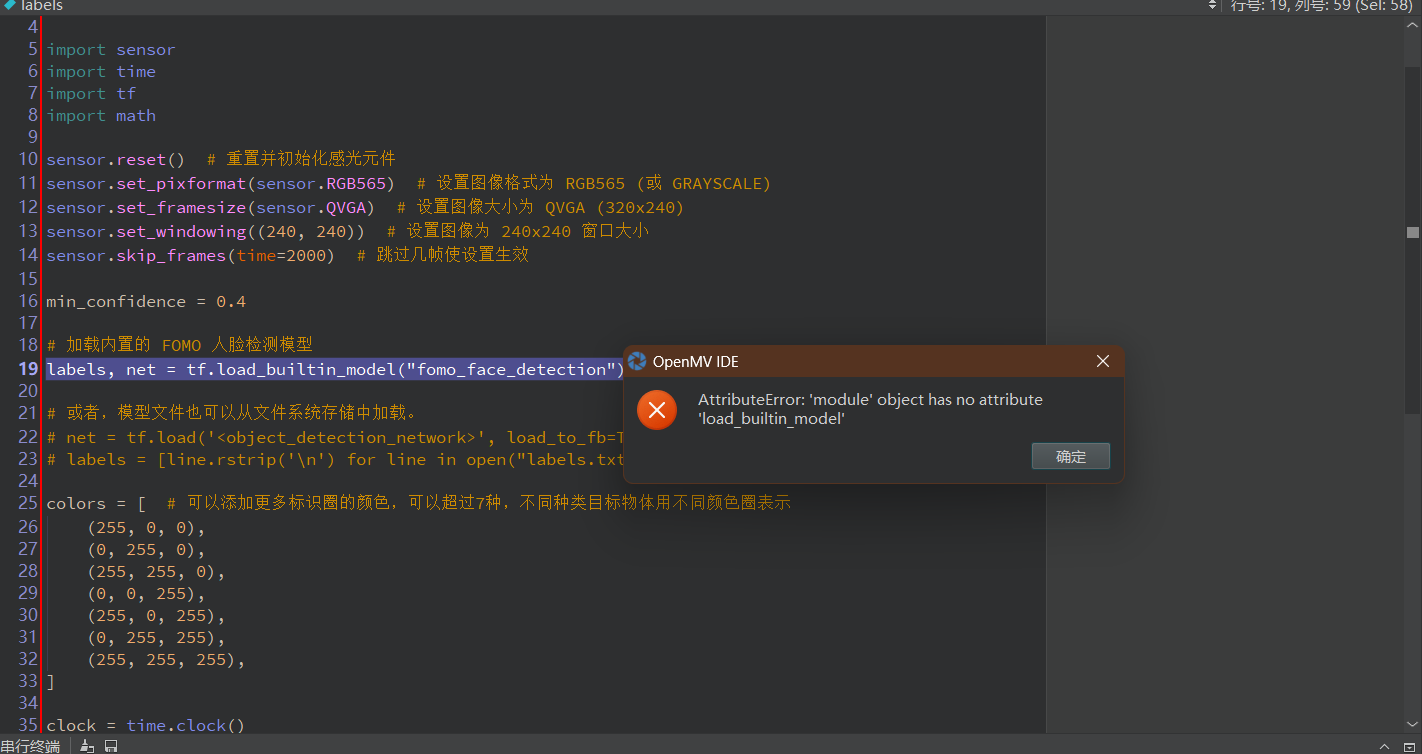
import sensor
import time
import tf
import math

sensor.reset()  # 重置并初始化感光元件
sensor.set_pixformat(sensor.RGB565)  # 设置图像格式为 RGB565 (或 GRAYSCALE)
sensor.set_framesize(sensor.QVGA)  # 设置图像大小为 QVGA (320x240)
sensor.set_windowing((240, 240))  # 设置图像为 240x240 窗口大小
sensor.skip_frames(time=2000)  # 跳过几帧使设置生效

min_confidence = 0.4

# 加载内置的 FOMO 人脸检测模型
labels, net = tf.load_builtin_model("fomo_face_detection")

# 或者,模型文件也可以从文件系统存储中加载。
# net = tf.load('<object_detection_network>', load_to_fb=True)
# labels = [line.rstrip('\n') for line in open("labels.txt")]

colors = [  # 可以添加更多标识圈的颜色,可以超过7种,不同种类目标物体用不同颜色圈表示
    (255, 0, 0),
    (0, 255, 0),
    (255, 255, 0),
    (0, 0, 255),
    (255, 0, 255),
    (0, 255, 255),
    (255, 255, 255),
]

clock = time.clock()
while True:
    clock.tick()

    img = sensor.snapshot()

    # detect() 返回图像中检测到的所有的物体 (已经按照种类分类好)
    # 跳过索引0, 因为第0个分类是 背景
    # 然后在识别到的物体中央画出圆圈

    for i, detection_list in enumerate(
        net.detect(img, thresholds=[(math.ceil(min_confidence * 255), 255)])
    ):
        if i == 0:
            continue  # 索引0是背景分类
        if len(detection_list) == 0:
            continue  # 没有检测到这个种类的物体

        print("********** %s **********" % labels[i])
        for d in detection_list:
            [x, y, w, h] = d.rect()
            center_x = math.floor(x + (w / 2))
            center_y = math.floor(y + (h / 2))
            print(f"x {center_x}\ty {center_y}")
            img.draw_circle((center_x, center_y, 12), color=colors[i], thickness=2)

    print(clock.fps(), "fps", end="\n")