导航

    • 登录
    • 搜索
    • 版块
    • 产品
    • 教程
    • 论坛
    • 淘宝
    1. 主页
    2. fr5z
    F
    • 举报资料
    • 资料
    • 关注
    • 粉丝
    • 屏蔽
    • 帖子
    • 楼层
    • 最佳
    • 群组

    fr5z

    @fr5z

    0
    声望
    2
    楼层
    274
    资料浏览
    0
    粉丝
    0
    关注
    注册时间 最后登录

    fr5z 关注

    fr5z 发布的帖子

    • 人脸分辨时打不开sd卡里面的照片文件,lcd显示可以。

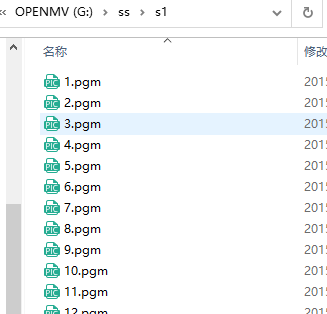
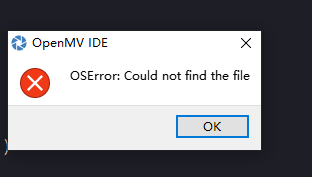
      人脸分辨的例程里面拍照的照片保存在sd卡里面,可以用lcd显示出来,但是做人脸分辨的时候找不到文件,是什么情况
      lcd代码

      
      import sensor, image, lcd,time
      
      sensor.reset() # Initialize the camera sensor.
      sensor.set_pixformat(sensor.RGB565) # or sensor.GRAYSCALE
      sensor.set_framesize(sensor.QQVGA2) # Special 128x160 framesize for LCD Shield.
      lcd.init() # Initialize the lcd screen.
      
      while(True):
        for i in range(1, 20):
              img = image.Image("singtown/s1/%d.pgm"%i)
              #img = image.Image("singtown/s1/7.pgm")
              lcd.display(img) # Take a picture and display the image.
              time.sleep_ms(500)


      人脸分辨代码

      # Face recognition with LBP descriptors.
      # See Timo Ahonen's "Face Recognition with Local Binary Patterns".
      #
      # Before running the example:
      # 1) Download the AT&T faces database http://www.cl.cam.ac.uk/Research/DTG/attarchive/pub/data/att_faces.zip
      # 2) Exract and copy the orl_faces directory to the SD card root.
      
      
      import sensor, time, image, pyb
      from pyb import UART
      uart = UART(3, 115200)
      sensor.reset() # Initialize the camera sensor.
      sensor.set_pixformat(sensor.GRAYSCALE) # or sensor.GRAYSCALE
      sensor.set_framesize(sensor.B128X128) # or sensor.QQVGA (or others)
      sensor.set_windowing((92,112))
      sensor.skip_frames(10) # Let new settings take affect.
      sensor.skip_frames(time = 5000) #等待5s


      #SUB =
      NUM_SUBJECTS = 6 #图像库中不同人数,一共6人
      NUM_SUBJECTS_IMGS = 20 #每人有20张样本图片
      
      # 拍摄当前人脸。
      img = sensor.snapshot()
      #img = image.Image("singtown/%s/1.pgm"%(SUB))
      d0 = img.find_lbp((0, 0, img.width(), img.height()))
      #d0为当前人脸的lbp特征
      img = None
      pmin = 999999
      num=0
      
      def min(pmin, a, s):
          global num
          if a<pmin:
              pmin=a
              num=s
          return pmin
      
      for s in range(1, 20):
          dist = 0
          for i in range(1, 20):
              img = image.Image("singtown/s%d/%d.pgm"%(s, i))
              d1 = img.find_lbp((0, 0, img.width(), img.height()))
              #d1为第s文件夹中的第i张图片的lbp特征
              dist += image.match_descriptor(d0, d1)#计算d0 d1即样本图像与被检测人脸的特征差异度。
          print("Average dist for subject %d: %d"%(s, dist/NUM_SUBJECTS_IMGS))
          pmin = min(pmin, dist/NUM_SUBJECTS_IMGS, s)#特征差异度越小,被检测人脸与此样本更相似更匹配。
          print(pmin)
      
      print(num) # num为当前最匹配的人的编号。
      uart.write(num)
      
      
      发布在 OpenMV Cam
      F
      fr5z
    • 人脸分辨,用的例程,该文件名,能写入照片,不能识别,识别时报错报打不开文件的提示

      用openmv4p跑的人脸拍照保存,然后分辨人脸的两个例程代码,人脸拍照保存有结果的0_1648439554438_faef4380-8c9c-411b-80dd-2b8db381f394-image.png
      一到分辨就跳变成找不到文件
      0_1648440168704_53ace19c-4d88-489a-a766-8c5dc823b351-image.png
      我改动的地方就是文件名

      我找之前的帖子,是说格式化SD卡,我格式化过好几遍了,没用
      格式化规格
      0_1648440460802_f4859f86-ea0b-4f8d-8788-fff37ac539e6-image.png

      ####拍照部分代码

      # Snapshot Example
      #
      # Note: You will need an SD card to run this example.
      #
      # You can use your OpenMV Cam to save image files.
      
      import sensor, image, pyb
      
      RED_LED_PIN = 1
      BLUE_LED_PIN = 3
      
      sensor.reset() # Initialize the camera sensor.
      sensor.set_pixformat(sensor.GRAYSCALE) # or sensor.GRAYSCALE
      sensor.set_framesize(sensor.B128X128) # or sensor.QQVGA (or others)
      sensor.set_windowing((92,112))
      sensor.skip_frames(10) # Let new settings take affect.
      sensor.skip_frames(time = 2000)
      
      num = 1 #设置被拍摄者序号,第一个人的图片保存到s1文件夹,第二个人的图片保存到s2文件夹,以此类推。每次更换拍摄者时,修改num值。
      
      n = 20 #设置每个人拍摄图片数量。
      
      #连续拍摄n张照片,每间隔3s拍摄一次。
      while(n):
          #红灯亮
          pyb.LED(RED_LED_PIN).on()
          sensor.skip_frames(time = 3000) # Give the user time to get ready.等待3s,准备一下表情。
      
          #红灯灭,蓝灯亮
          pyb.LED(RED_LED_PIN).off()
          pyb.LED(BLUE_LED_PIN).on()
      
          #保存截取到的图片到SD卡
          print(n)
          sensor.snapshot().save("ss/s%s/%s.pgm" % (num,n) ) # or "example.bmp" (or others)
      
          n -= 1
      
          pyb.LED(BLUE_LED_PIN).off()
          print("Done! Reset the camera to see the saved image.")


      分辨部分代码

      sensor.set_framesize(sensor.B128X128) # or sensor.QQVGA (or others)
      sensor.set_windowing((92,112))
      sensor.skip_frames(10) # Let new settings take affect.
      sensor.skip_frames(time = 5000) #等待5s


      #SUB = "s1"
      NUM_SUBJECTS = 6 #图像库中不同人数,一共6人
      NUM_SUBJECTS_IMGS = 20 #每人有20张样本图片
      
      # 拍摄当前人脸。
      img = sensor.snapshot()
      #img = image.Image("singtown/%s/1.pgm"%(SUB))
      d0 = img.find_lbp((0, 0, img.width(), img.height()))
      #d0为当前人脸的lbp特征
      img = None
      pmin = 999999
      num=0
      
      def min(pmin, a, s):
          global num
          if a<pmin:
              pmin=a
              num=s
          return pmin
      
      for s in range(1, NUM_SUBJECTS+1):
          dist = 0
          for i in range(2, NUM_SUBJECTS_IMGS+1):
              img = image.Image("ss/s%s/%s.pgm" % (s,i))
              d1 = img.find_lbp((0, 0, img.width(), img.height()))
              #d1为第s文件夹中的第i张图片的lbp特征
              dist += image.match_descriptor(d0, d1)#计算d0 d1即样本图像与被检测人脸的特征差异度。
          print("Average dist for subject %d: %d"%(s, dist/NUM_SUBJECTS_IMGS))
          pmin = min(pmin, dist/NUM_SUBJECTS_IMGS, s)#特征差异度越小,被检测人脸与此样本更相似更匹配。
          print(pmin)
      
      print(num) # num为当前最匹配的人的编号。
      
      
      发布在 OpenMV Cam
      F
      fr5z