# 圆形检测例程
#
# 这个例子展示了如何用Hough变换在图像中找到圆。
# https://en.wikipedia.org/wiki/Circle_Hough_Transform
#
# 请注意,find_circles()方法将只能找到完全在图像内部的圆。圈子之外的
# 图像/ roi被忽略...

import sensor, image, time

sensor.reset()
sensor.set_pixformat(sensor.RGB565) # 灰度更快
sensor.set_framesize(sensor.QQVGA)
sensor.skip_frames(time = 2000)
clock = time.clock()

while(True):
    clock.tick()

    #lens_corr(1.8)畸变矫正
    img = sensor.snapshot().lens_corr(1.8)

    # Circle对象有四个值: x, y, r (半径), 和 magnitude。
    # magnitude是检测圆的强度。越高越好

    # roi 是一个用以复制的矩形的感兴趣区域(x, y, w, h)。如果未指定,
    # ROI 即图像矩形。操作范围仅限于roi区域内的像素。

    # x_stride 是霍夫变换时需要跳过的x像素的数量。若已知圆较大,可增加
    # x_stride 。

    # y_stride 是霍夫变换时需要跳过的y像素的数量。若已知直线较大,可增加
    # y_stride 。

    # threshold 控制从霍夫变换中监测到的圆。只返回大于或等于阈值的圆。
    # 应用程序的阈值正确值取决于图像。注意:一条圆的大小是组成圆所有
    # 索贝尔滤波像素大小的总和。

    # x_margin 控制所检测的圆的合并。 圆像素为 x_margin 、 y_margin 和
    # r_margin的部分合并。

    # y_margin 控制所检测的圆的合并。 圆像素为 x_margin 、 y_margin 和
    # r_margin 的部分合并。

    # r_margin 控制所检测的圆的合并。 圆像素为 x_margin 、 y_margin 和
    # r_margin 的部分合并。

    # r_min,r_max和r_step控制测试圆的半径。
    # 缩小测试圆半径的数量可以大大提升性能。
    # threshold = 3500比较合适。如果视野中检测到的圆过多,请增大阈值;
    # 相反,如果视野中检测到的圆过少,请减少阈值。
    for c in img.find_circles(threshold = 3500, x_margin = 10, y_margin = 10, r_margin = 10,r_min = 2, r_max = 100, r_step = 2):
        img.draw_circle(c.x(), c.y(), c.r(), color = (255, 0, 0))
        圆 =img.find_circles()
        if(圆):
           print("找到了",c)
        else:
           print("五")
3
3mnc
@3mnc
0
声望
2
楼层
315
资料浏览
0
粉丝
0
关注
3mnc 发布的帖子
-
为什么在没有圆的时候不打印“五”发布在 OpenMV Cam
-
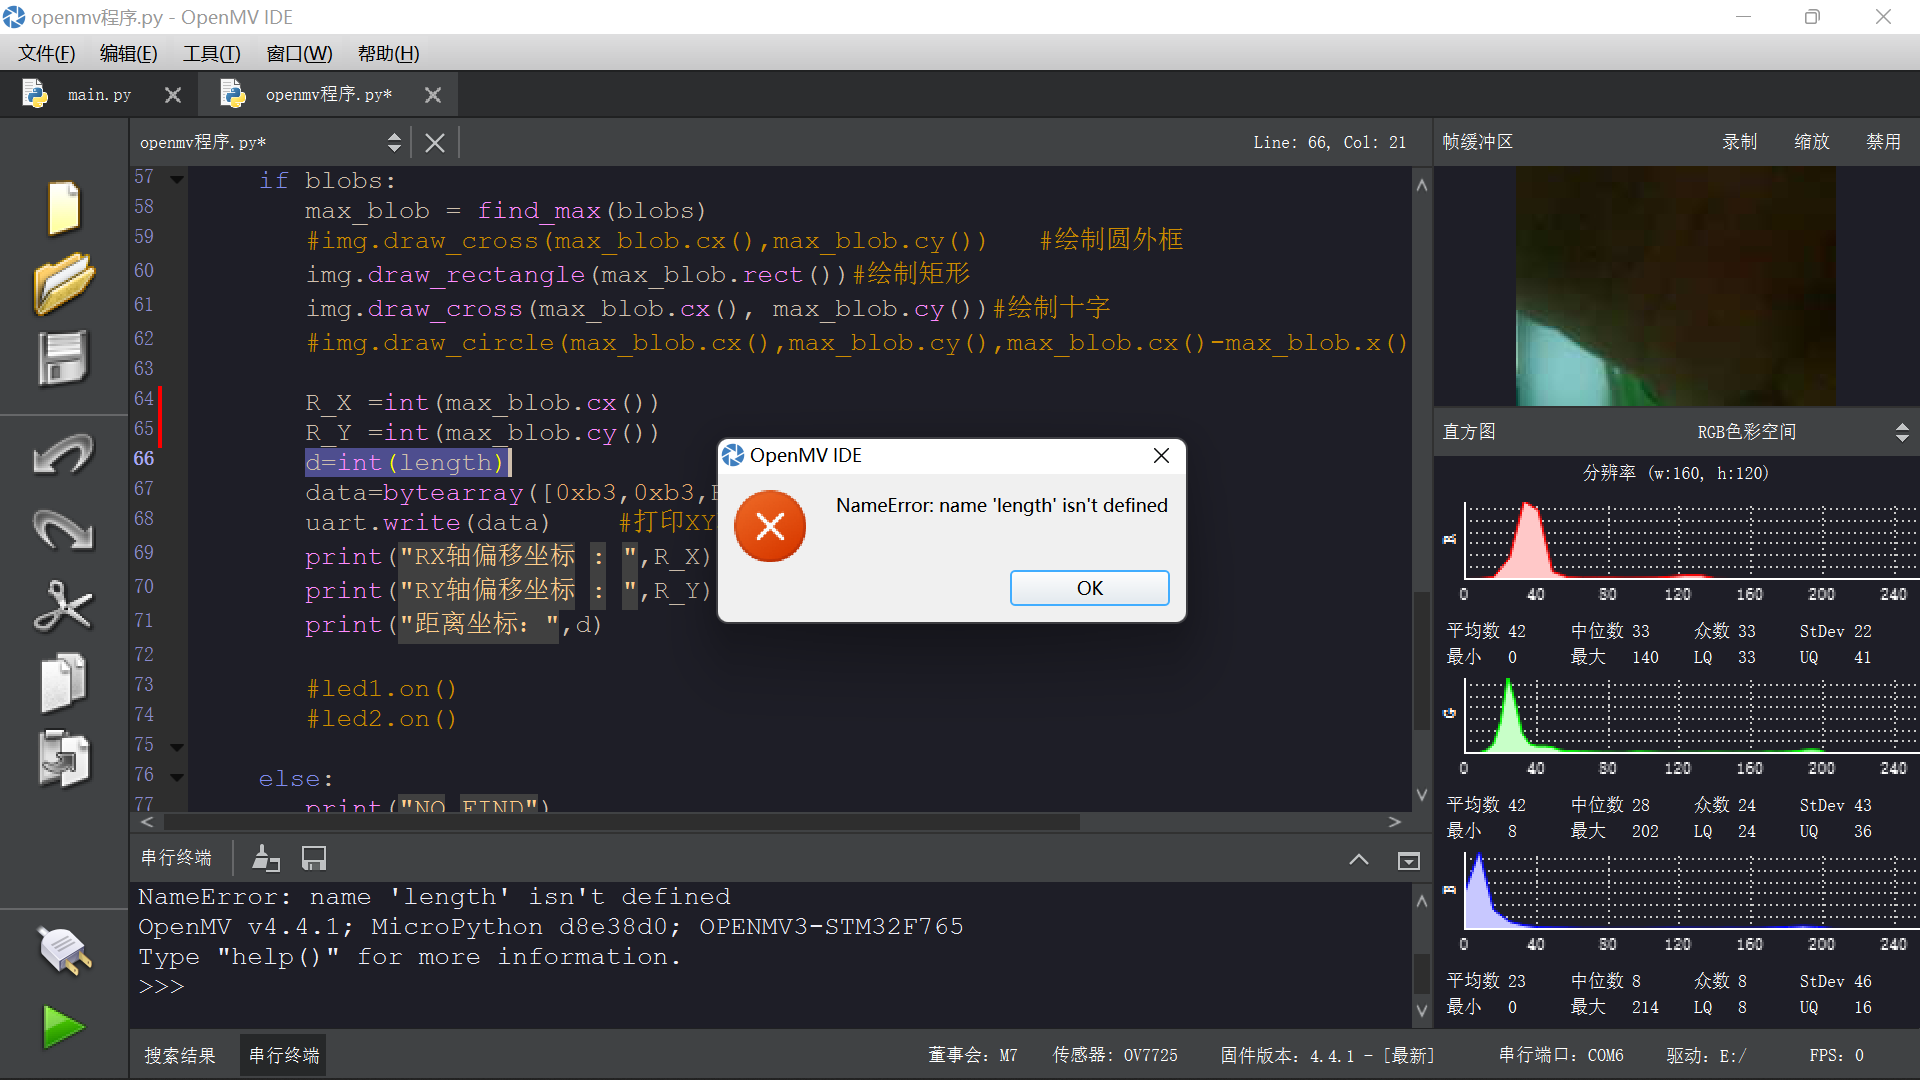
为啥更改阈值之后就会报错发布在 OpenMV Cam
import sensor, image, time,pyb
from pyb import UART
import json
from pyb import LED

led1 = pyb.LED(2)
led2 = pyb.LED(3)

red_threshold   =  (20, 59, 39, 127, 125, -73)
#green_threshold = (23, 35, -23, -39, 10, 25)
#blue_threshold  = (36, 12, 22, -41, -52, -11)


G_X=0
G_Y=0
R_X=0
R_Y=0
Y_X=0
Y_Y=0
G_data=0
R_data=0
Y_data = 0
add_data=0
data=0
sensor.reset() # Initialize the camera sensor.
sensor.set_pixformat(sensor.RGB565) # use RGB565.
sensor.set_framesize(sensor.QQVGA) # use QQVGA for speed.
sensor.skip_frames(10) # Let new settings take affect.
sensor.set_auto_whitebal(False) # turn this off.
clock = time.clock() # Tracks FPS.
K=5000#the value should be measured
uart = UART(3, 115200)
uart.init(115200, bits=8, parity=None, stop=1)  #8位数据位,无校验位,1位停止位

def find_max(blobs):
    max_size=0
    for blob in blobs:
        if blob[2]*blob[3] > max_size:
            max_blob=blob
            max_size = blob[2]*blob[3]
    return max_blob

while(True):
    clock.tick() # Track elapsed milliseconds between snapshots().
    img = sensor.snapshot() # Take a picture and return the image.
    blobs = img.find_blobs([red_threshold],x_stride =15,y_stride = 15)

    if len(blobs) == 1:
        # Draw a rect around the blob.
        b = blobs[0]
        img.draw_rectangle(b[0:4]) # rect
        img.draw_cross(b[5], b[6]) # cx, cy
        Lm = (b[2]+b[3])/2
        length = K/Lm

    if blobs:
       max_blob = find_max(blobs)
       #img.draw_cross(max_blob.cx(),max_blob.cy())   #绘制圆外框
       img.draw_rectangle(max_blob.rect())#绘制矩形
       img.draw_cross(max_blob.cx(), max_blob.cy())#绘制十字
       #img.draw_circle(max_blob.cx(),max_blob.cy(),max_blob.cx()-max_blob.x(), color = (168, 11, 133))

       R_X =int(max_blob.cx())
       R_Y =int(max_blob.cy())
       d=int(length)
       data=bytearray([0xb3,0xb3,R_X,R_Y,d,1,0x5b])
       uart.write(data)    #打印XY轴的偏移坐标
       print("RX轴偏移坐标 : ",R_X)
       print("RY轴偏移坐标 : ",R_Y)
       print("距离坐标:",d)

       #led1.on()
       #led2.on()

    else:
       print("NO FIND")
       data=bytearray([0xb3,0xb3,0,0,0,0x5b])
       uart.write(data)    #打印XY轴的偏移坐标
       #led1.off()
       #led2.off()
这是我更改阈值之前的代码,即使找不到需要的颜色也只是会输出no find,

但是只要更改一下阈值import sensor, image, time,pyb from pyb import UART import json from pyb import LED led1 = pyb.LED(2) led2 = pyb.LED(3) red_threshold = (39, 6, -56, -10, 41, 10) #green_threshold = (23, 35, -23, -39, 10, 25) #blue_threshold = (36, 12, 22, -41, -52, -11) G_X=0 G_Y=0 R_X=0 R_Y=0 Y_X=0 Y_Y=0 G_data=0 R_data=0 Y_data = 0 add_data=0 data=0 sensor.reset() # Initialize the camera sensor. sensor.set_pixformat(sensor.RGB565) # use RGB565. sensor.set_framesize(sensor.QQVGA) # use QQVGA for speed. sensor.skip_frames(10) # Let new settings take affect. sensor.set_auto_whitebal(False) # turn this off. clock = time.clock() # Tracks FPS. K=5000#the value should be measured uart = UART(3, 115200) uart.init(115200, bits=8, parity=None, stop=1) #8位数据位,无校验位,1位停止位 def find_max(blobs): max_size=0 for blob in blobs: if blob[2]*blob[3] > max_size: max_blob=blob max_size = blob[2]*blob[3] return max_blob while(True): clock.tick() # Track elapsed milliseconds between snapshots(). img = sensor.snapshot() # Take a picture and return the image. blobs = img.find_blobs([red_threshold],x_stride =15,y_stride = 15) if len(blobs) == 1: # Draw a rect around the blob. b = blobs[0] img.draw_rectangle(b[0:4]) # rect img.draw_cross(b[5], b[6]) # cx, cy Lm = (b[2]+b[3])/2 length = K/Lm if blobs: max_blob = find_max(blobs) #img.draw_cross(max_blob.cx(),max_blob.cy()) #绘制圆外框 img.draw_rectangle(max_blob.rect())#绘制矩形 img.draw_cross(max_blob.cx(), max_blob.cy())#绘制十字 #img.draw_circle(max_blob.cx(),max_blob.cy(),max_blob.cx()-max_blob.x(), color = (168, 11, 133)) R_X =int(max_blob.cx()) R_Y =int(max_blob.cy()) d=int(length) data=bytearray([0xb3,0xb3,R_X,R_Y,d,1,0x5b]) uart.write(data) #打印XY轴的偏移坐标 print("RX轴偏移坐标 : ",R_X) print("RY轴偏移坐标 : ",R_Y) print("距离坐标:",d) #led1.on() #led2.on() else: print("NO FIND") data=bytearray([0xb3,0xb3,0,0,0,0x5b]) uart.write(data) #打印XY轴的偏移坐标 #led1.off() #led2.off()就会出现这个