#烧录进OPENMV程序,阈值待修改。2018年1月5日。
import sensor, image, time,pyb,utime,math
import json
from pyb import UART
#加载串口模块
from pyb import Timer
#加载定时器模块
from pyb import LED
#加载LED模块
threshold_index = 0 # 0 for red, 1 for green, 2 for blue
为了使色彩追踪效果真的很好,你应该在一个非常受控制的照明环境中。
#threshold = (63, 100, 15, 127, -9, -4) #red
#threshold = ( 0, 80, -70, -10, -0, 30) #小球
#threshold = (30, 80, -39, -12, -52, 14)
thresholds = [(26, 3, -14, 13, -22, 16)] #黑教鞭
#设定感兴趣区域,阈值为10~99,这样保证输出为两位数
#grayscale_threshold = (242,255)
#grayscale_roi = (30,10,90,90)
def timer4():
global switch
switch = 1
#开启图像拍照识别开关,这样能稳定获得50帧的图像,前提是不链接电脑。
#定义中断函数,作用是没20ms开启图像开关一次。
#各个函数中使用全局变量要先用global关键字声明,然后再使用此全局变量。
tim = Timer(4) #使用定时器4创建一个定时器对象
tim.init(freq=50) # 以50Hz触发,测试使用
tim.callback(lambda t: timer4())#中断持续进行要记得更新即加入lambda t:
sensor.reset()
sensor.set_pixformat(sensor.RGB565)
sensor.set_framesize(sensor.QQVGA)
sensor.skip_frames(time = 1000)
sensor.set_auto_gain(False) # must be turned off for color tracking
sensor.set_auto_whitebal(False) # must be turned off for color tracking
clock = time.clock()
#定义全局变量开关。
global switch
switch = 0
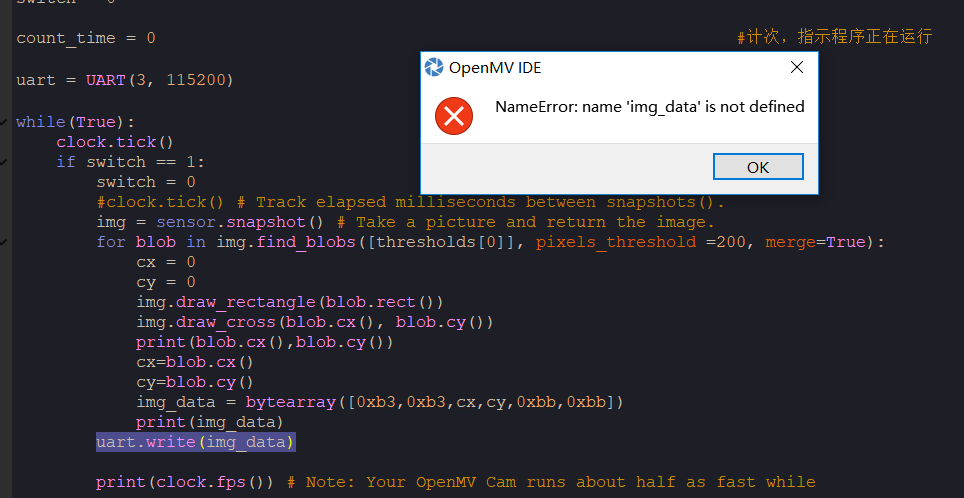
count_time = 0 #计次,指示程序正在运行
uart = UART(3, 115200) #串口初始化。
while(True):
clock.tick()
if switch == 1:
switch = 0
#clock.tick() # Track elapsed milliseconds between snapshots().
img = sensor.snapshot() # Take a picture and return the image.
for blob in img.find_blobs([thresholds[0]], pixels_threshold =200, merge=True):
cx = 0
cy = 0
img.draw_rectangle(blob.rect())
img.draw_cross(blob.cx(), blob.cy())
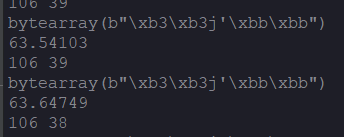
print(blob.cx(),blob.cy())
cx=blob.cx()
cy=blob.cy()
img_data = bytearray([0xb3,0xb3,cx,cy,0xbb,0xbb])
print(img_data)
uart.write(img_data)
print(clock.fps()) # Note: Your OpenMV Cam runs about half as fast while
注释掉串口,看到的数据是错误的