小车无法脱机运行
-
大佬,我格式化了还是不行呀 ,弄个追球小车,断开数据线就 接上锂电池 毫无反映呀,代码都弄到里面去的。
-
大佬可以给个联系方式具体私聊吗? 我QQ1003002790
-
请把你保存文件的具体步骤描述一下
-
-
链接数据线和锂电池 小车有反应 断开其中一个就不行了
-
“先保存了一个 car.py 的代码文件 在保存一个pid.py的文件 ”
怎么保存的?具体的步骤发一下
-
先编写此代码
from pyb import Pin, Timer
inverse_left=False  #change it to True to inverse left wheel
inverse_right=False #change it to True to inverse right wheel

ain1 =  Pin('P0', Pin.OUT_PP)
ain2 =  Pin('P1', Pin.OUT_PP)
bin1 =  Pin('P2', Pin.OUT_PP)
bin2 =  Pin('P3', Pin.OUT_PP)
ain1.low()
ain2.low()
bin1.low()
bin2.low()

pwma = Pin('P7')
pwmb = Pin('P8')
tim = Timer(4, freq=1000)
ch1 = tim.channel(1, Timer.PWM, pin=pwma)
ch2 = tim.channel(2, Timer.PWM, pin=pwmb)
ch1.pulse_width_percent(0)
ch2.pulse_width_percent(0)

def run(left_speed, right_speed):
    if inverse_left==True:
        left_speed=(-left_speed)
    if inverse_right==True:
        right_speed=(-right_speed)

    if left_speed < 0:
        ain1.low()
        ain2.high()
    else:
        ain1.high()
        ain2.low()
    ch1.pulse_width_percent(abs(left_speed))

    if right_speed < 0:
        bin1.low()
        bin2.high()
    else:
        bin1.high()
        bin2.low()
    ch2.pulse_width_percent(abs(right_speed))

``` 保存到FLASH里面 改名为car.py
在编写此代码
from pyb import millis
from math import pi, isnanclass PID:
_kp = _ki = _kd = _integrator = _imax = 0
_last_error = _last_derivative = _last_t = 0
_RC = 1/(2 * pi * 20)
def init(self, p=0, i=0, d=0, imax=0):
self._kp = float(p)
self._ki = float(i)
self._kd = float(d)
self._imax = abs(imax)
self._last_derivative = float('nan')def get_pid(self, error, scaler): tnow = millis() dt = tnow - self._last_t output = 0 if self._last_t == 0 or dt > 1000: dt = 0 self.reset_I() self._last_t = tnow delta_time = float(dt) / float(1000) output += error * self._kp if abs(self._kd) > 0 and dt > 0: if isnan(self._last_derivative): derivative = 0 self._last_derivative = 0 else: derivative = (error - self._last_error) / delta_time derivative = self._last_derivative + \ ((delta_time / (self._RC + delta_time)) * \ (derivative - self._last_derivative)) self._last_error = error self._last_derivative = derivative output += self._kd * derivative output *= scaler if abs(self._ki) > 0 and dt > 0: self._integrator += (error * self._ki) * scaler * delta_time if self._integrator < -self._imax: self._integrator = -self._imax elif self._integrator > self._imax: self._integrator = self._imax output += self._integrator return output def reset_I(self): self._integrator = 0 self._last_derivative = float('nan')接着编写此代码Blob Detection Example
This example shows off how to use the find_blobs function to find color
blobs in the image. This example in particular looks for dark green objects.
import sensor, image, time
import car
from pid import PIDYou may need to tweak the above settings for tracking green things...
Select an area in the Framebuffer to copy the color settings.
sensor.reset() # Initialize the camera sensor.
sensor.set_pixformat(sensor.RGB565) # use RGB565.
sensor.set_framesize(sensor.QQVGA) # use QQVGA for speed.
sensor.skip_frames(10) # Let new settings take affect.
sensor.set_auto_whitebal(False) # turn this off.
clock = time.clock() # Tracks FPS.For color tracking to work really well you should ideally be in a very, very,
very, controlled enviroment where the lighting is constant...
green_threshold = (76, 96, -110, -30, 8, 66)
size_threshold = 2000
x_pid = PID(p=0.5, i=1, imax=100)
h_pid = PID(p=0.05, i=0.1, imax=50)def find_max(blobs):
max_size=0
for blob in blobs:
if blob[2]*blob[3] > max_size:
max_blob=blob
max_size = blob[2]*blob[3]
return max_blobwhile(True):
clock.tick() # Track elapsed milliseconds between snapshots().
img = sensor.snapshot() # Take a picture and return the image.blobs = img.find_blobs([green_threshold]) if blobs: max_blob = find_max(blobs) x_error = max_blob[5]-img.width()/2 h_error = max_blob[2]*max_blob[3]-size_threshold print("x error: ", x_error) ''' for b in blobs: # Draw a rect around the blob. img.draw_rectangle(b[0:4]) # rect img.draw_cross(b[5], b[6]) # cx, cy ''' img.draw_rectangle(max_blob[0:4]) # rect img.draw_cross(max_blob[5], max_blob[6]) # cx, cy x_output=x_pid.get_pid(x_error,1) h_output=h_pid.get_pid(h_error,1) print("h_output",h_output) car.run(-h_output-x_output,-h_output+x_output) else: car.run(10,-10)最后是如此显示 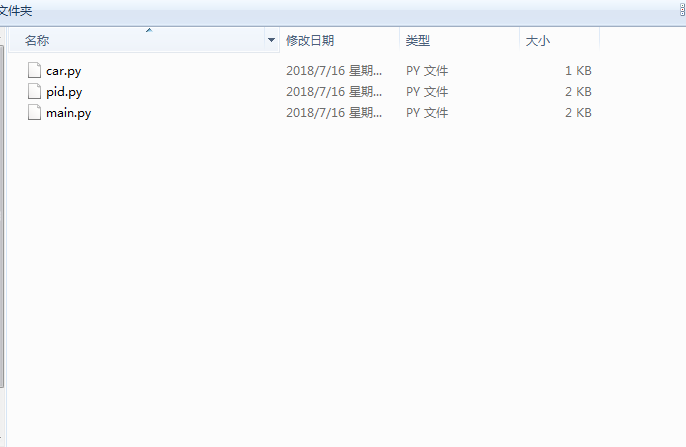
-
具体是按照追球小车的那三个代码来编的链接文本
-
你发的图片看不见。
你是怎么保存的,用的一键保存按钮?
-
用工具里面的那个 "将打开的脚本保存到openmv cam" 保存的
-
断开数据线后,电池连接了吗?
-
链接了的 数据线和电池都链接的 但是断了数据线后 小车就不动了
-
首先,你要确保程序是正确的。
直接在IDE里运行小车的主程序。