OV5640用户手册里给出:
”QSXGA (2592x1944): 15 fps
1080p: 30 fps
1280x960: 45 fps
720p: 60 fps
VGA (640x480): 90 fps
QVGA (320x240): 120 fps”
没有提到限制啊?而且现在常用手机摄像头很容易就60、120fps啊,不应该是限制了。
W
w236
@w236
0
声望
4
楼层
507
资料浏览
0
粉丝
0
关注
w236 发布的帖子
-
RE: OV5640提高拍摄帧速率要怎么操作?发布在 OpenMV Cam
-
OV5640提高拍摄帧速率要怎么操作?发布在 OpenMV Cam
使用示例代码测量相机的拍摄帧速率,为什么无论设置拍摄分辨率为QQQVGA、QQVGA、QVGA、VQA,disable图像区后,打印出来的帧速率最高仅为46.6 fps。是不是达到了系统支持的最高帧速率,还是什么原因?
查OV5640手册:
QSXGA (2592x1944): 15 fps
1080p: 30 fps
1280x960: 45 fps
720p: 60 fps
VGA (640x480): 90 fps
QVGA (320x240): 120 fps提高拍摄帧速率要怎么操作?

import sensor, image, time sensor.reset() sensor.set_pixformat(sensor.RGB565) sensor.set_framesize(sensor.QQQVGA) sensor.skip_frames(time = 2000) clock = time.clock() while(True): clock.tick() img = sensor.snapshot() print(clock.fps()) -
RuntimeError Capture Failed: -2 问题怎么解决?发布在 OpenMV Cam

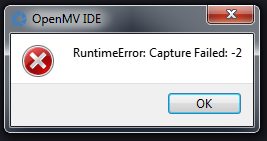
计算出roi后,设置window后拍摄图片失败,谢谢
关键代码如下:import sensor, image, time # Set the basic parameters of the image sensor. sensor.reset() # 初始化摄像头 sensor.set_pixformat(sensor.GRAYSCALE) # 格式为 灰度图. sensor.set_framesize(sensor.VGA) # 使用 QVGA 视野广,1280*960。 sensor.set_auto_gain(False) # 关闭自动自动增益。默认开启的,在颜色识别中,一定要关闭白平衡。 sensor.set_auto_whitebal(False) # 关闭白平衡。白平衡是默认开启的,在颜色识别中,一定要关闭白平衡。 sensor.set_auto_exposure(False, 10000) # 关闭自动曝光,并将曝光时间设定为5000 us。 sensor.skip_frames(time = 1000) # 跳过2000ms,使新设置生效。 # Set the RoI area. tracking_threshold = (232, 255) # 设定光源图像的灰度阈值。 img = sensor.snapshot() # 从感光芯片获得一张图像。 blobs = img.find_blobs([tracking_threshold]) # 检测图片中的疑似光源图像RoIs。 # 如果找到了疑似光源图像RoIs if blobs: print(str(len(blobs)) + " blocks are found!") # 迭代找到的疑似光源图像RoIs的区域 for b in blobs: # Draw a rect around the blob. print("The found RoI is: " + str(b[0:4])) img.draw_rectangle(b[0:4]) # 用矩形标记出目标颜色区域 else: print("No blocks are found!\n") roi = (b[0], b[1], b[2], b[3]) # 计算光源像点的RoI print(roi) sensor.reset() # 初始化摄像头 sensor.set_pixformat(sensor.GRAYSCALE) # 格式为 灰度图. sensor.set_framesize(sensor.VGA) # 使用 QVGA 视野广,1280*960。 sensor.set_windowing(roi) # 设置相机的RoI sensor.skip_frames(time = 1000) # 跳过1000ms,使新设置生效。 img = sensor.snapshot() rows = img.width() columns = img.height() print(rows, columns) clock = time.clock() while(True): clock.tick() img = sensor.snapshot() print(clock.fps())